9 steps instruction
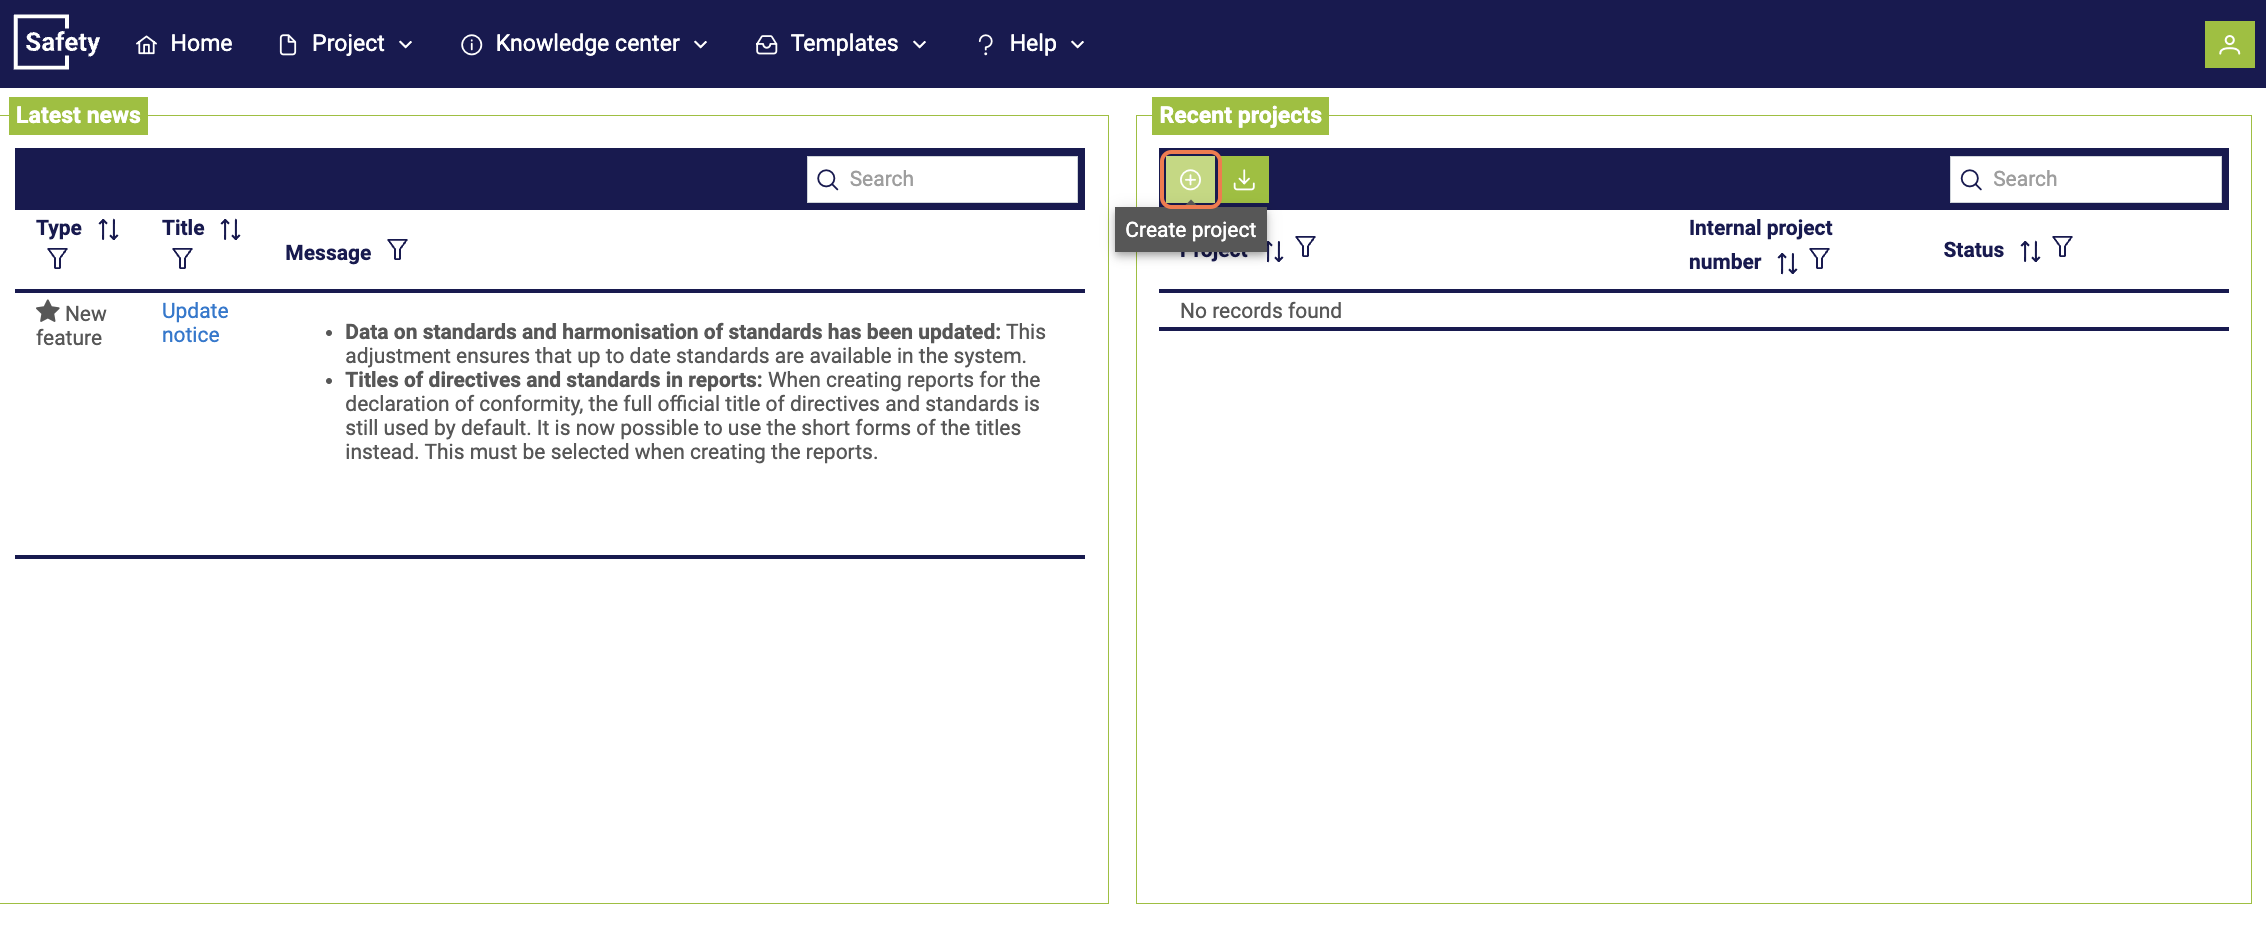
1. Creating a project
After triggering the process, a pop-up window will open. After selecting the project category "Machine/Product Safety", you must select a project type. Each project type has a brief description and its own information help to understand the differentiations.
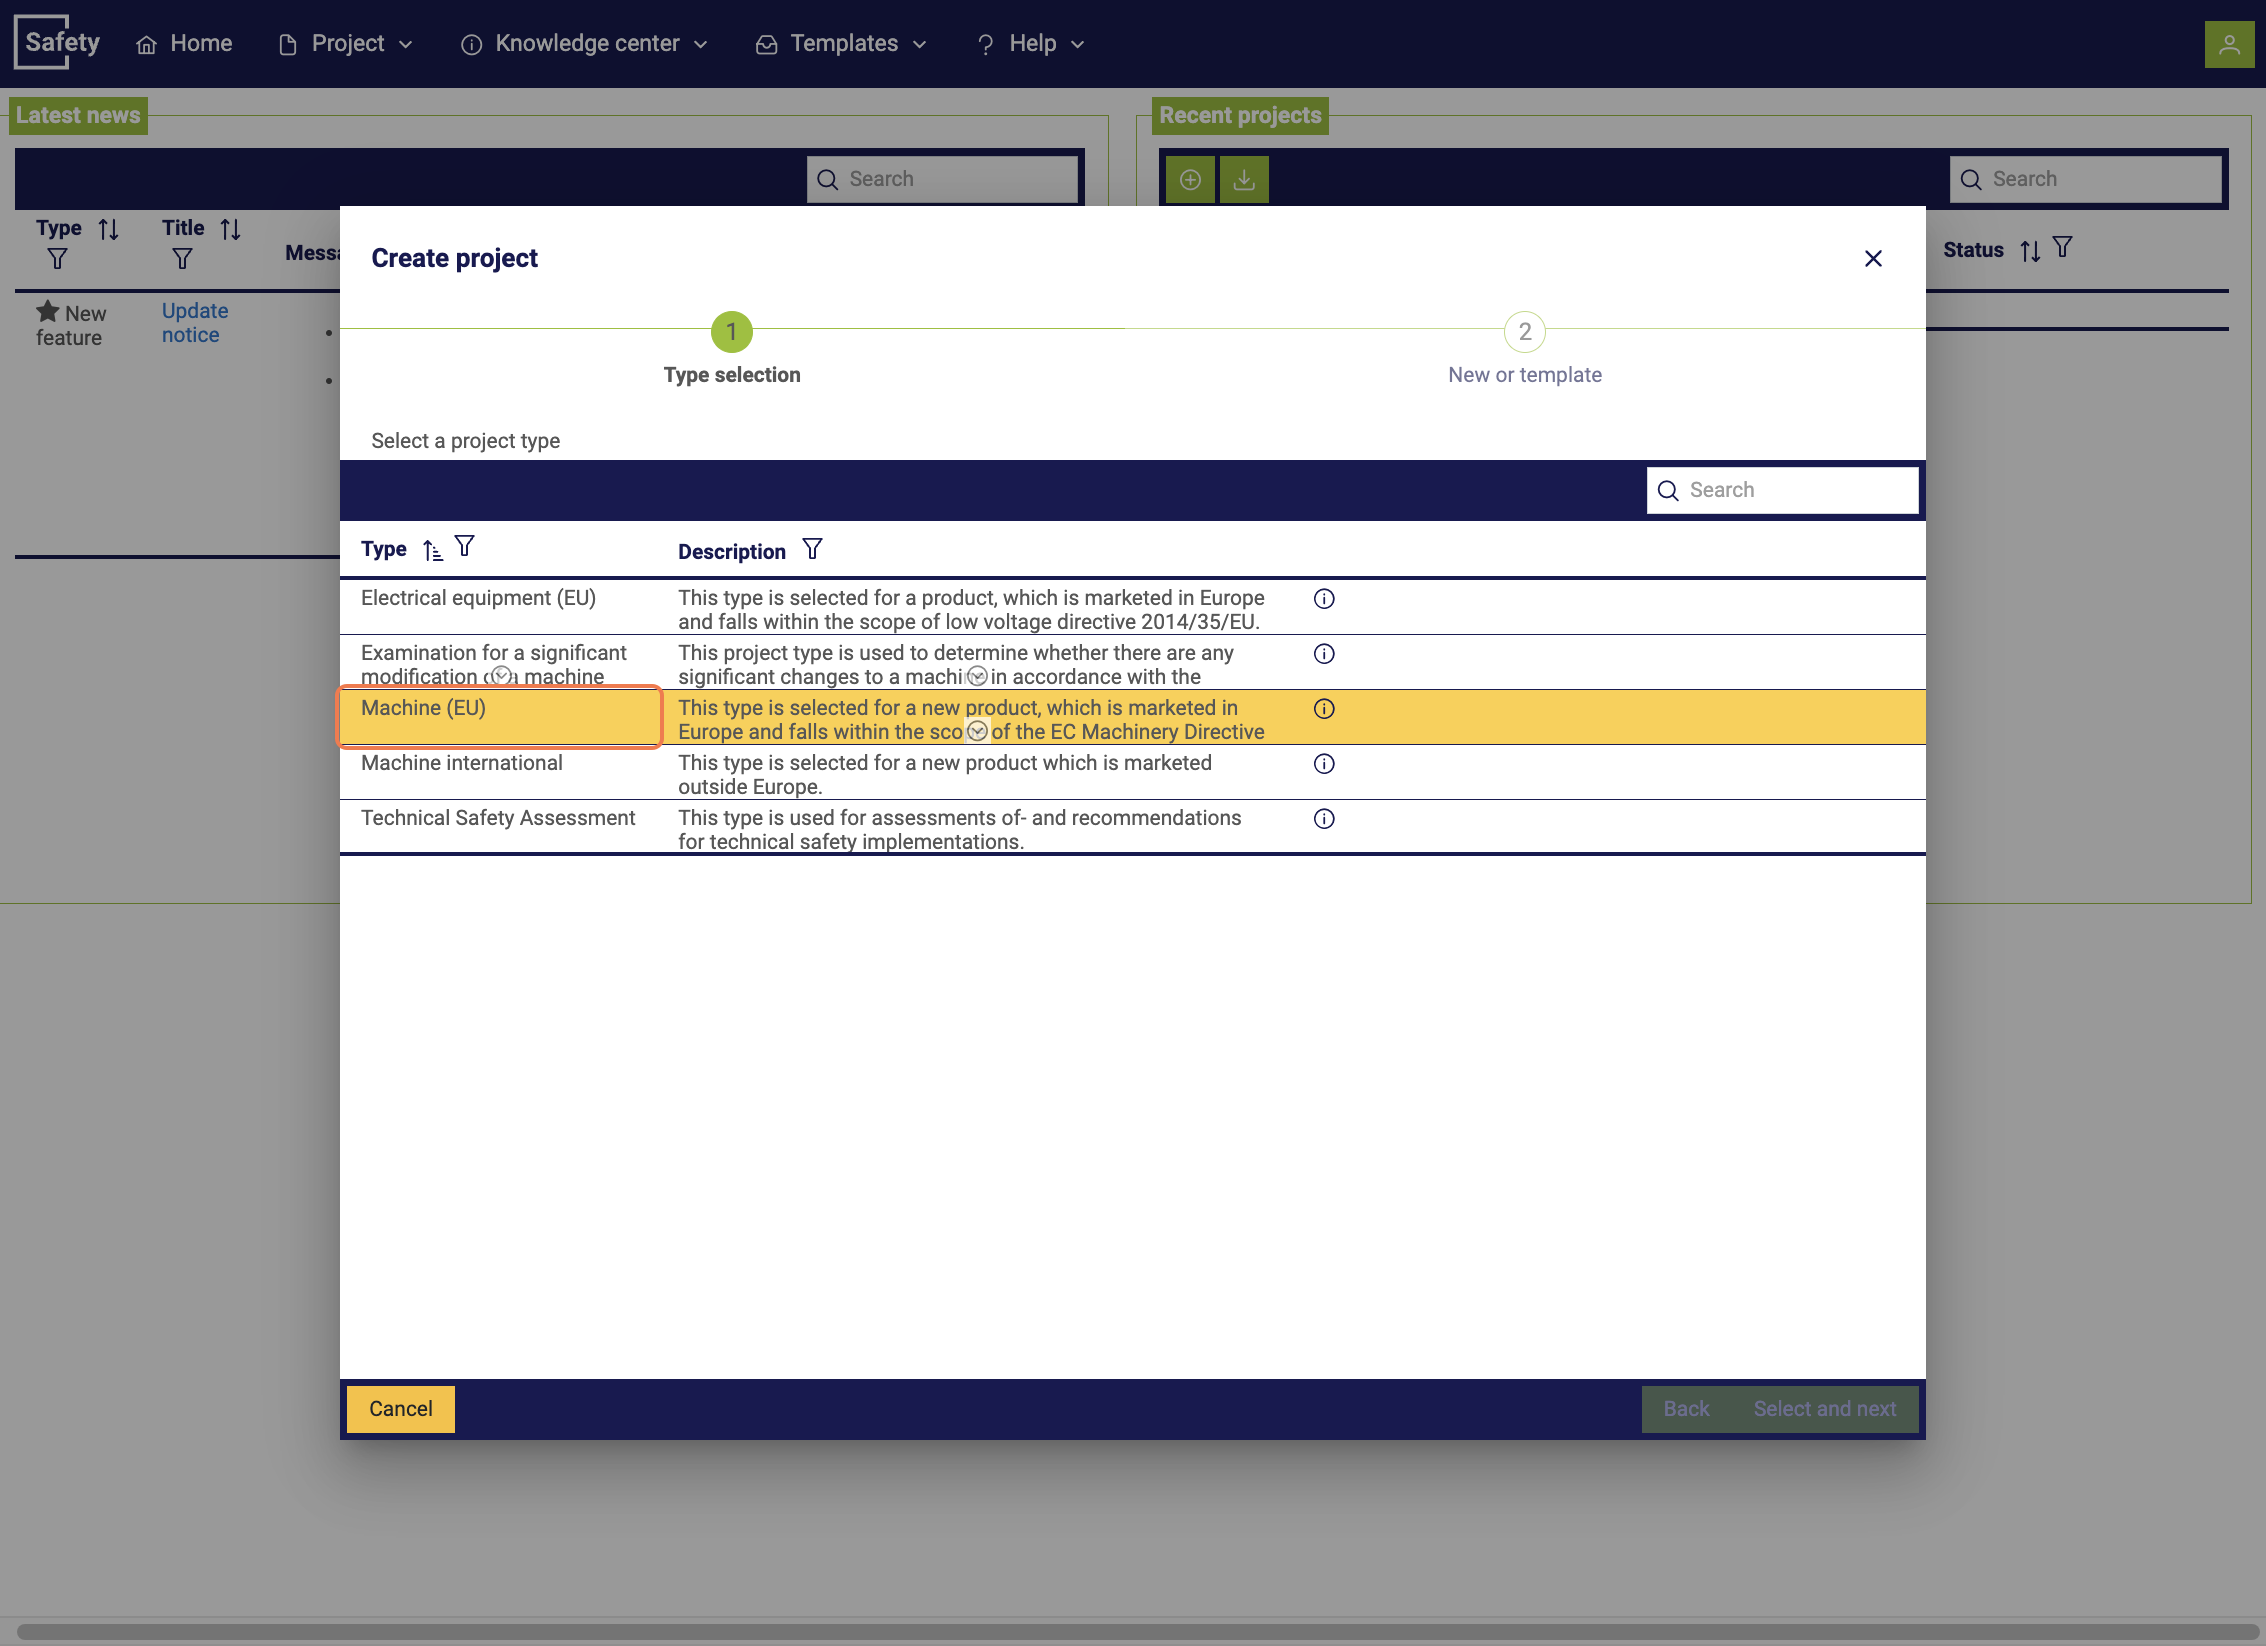
Different project types exist for different areas of application, each with its own specific requirements. For more information on the different project types, see the chapter Differences between project types.
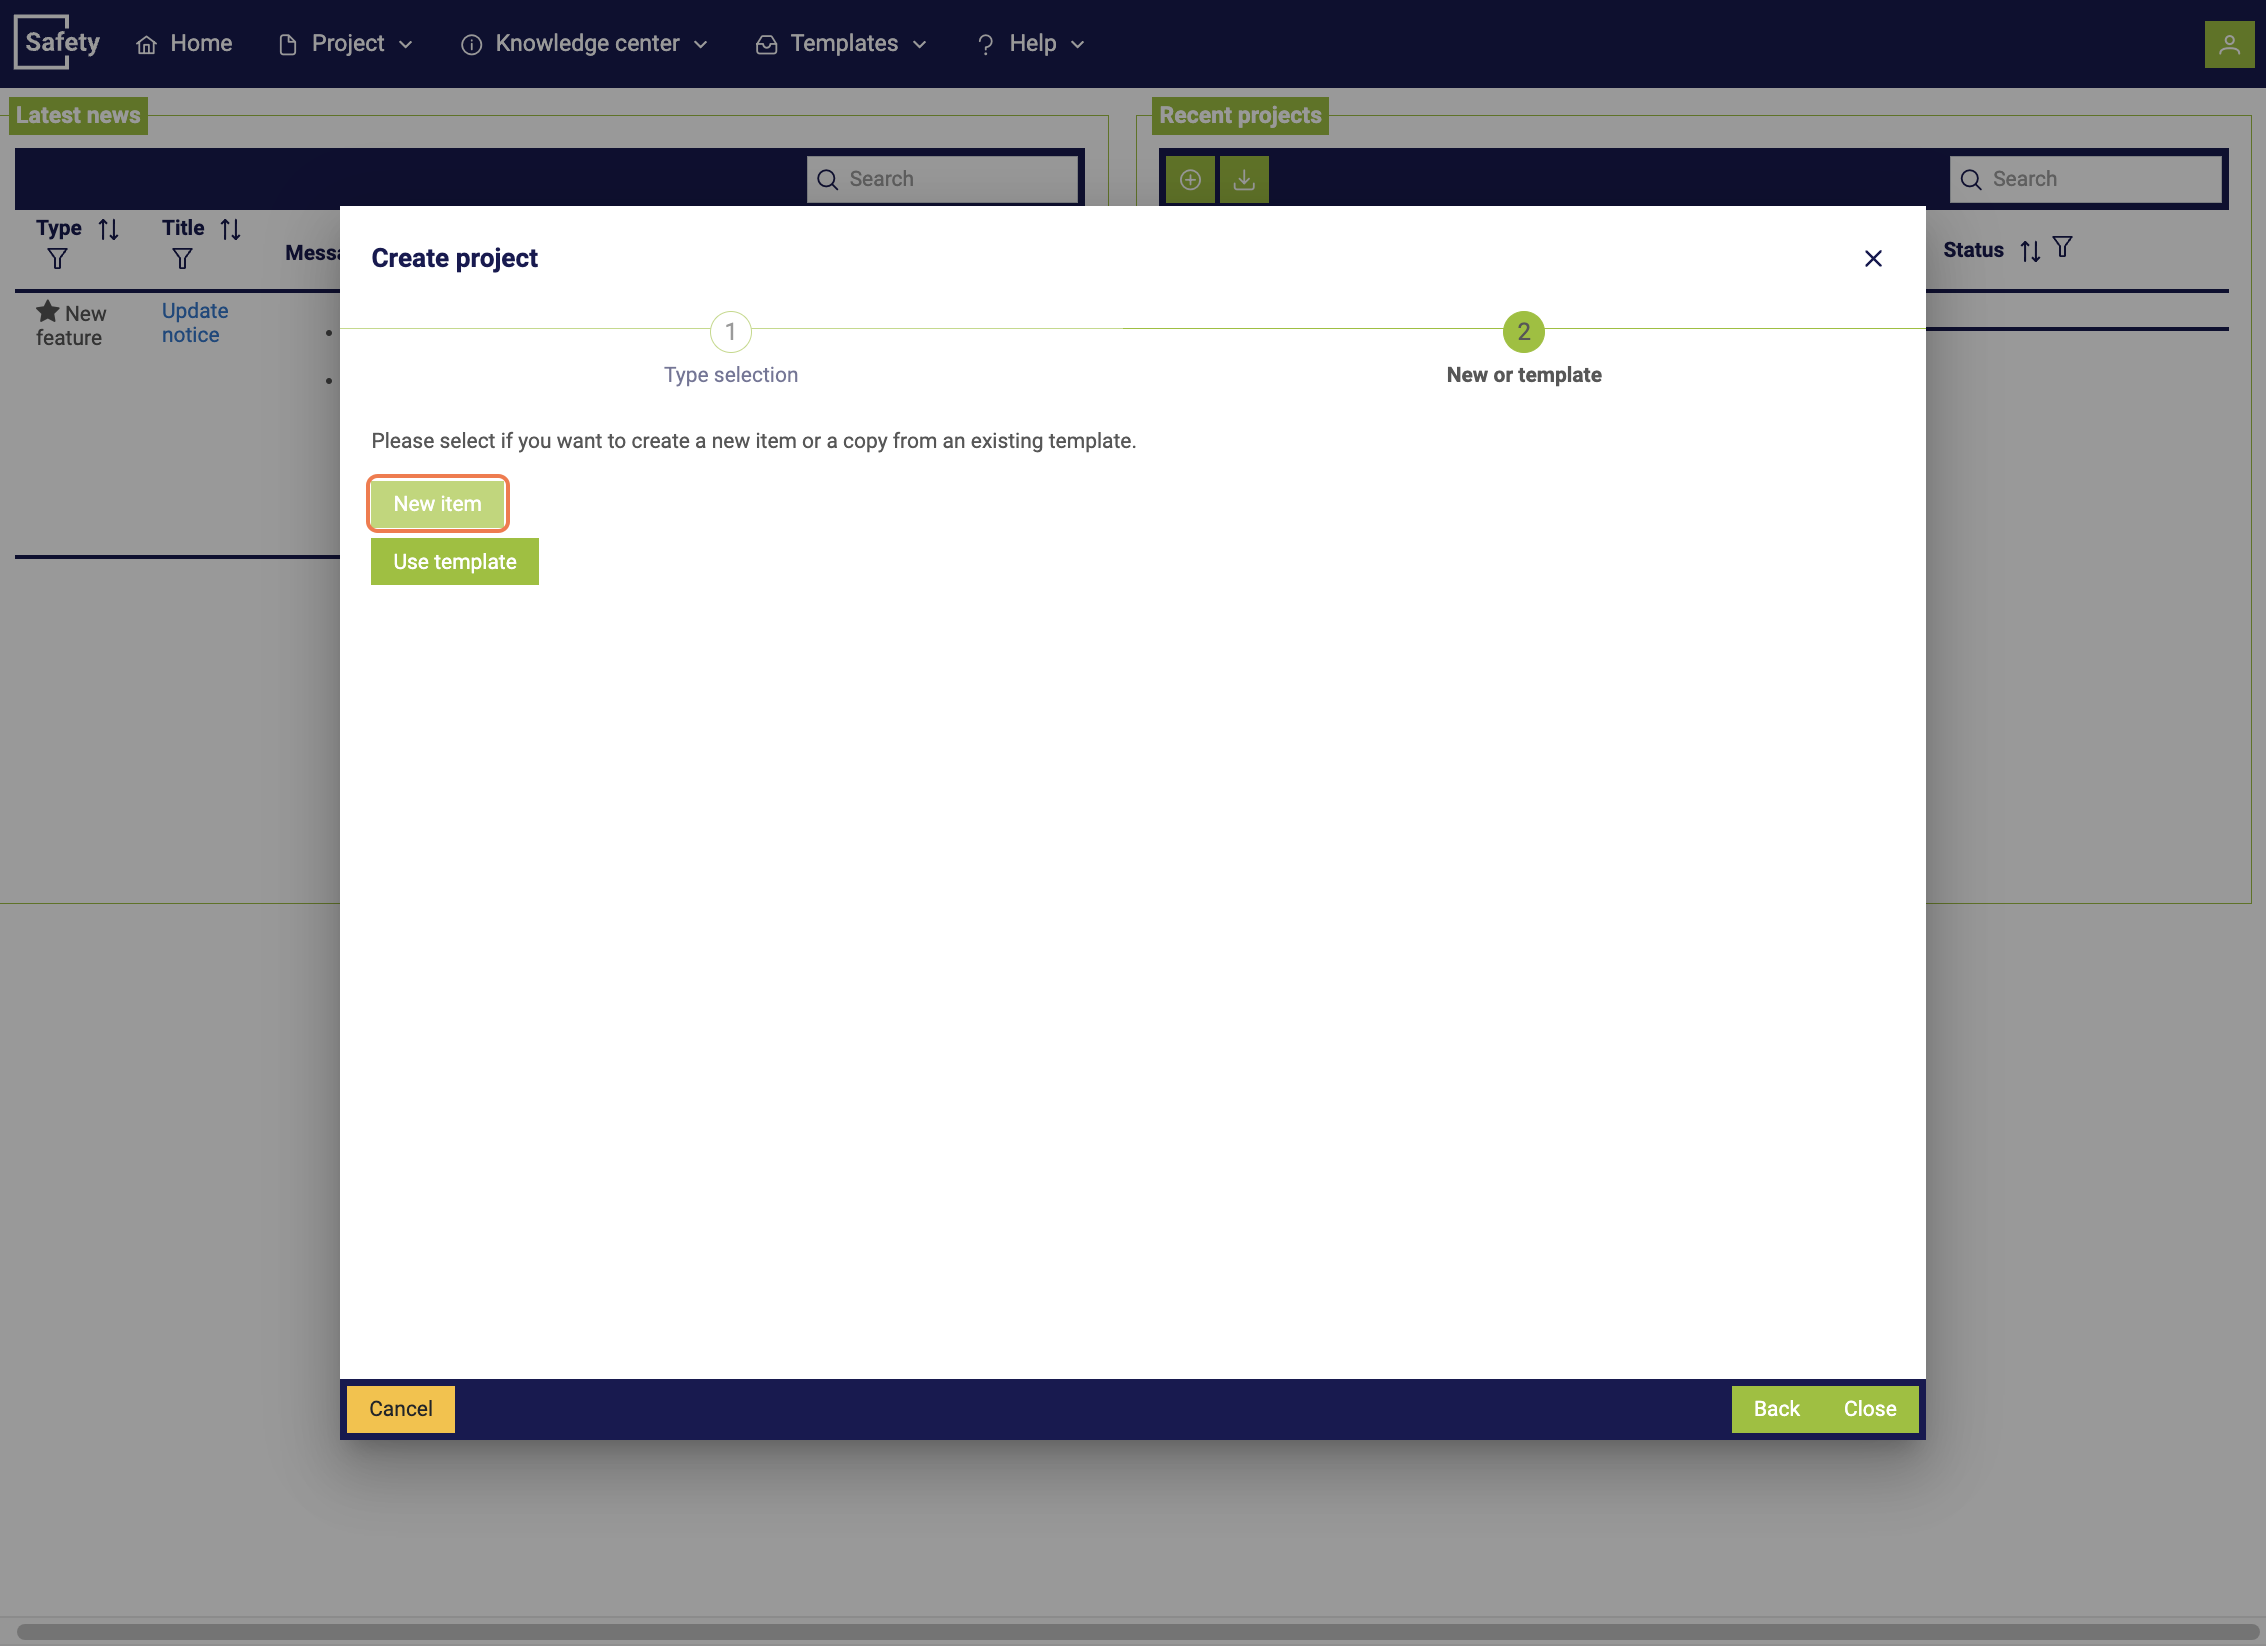
You have the option to decide whether to create a completely new project or use an existing template. A new dataset will be created in the following step.
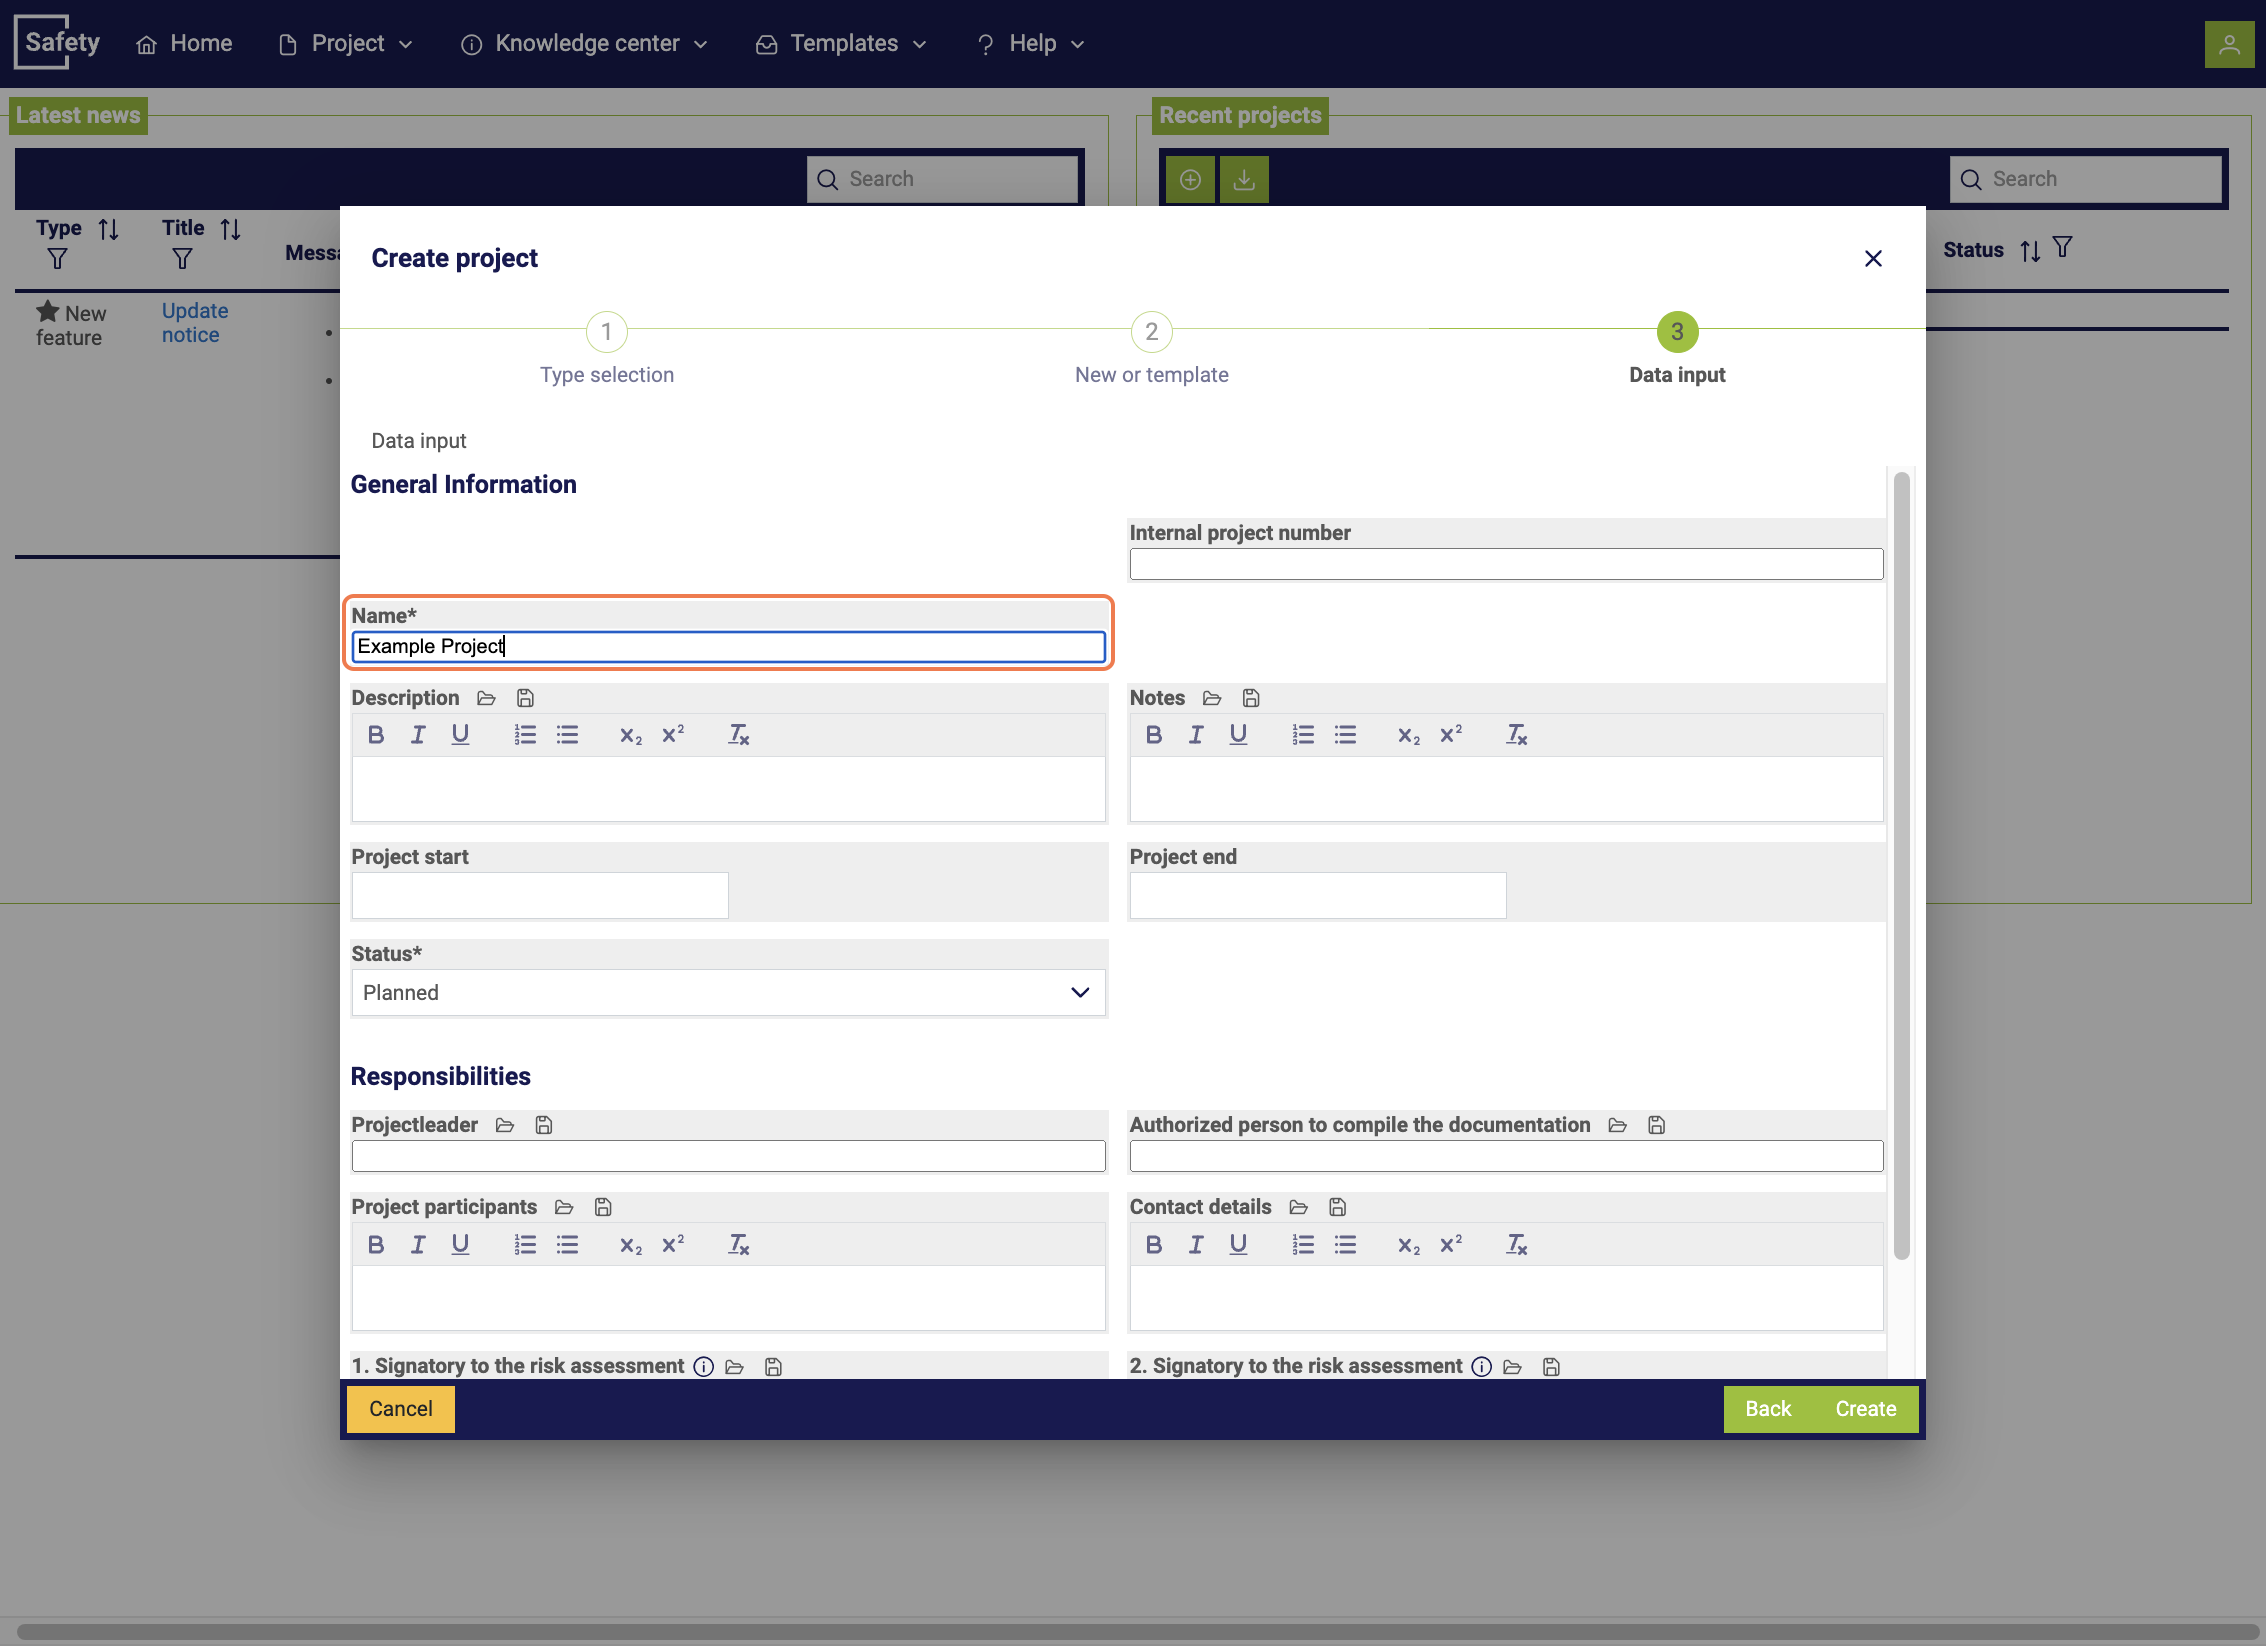
Each project links the basic directives that are to be considered in the examination. They are linked by project type. This has a direct impact on which hazards, life stages, and documents are available. Finally, you must assign a name to the project and can supplement it with additional information.
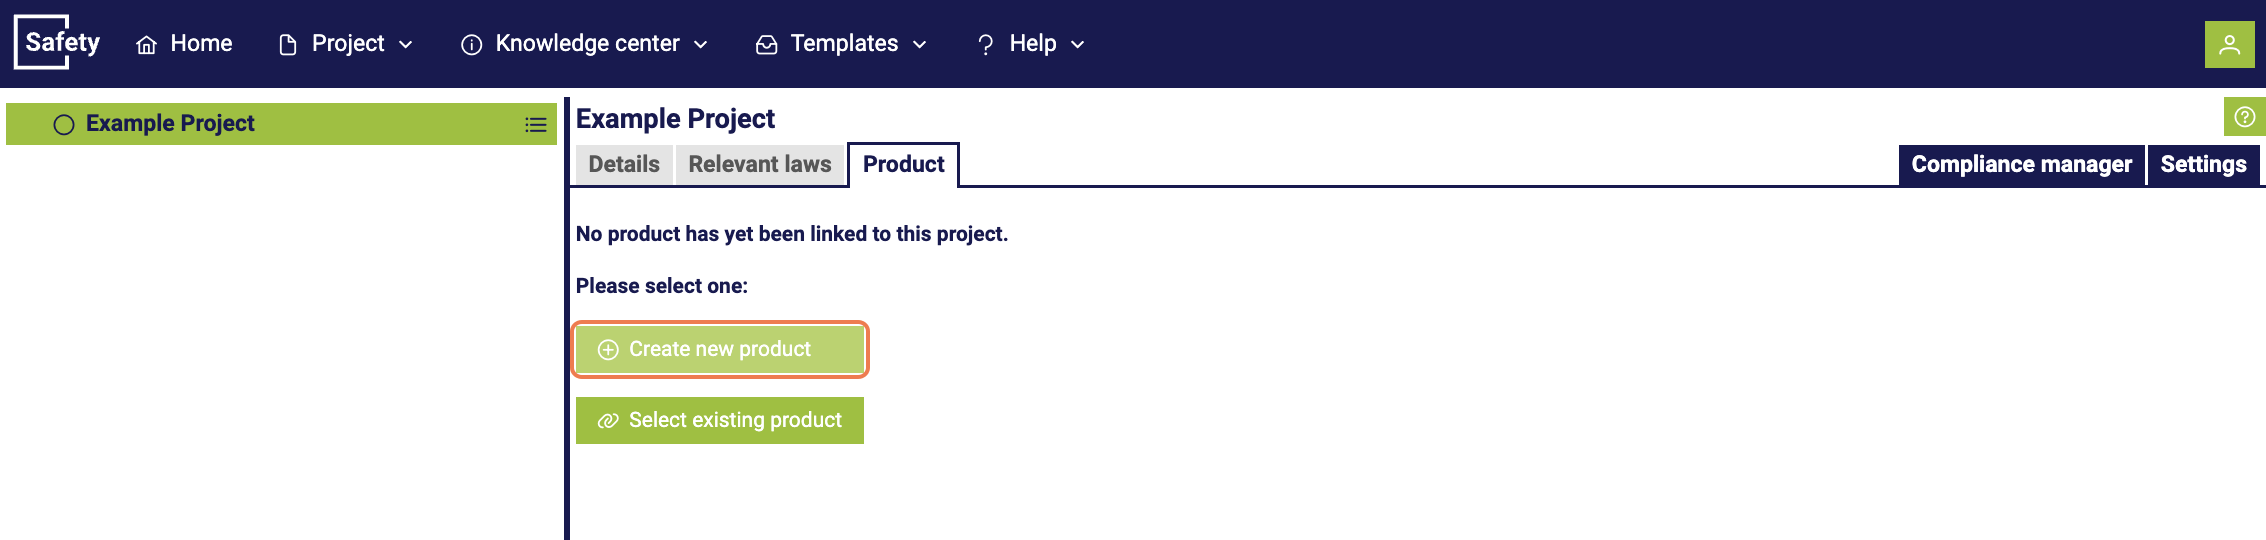
2. Creating a product
To create a product, start in the "Product" tab of a project. You can trigger the process by clicking on the plus symbol. In the following, a new product is created.
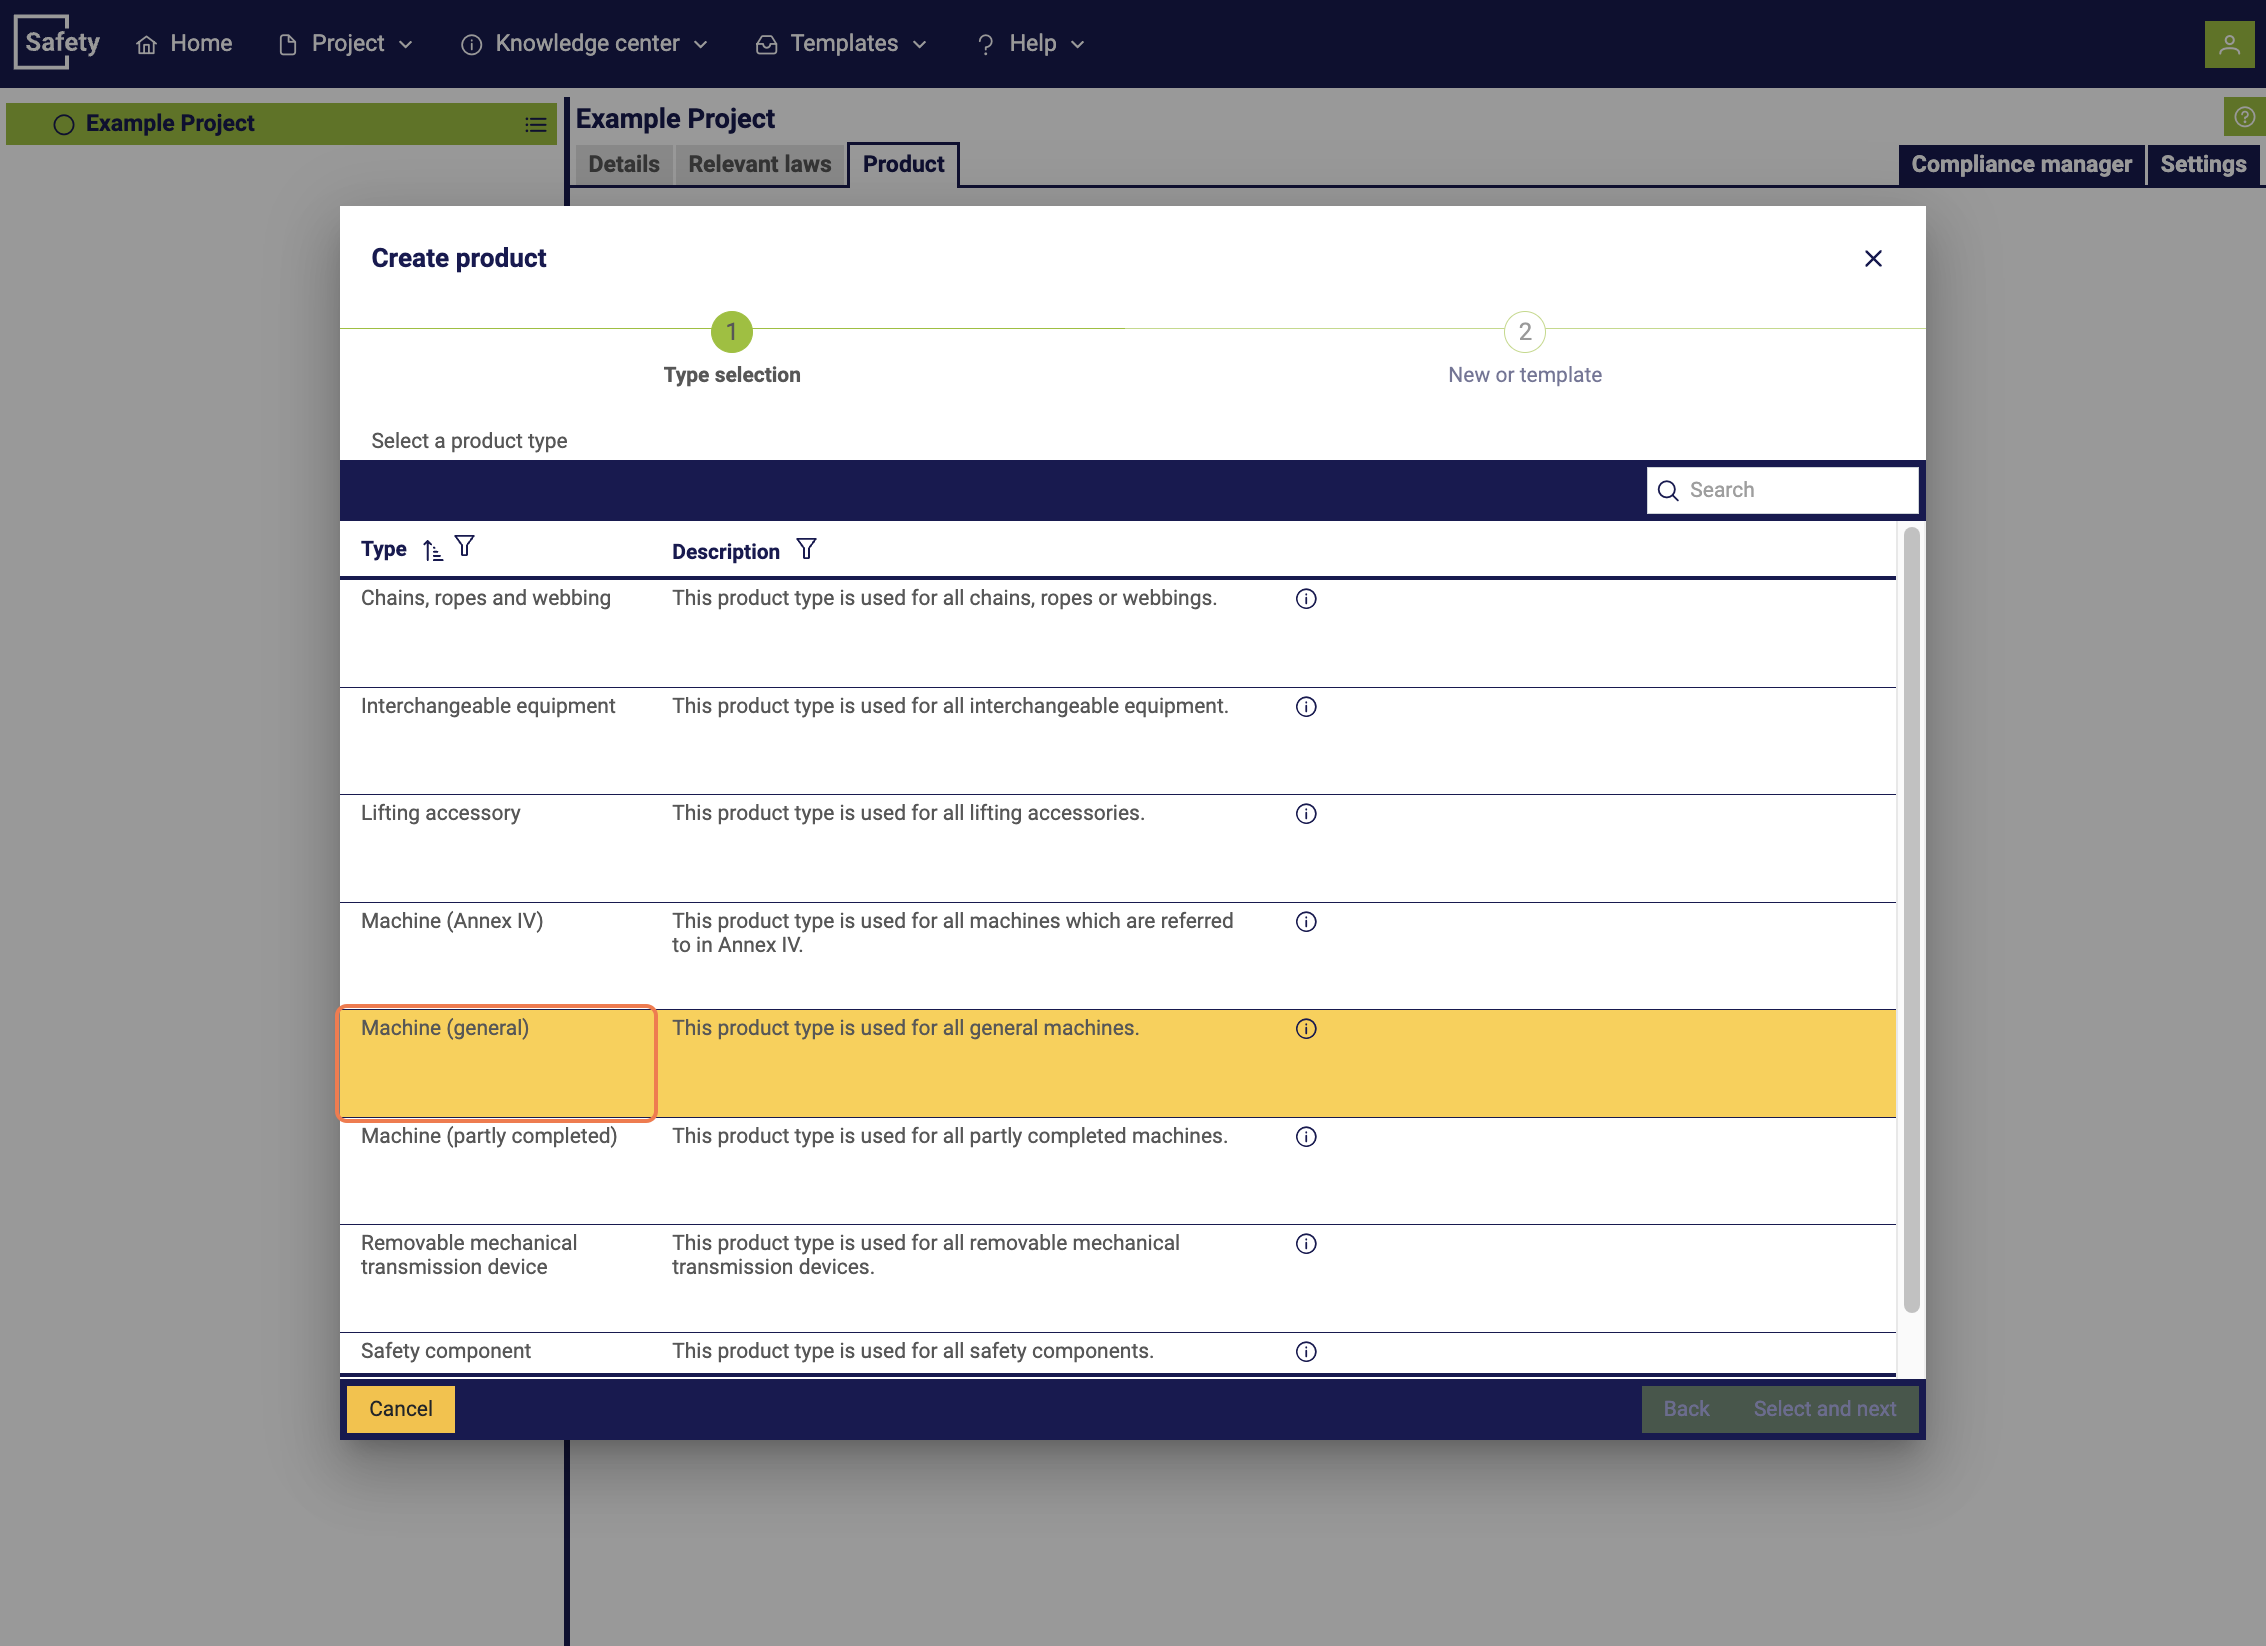
After starting the creation of a new product, a pop-up window will open. In this window, different product types with corresponding descriptions and differences in the data to be recorded are displayed. Please select the one that applies.
CE-CON Safety provides different product types to make it easier to describe products. These product types refer to the corresponding distinction types from the Machinery Directive and allow separate entries, making it easier to output the recorded data in documents without having to record all information in a continuous text.
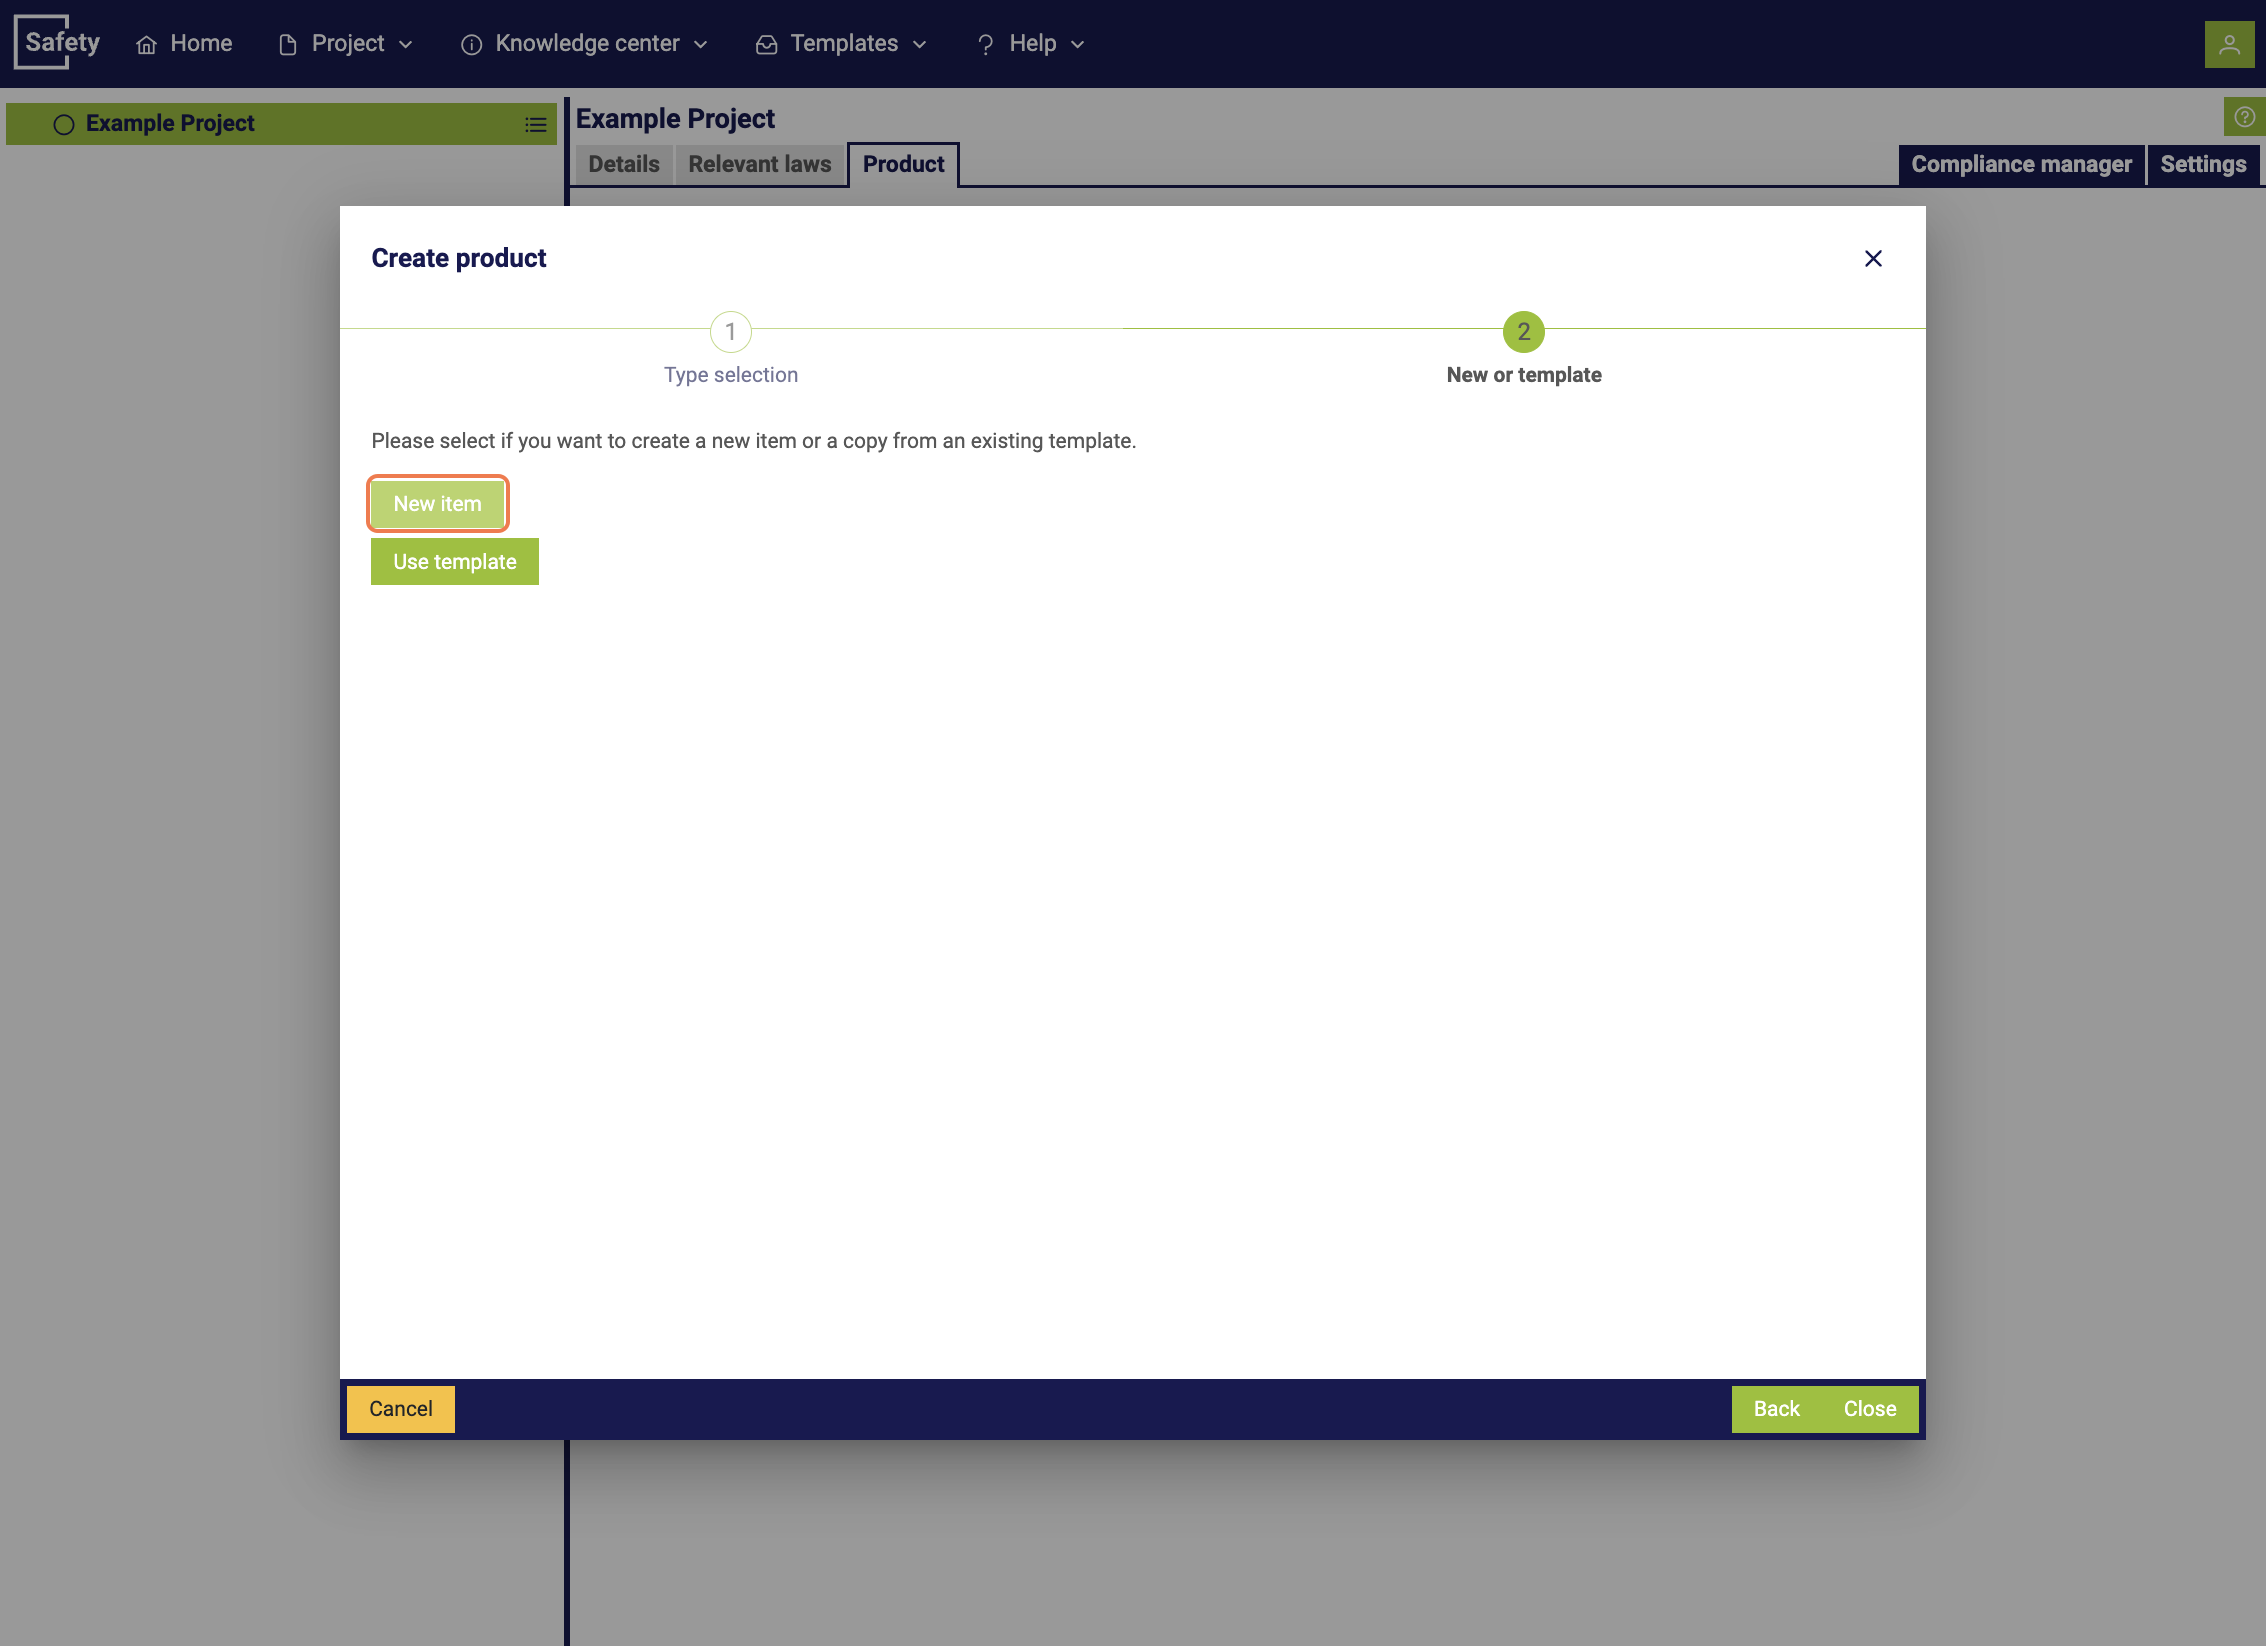
In the next step, you have the option to decide whether to create a completely new product or use an existing template. In the following, a new dataset is created.
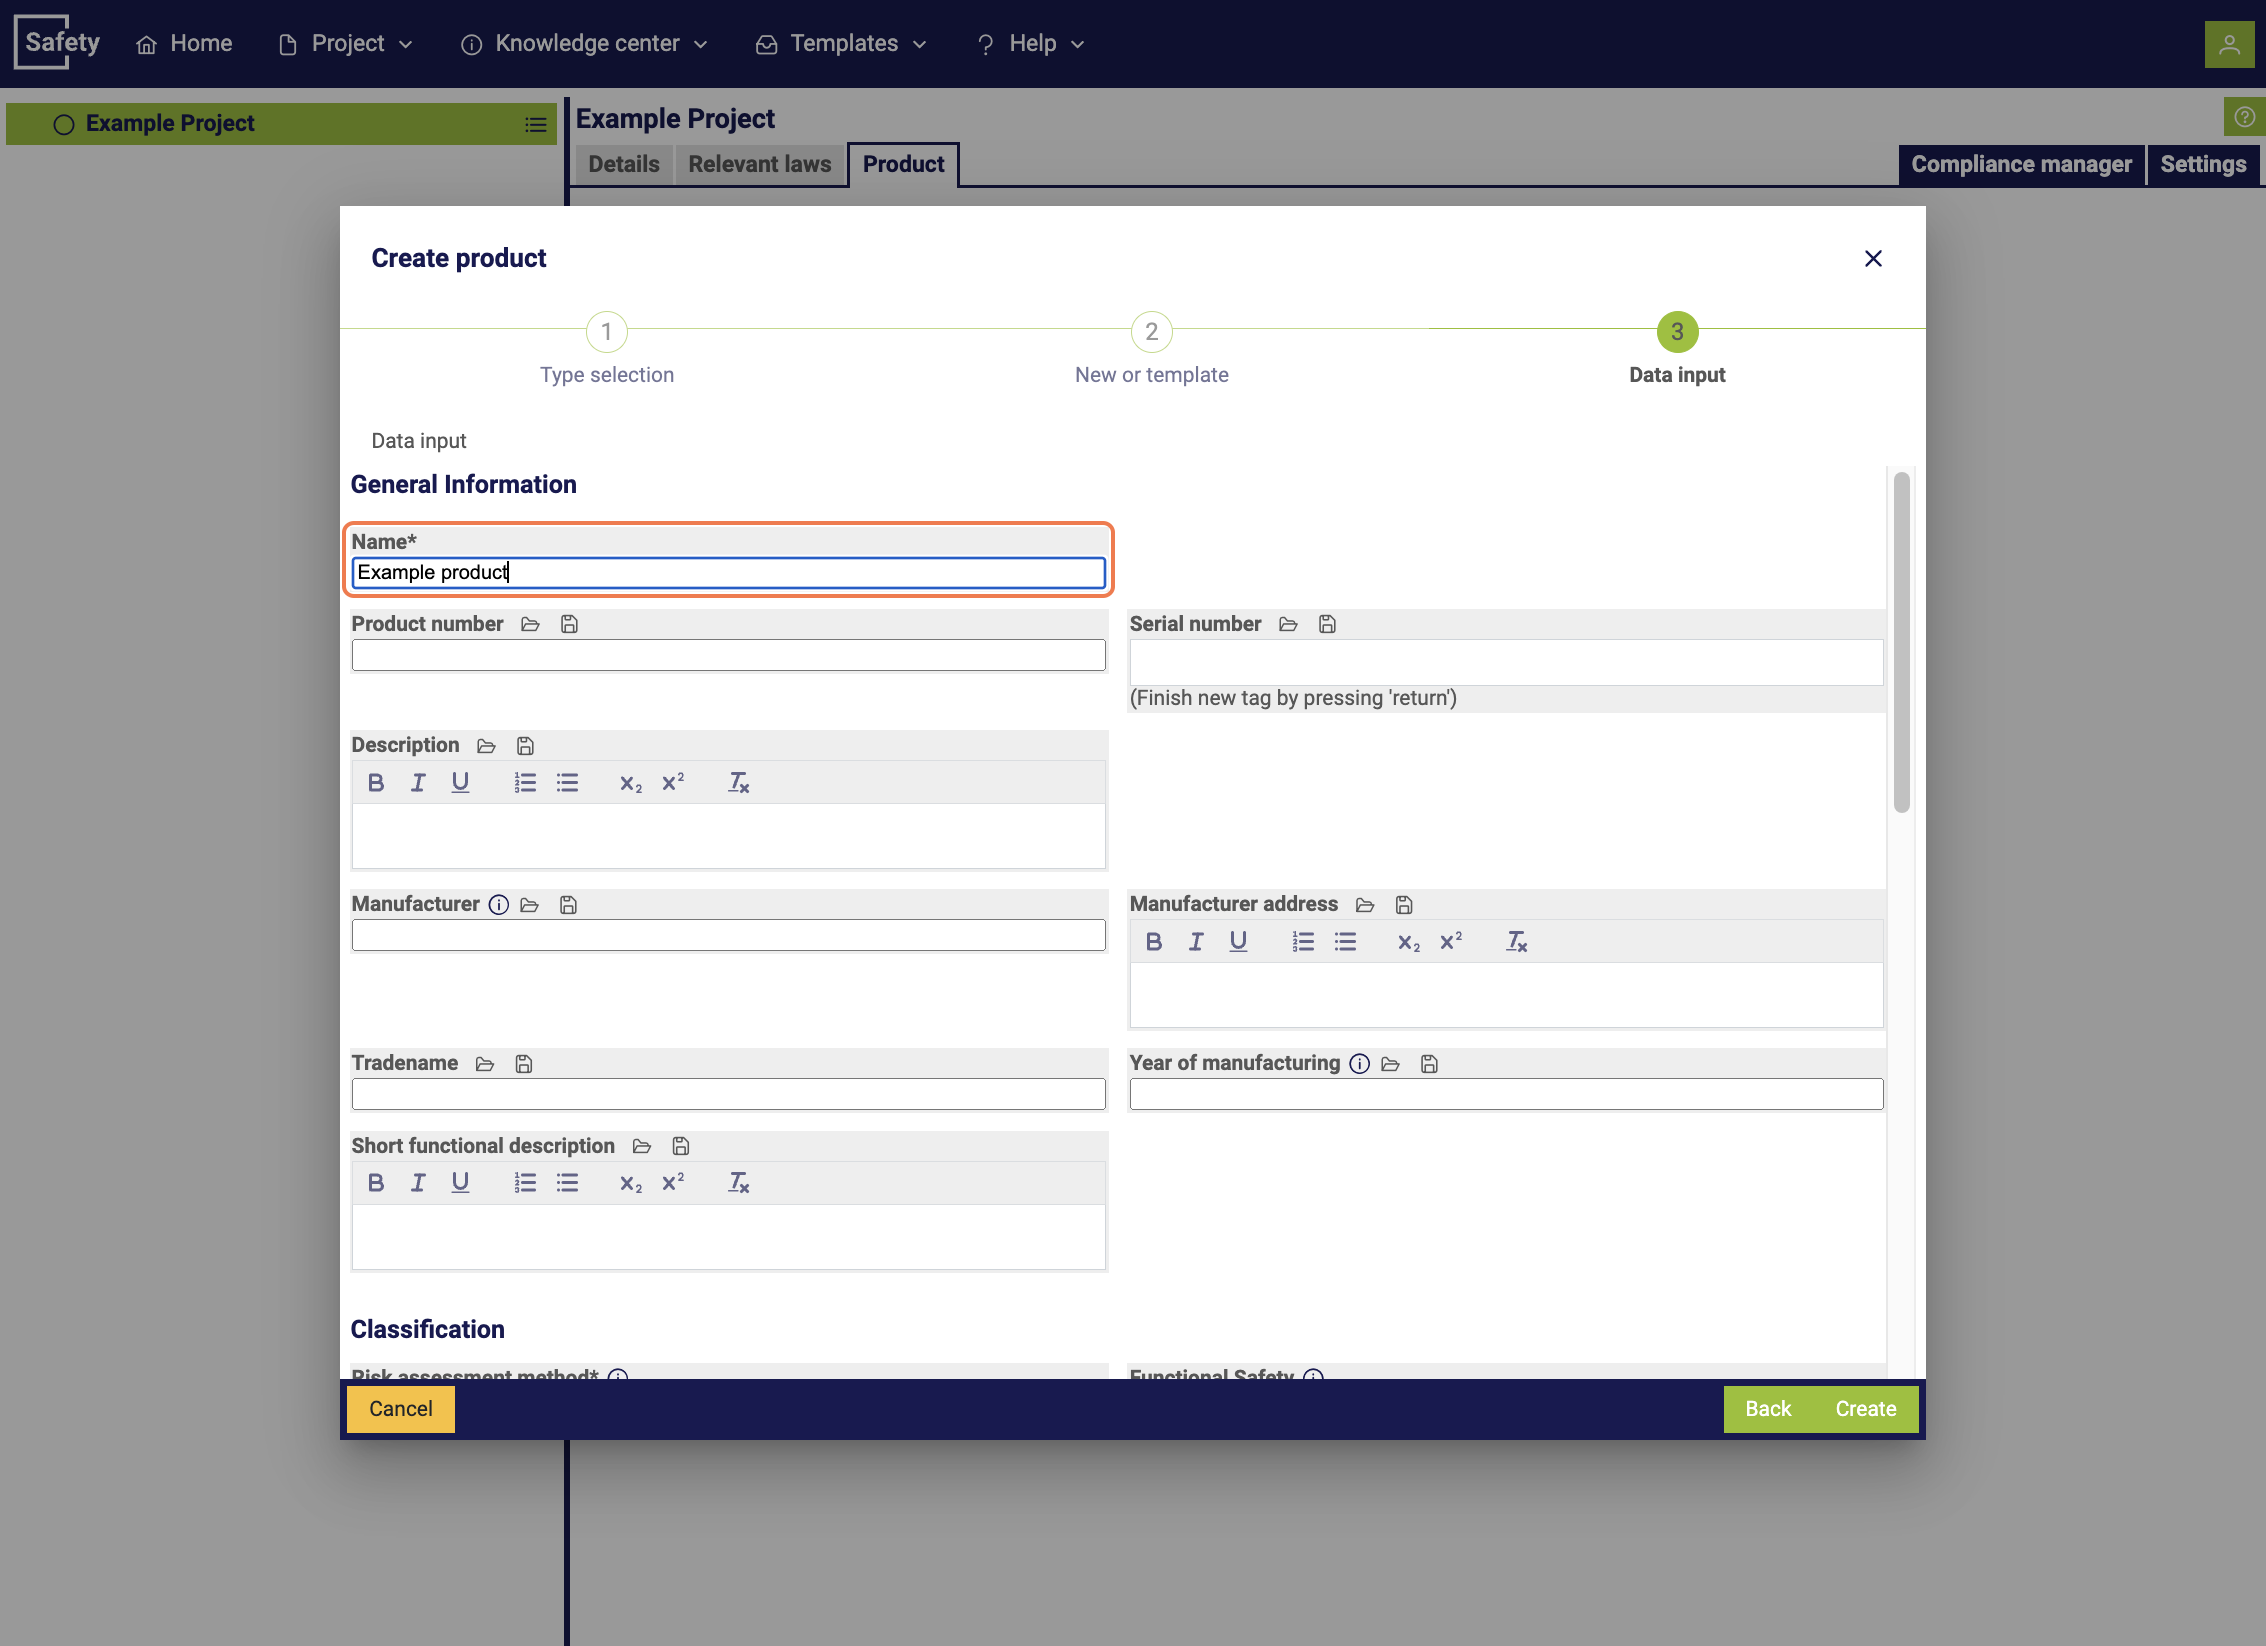
Finally, you must give the product a name and can add additional information to it.
Product limits are of great importance in defining specific restrictions for products. This information is included in documents such as the risk assessment and the declaration of conformity. There are different types of limits according to the Machinery Directive, which are differentiated as follows:
-
Intended use: This step is crucial in the risk assessment, as it defines the limits of the product, including its intended use. It is important to note that not all possible uses of a product are automatically safe. For example, machines designed for metalworking are not normally safe for woodworking and vice versa.
-
Reasonably foreseeable misuse: The manufacturer is expected to consider the reasonably foreseeable misuse of the machine. It is unrealistic to expect that all possible misuses can be considered. However, certain types of misuses can be predicted based on previous experience, accident investigations, and knowledge of human behavior.
-
Spatial limits: This includes the required movement space of the machine, the space required by people who operate the machine, and the interactions between humans and machines, such as the interface "human/machine" and "machine/energy supply".
-
Time limits: This includes the expected service life of the machine, the service life of wear parts, and the maintenance intervals.
-
Other limits: These include properties of the materials to be processed, as well as environmental conditions, such as minimum and maximum temperatures, operating conditions in enclosed spaces or outdoors, under different weather conditions, and much more.
In documents such as the risk assessment, there is a separate chapter for limits. There, the limits of the product are listed for each type of limit, to ensure clear and comprehensive documentation.
3. Creating a component
To create a component, select the "Components" section in the product. Here you can start the process via the plus symbol.

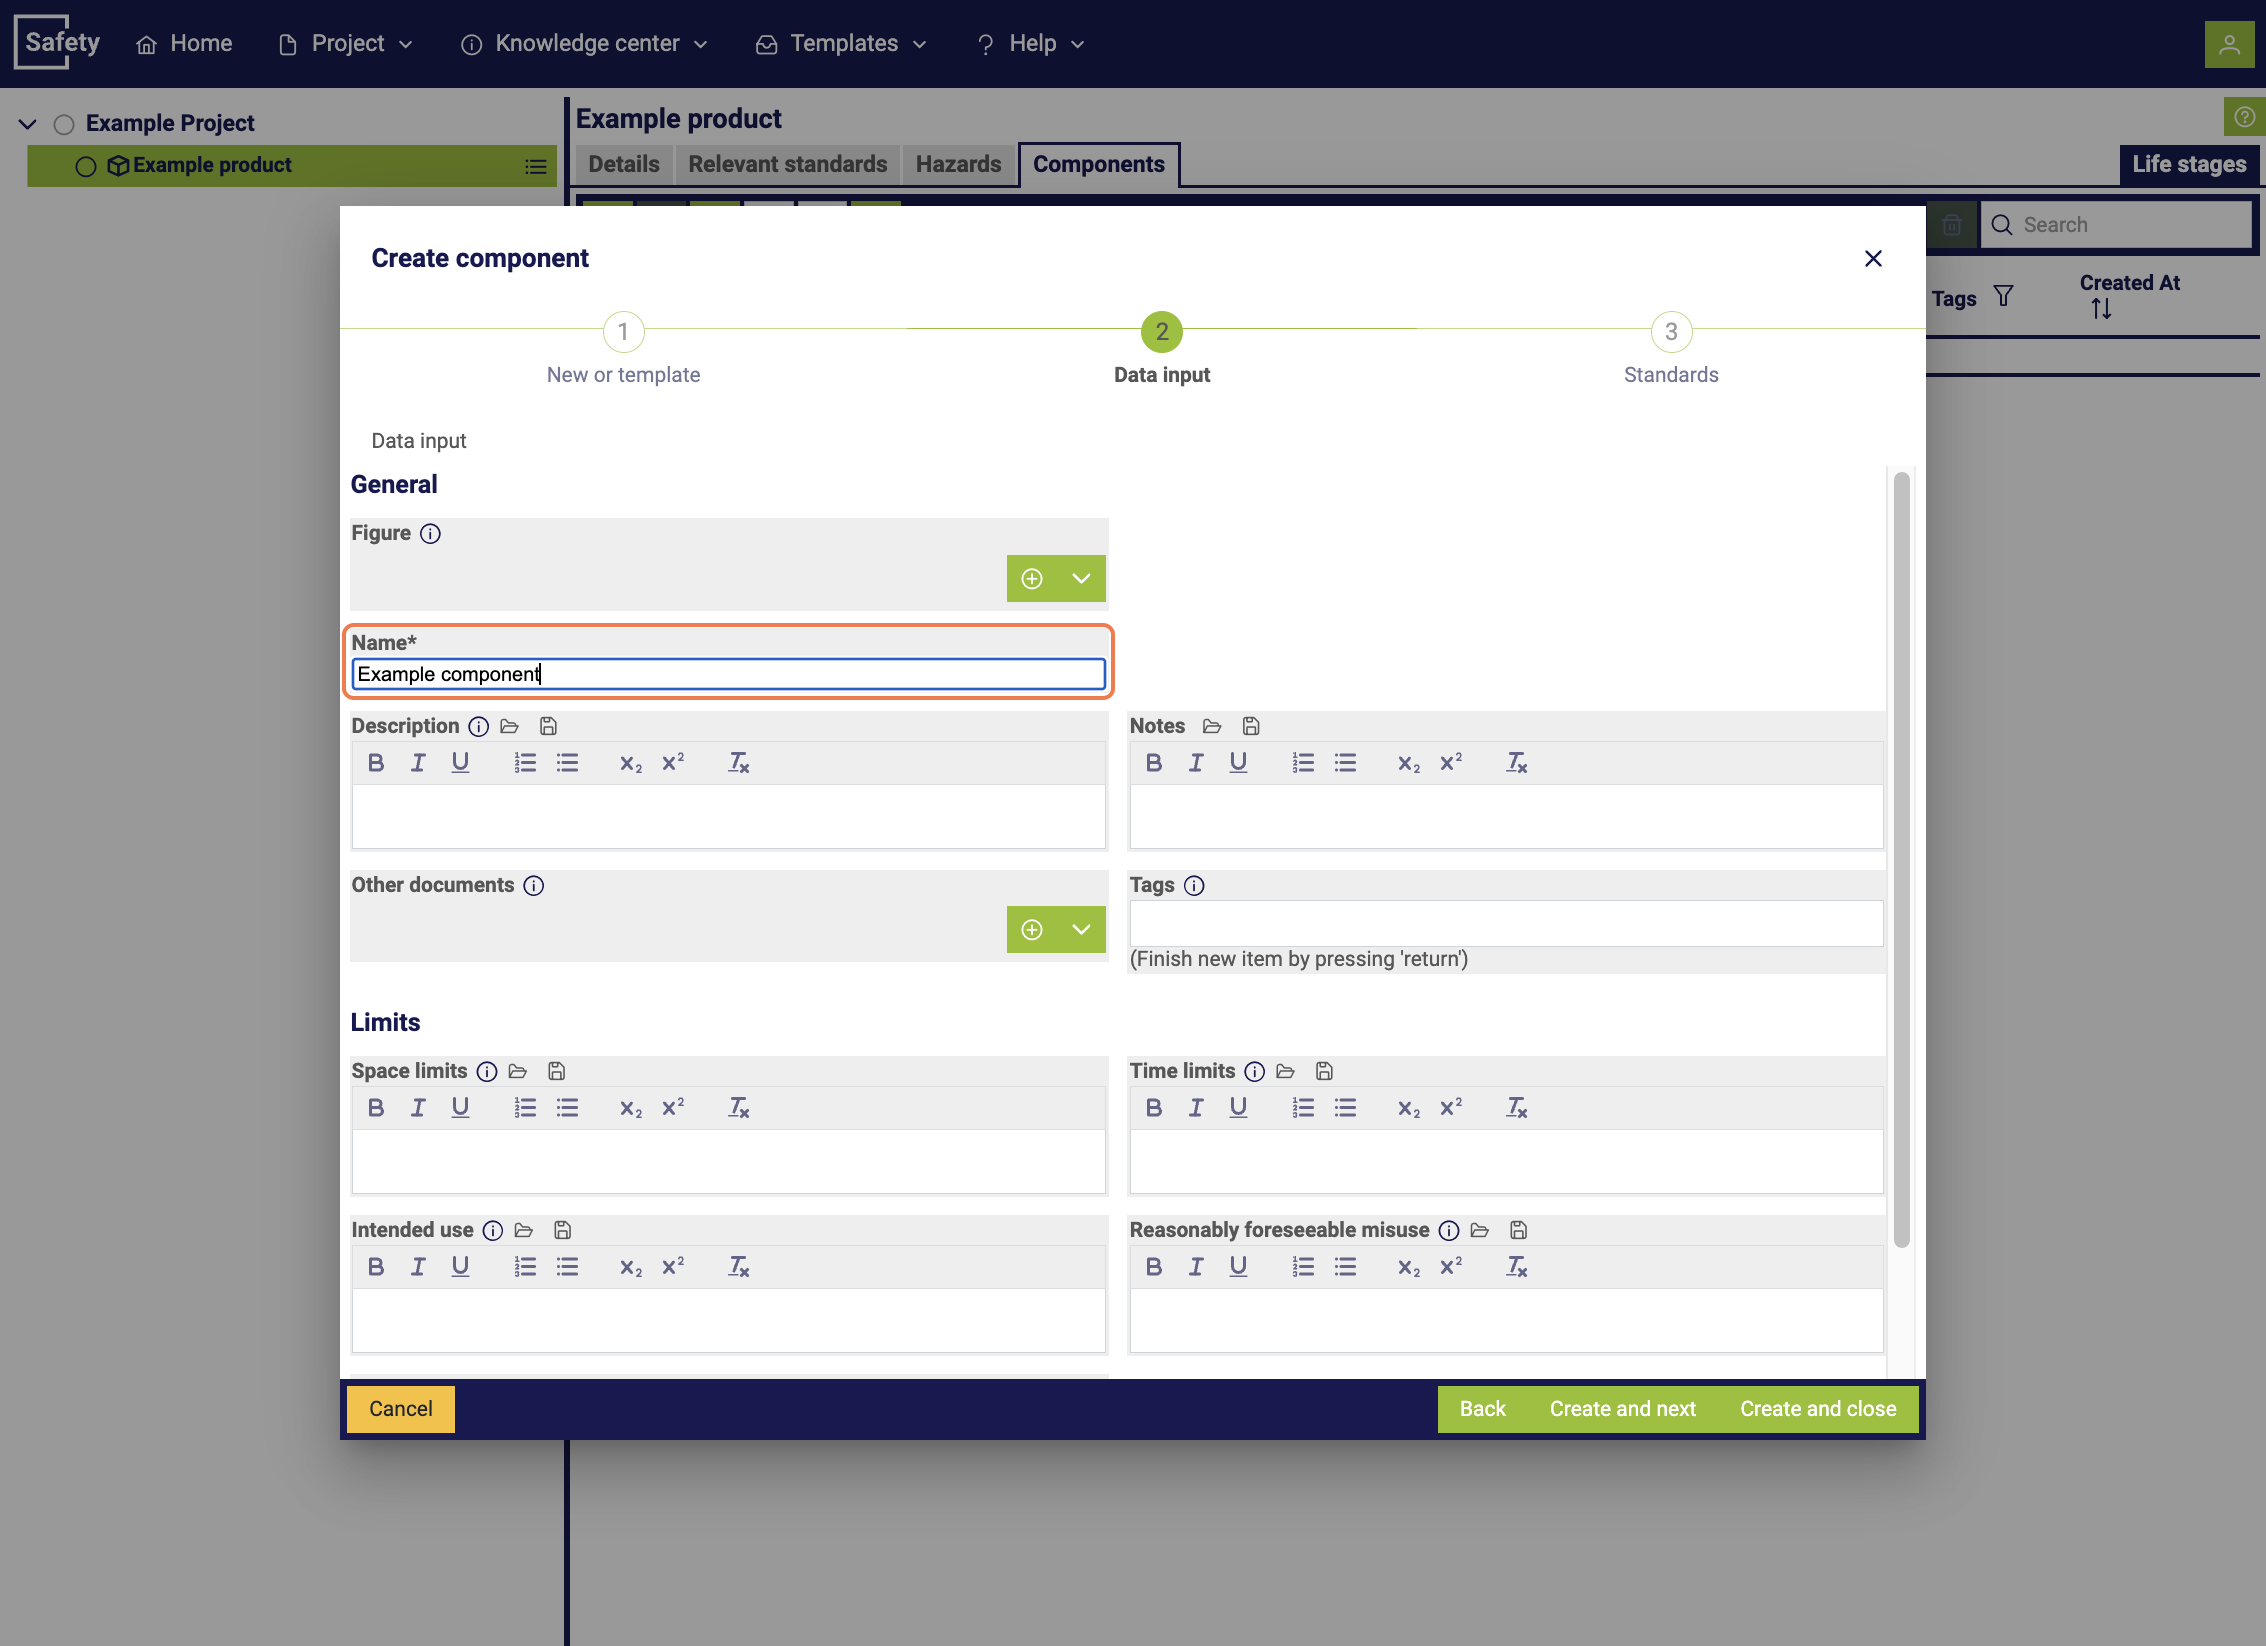
In the next step, you have the option to decide whether you want to create a completely new component or use an existing template. In the following, a new data record is created.
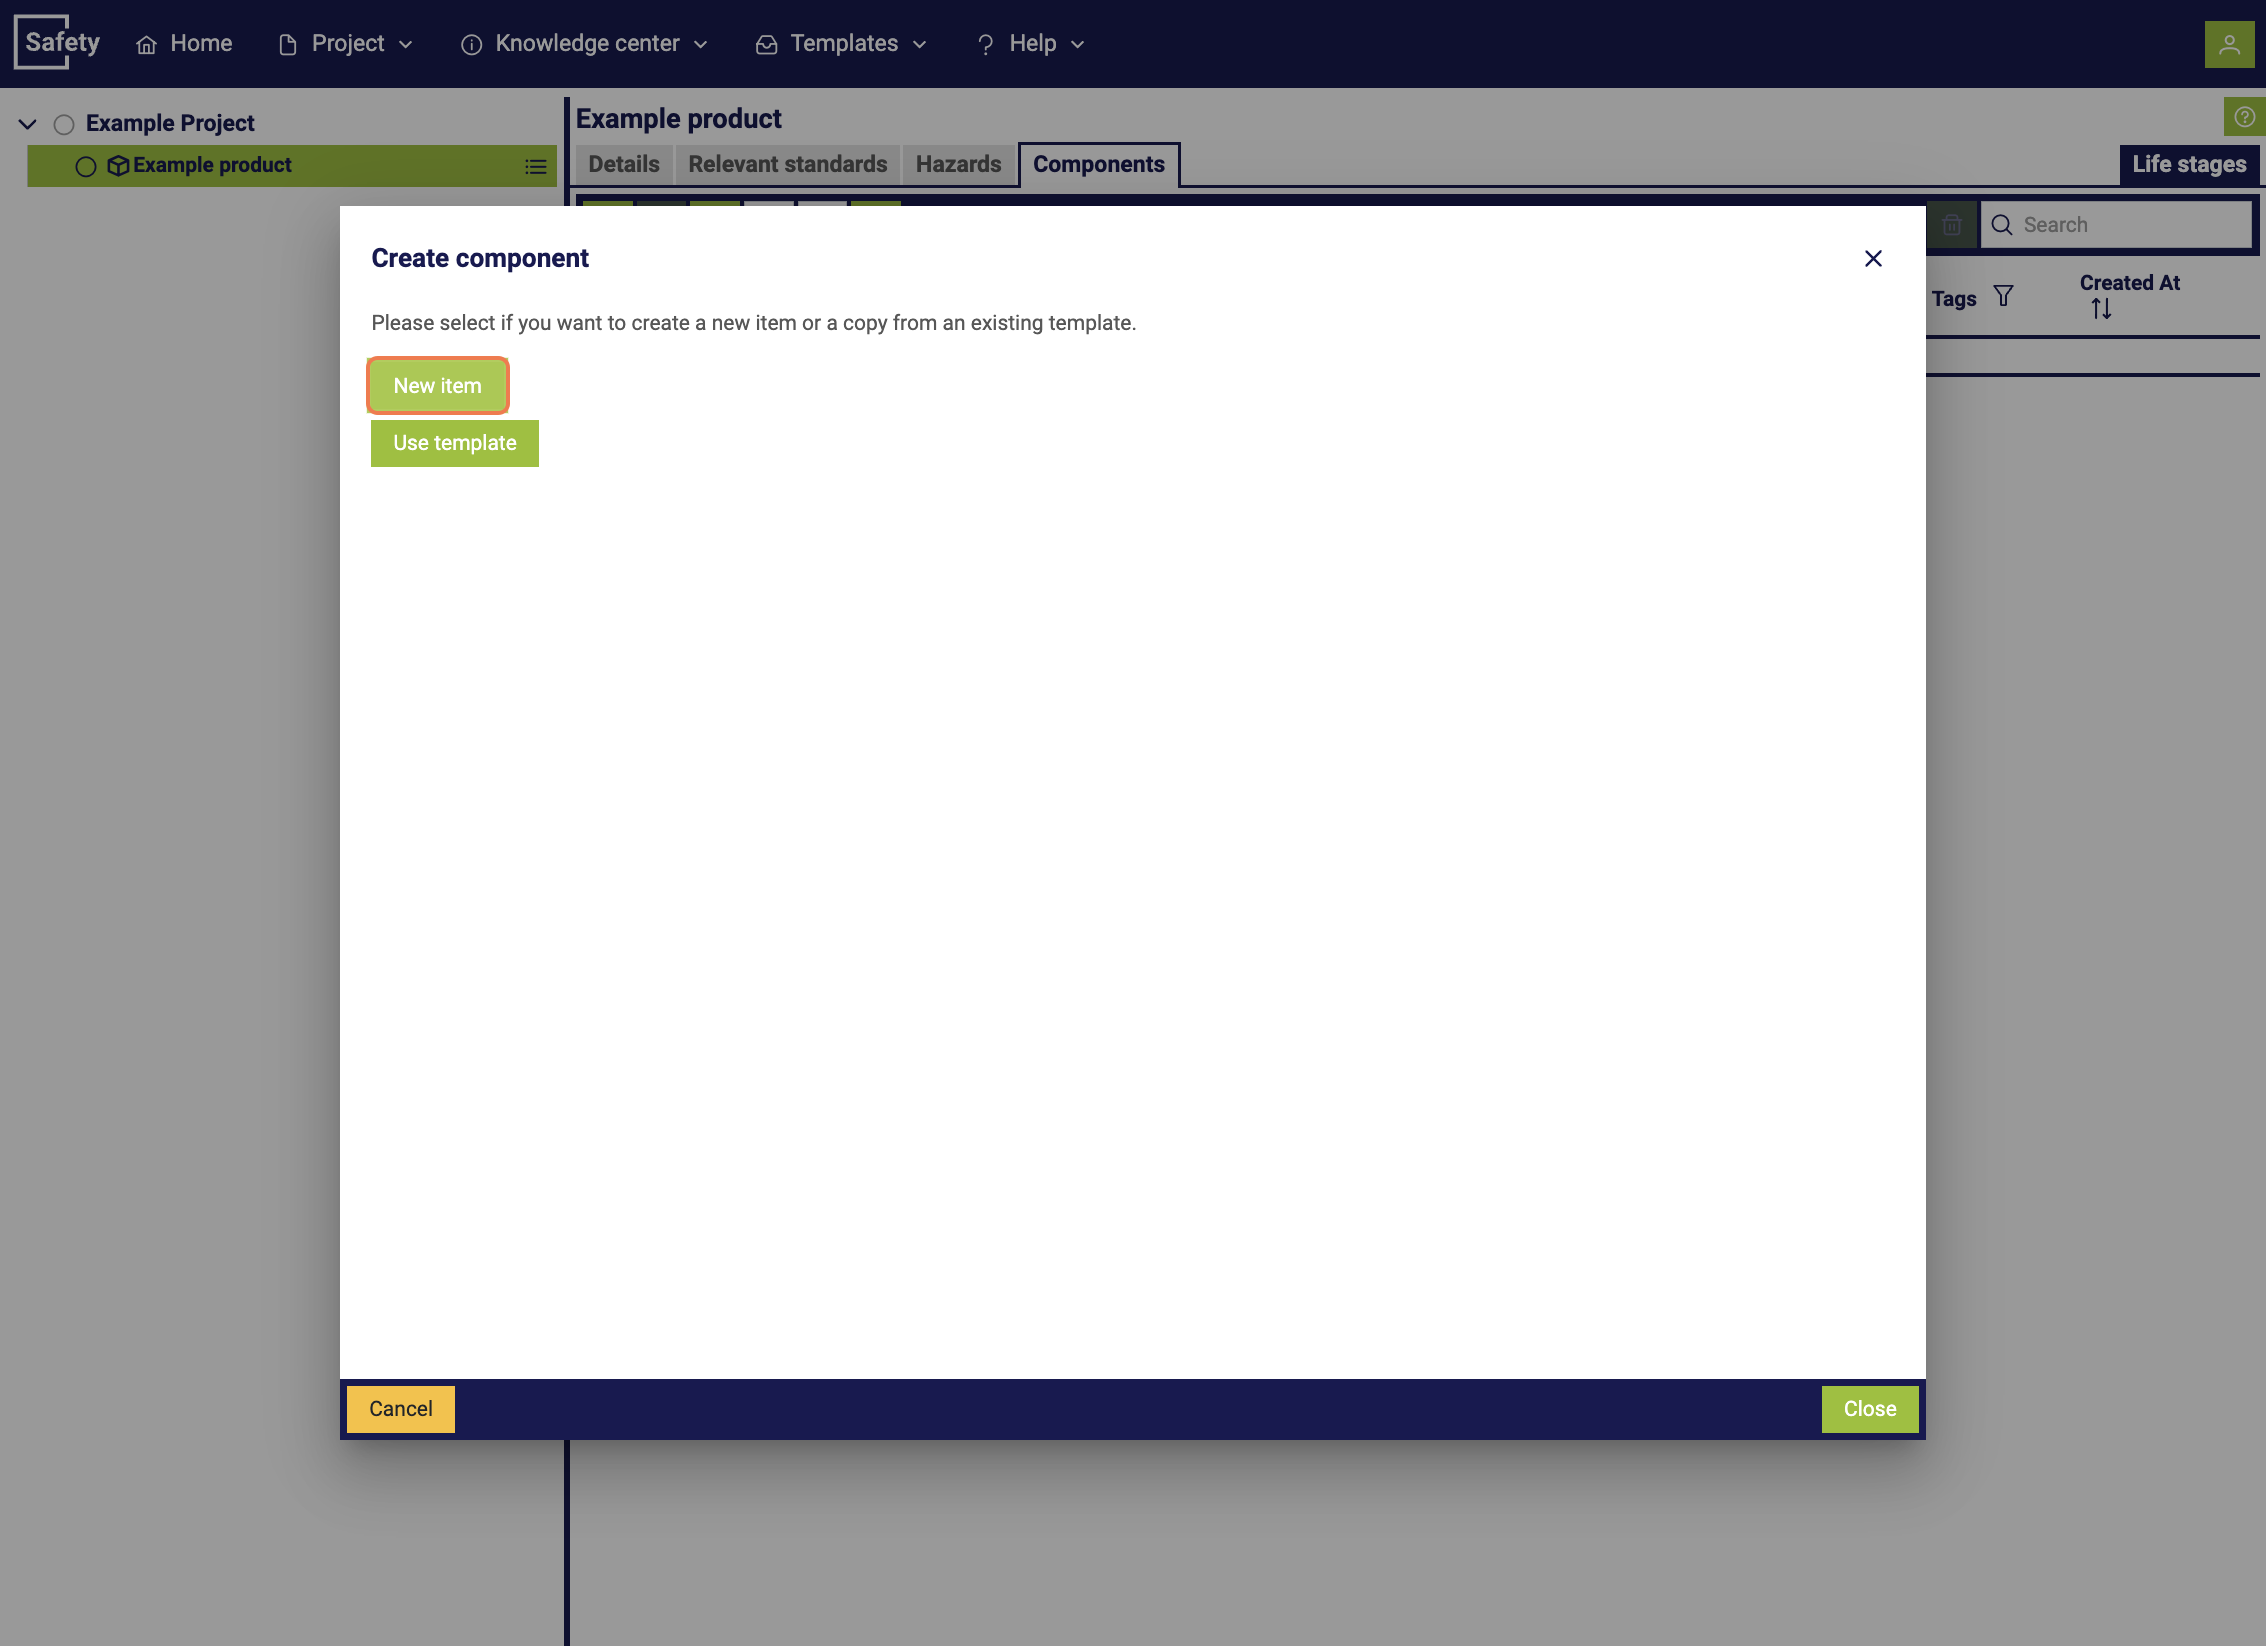
In the subsequent popup window, you must assign a name to the component and can add additional information.
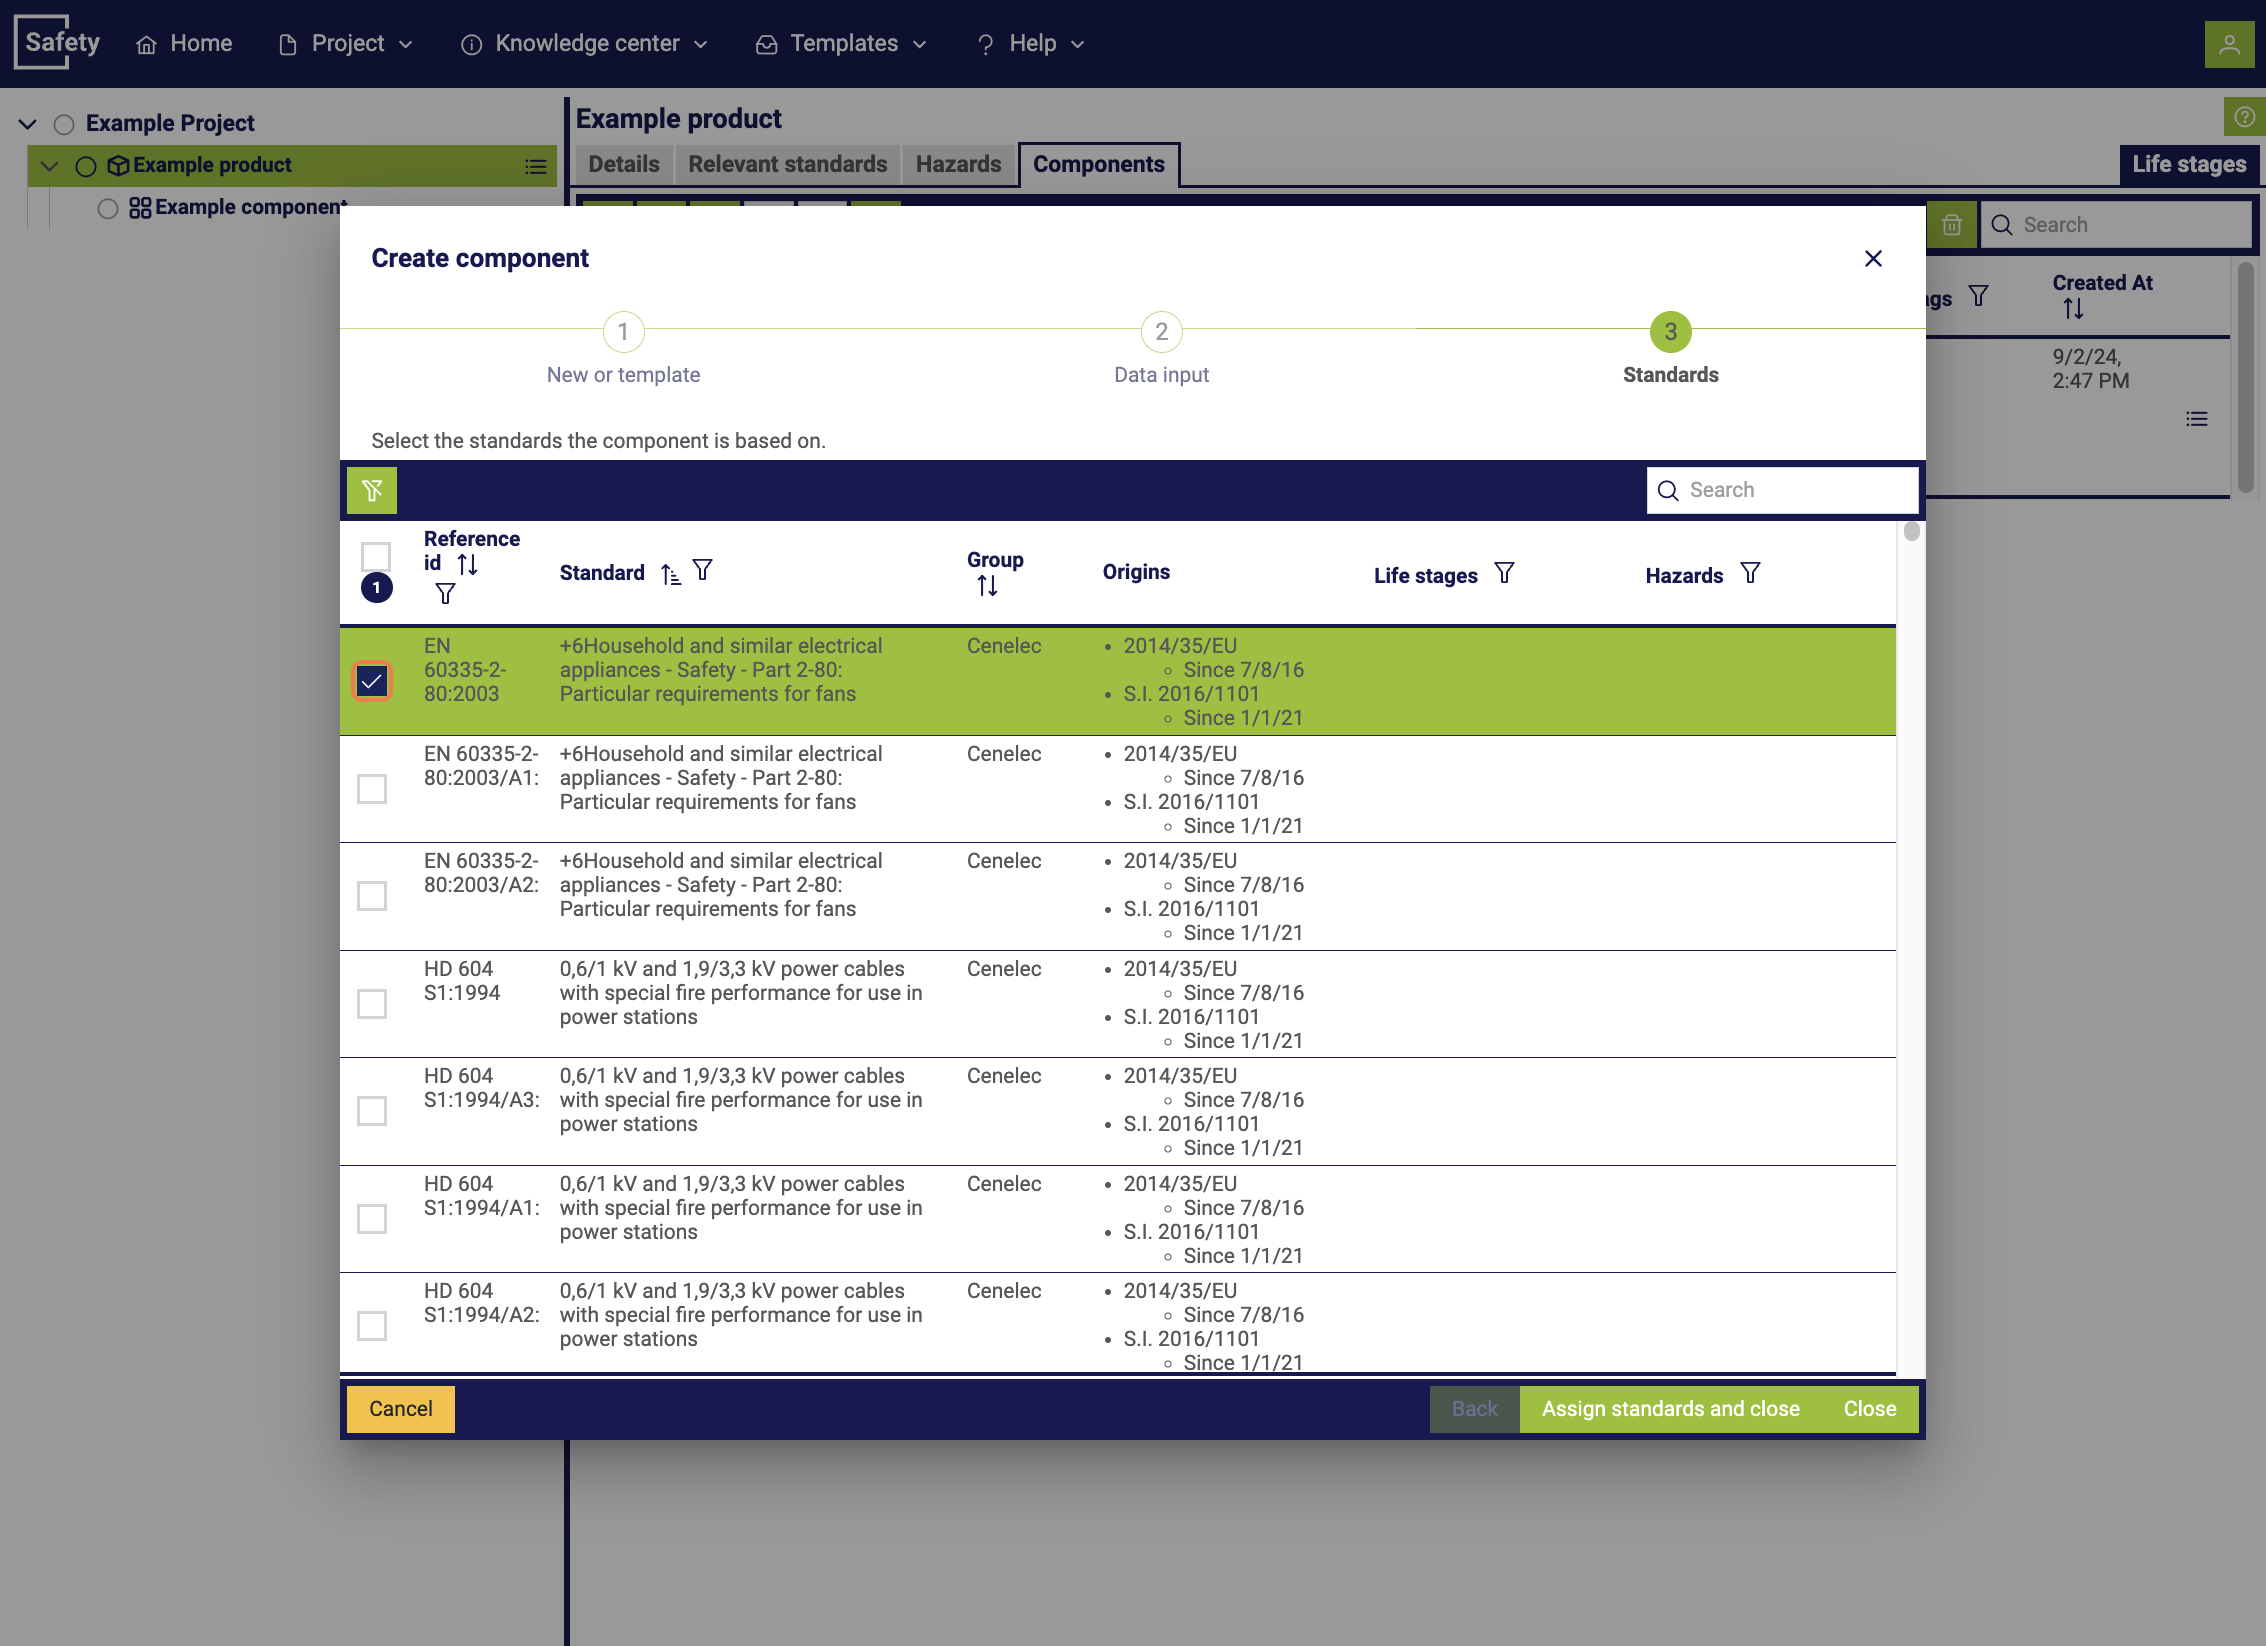
Finally, relevant standards can be allocated to the component.
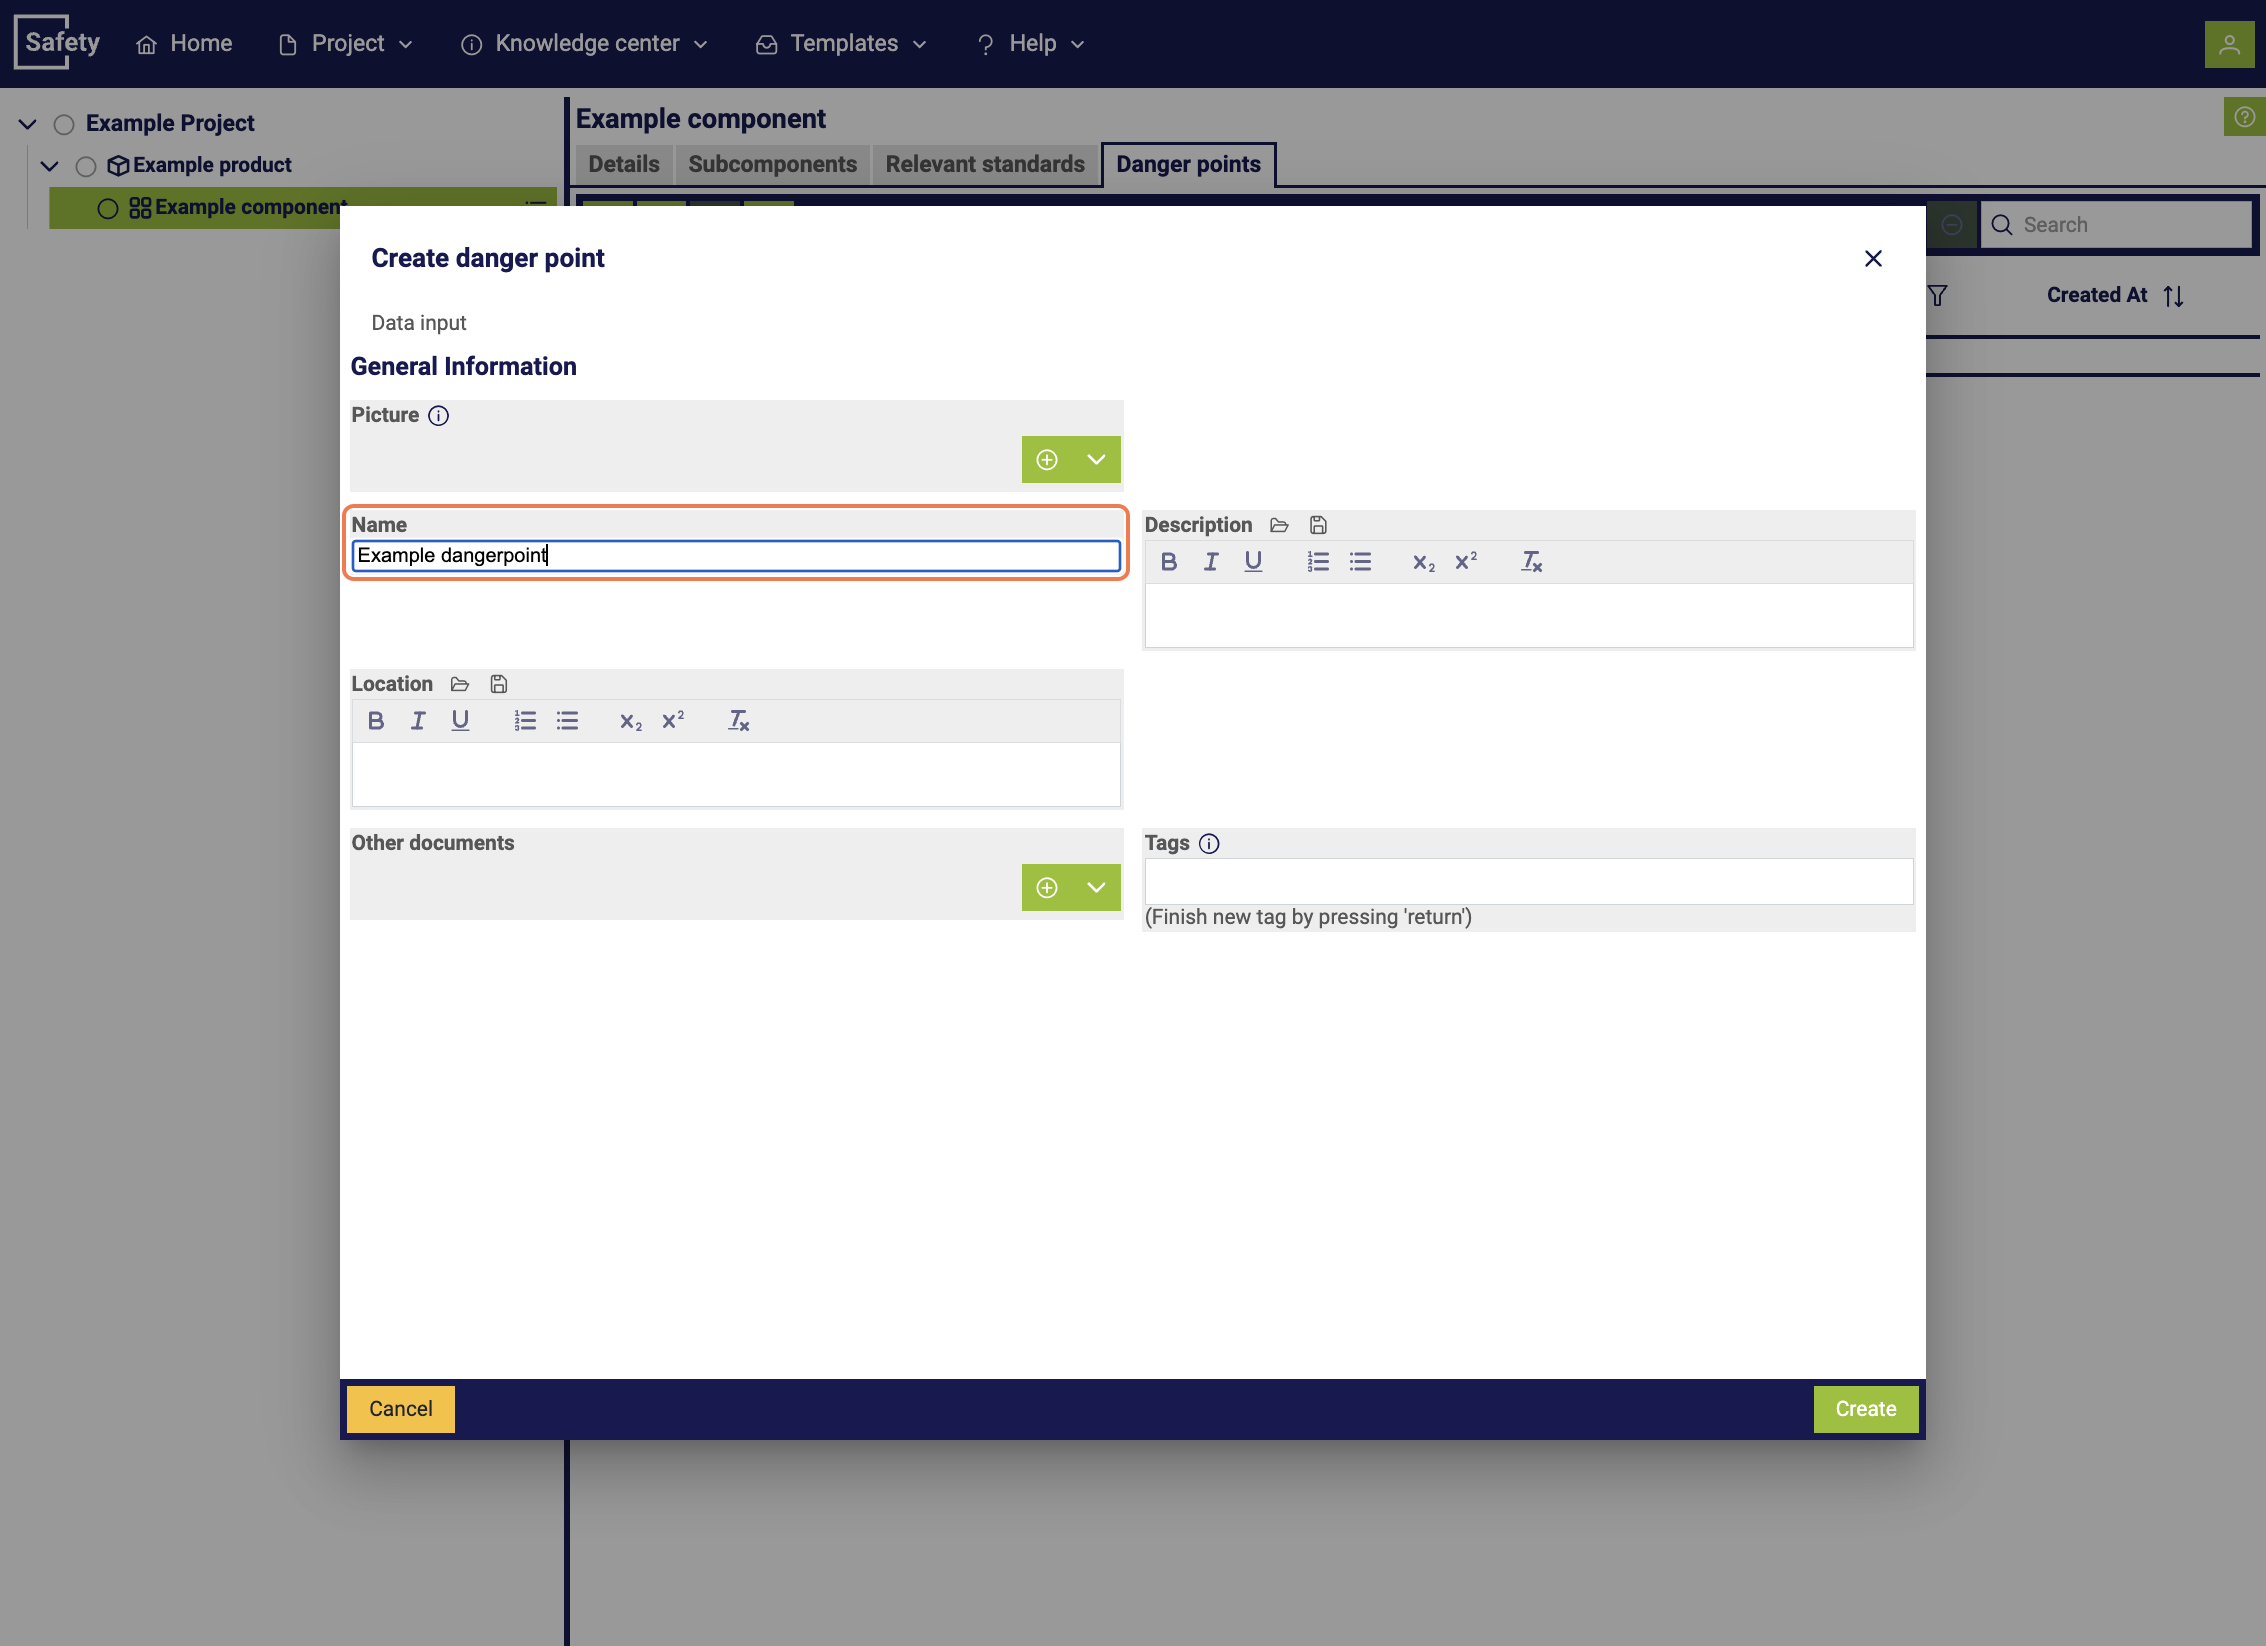
4. Creating a danger point
To create a danger point, select the "Danger points" section in a component. You can start the process by clicking on the plus symbol.
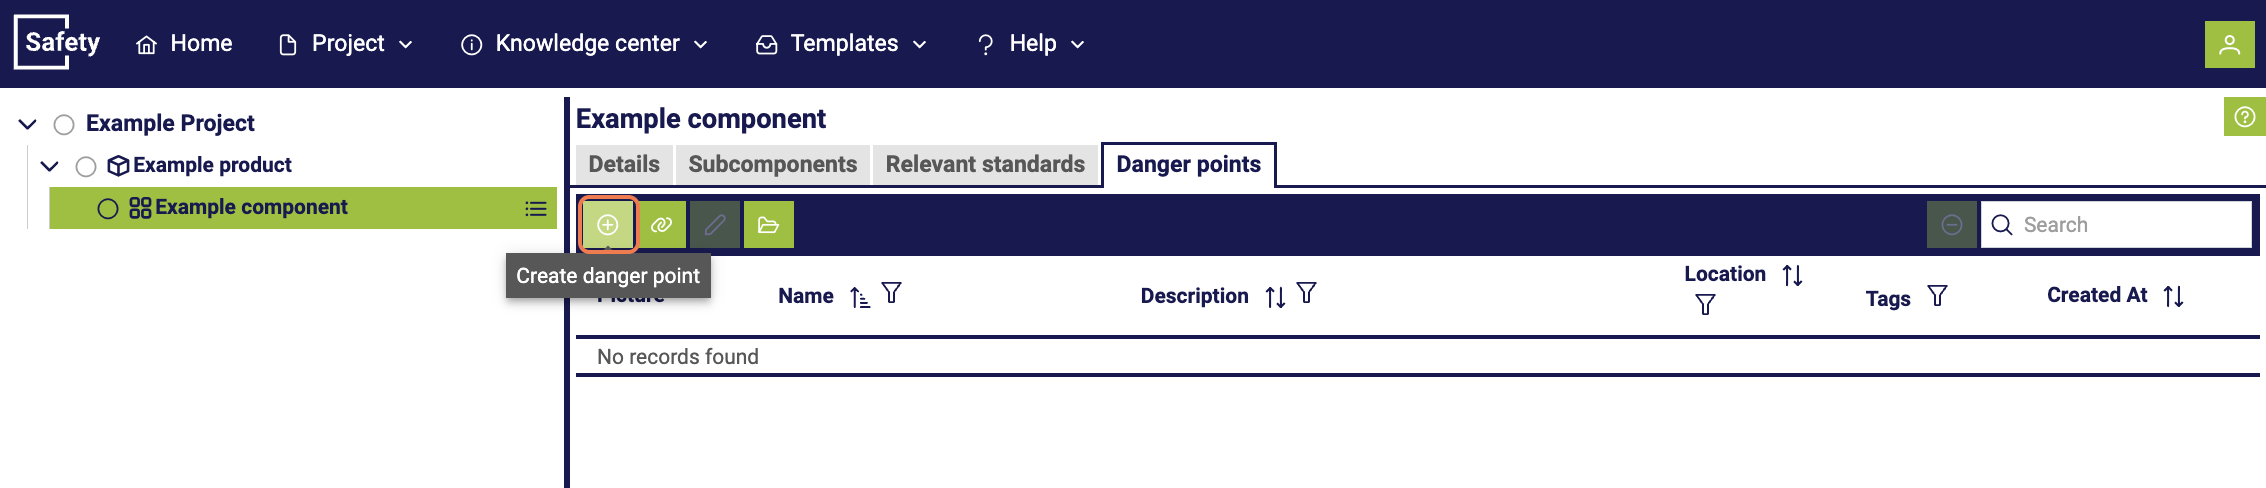
Finally, a pop-up window opens, where you can give the danger point a name and add additional information.
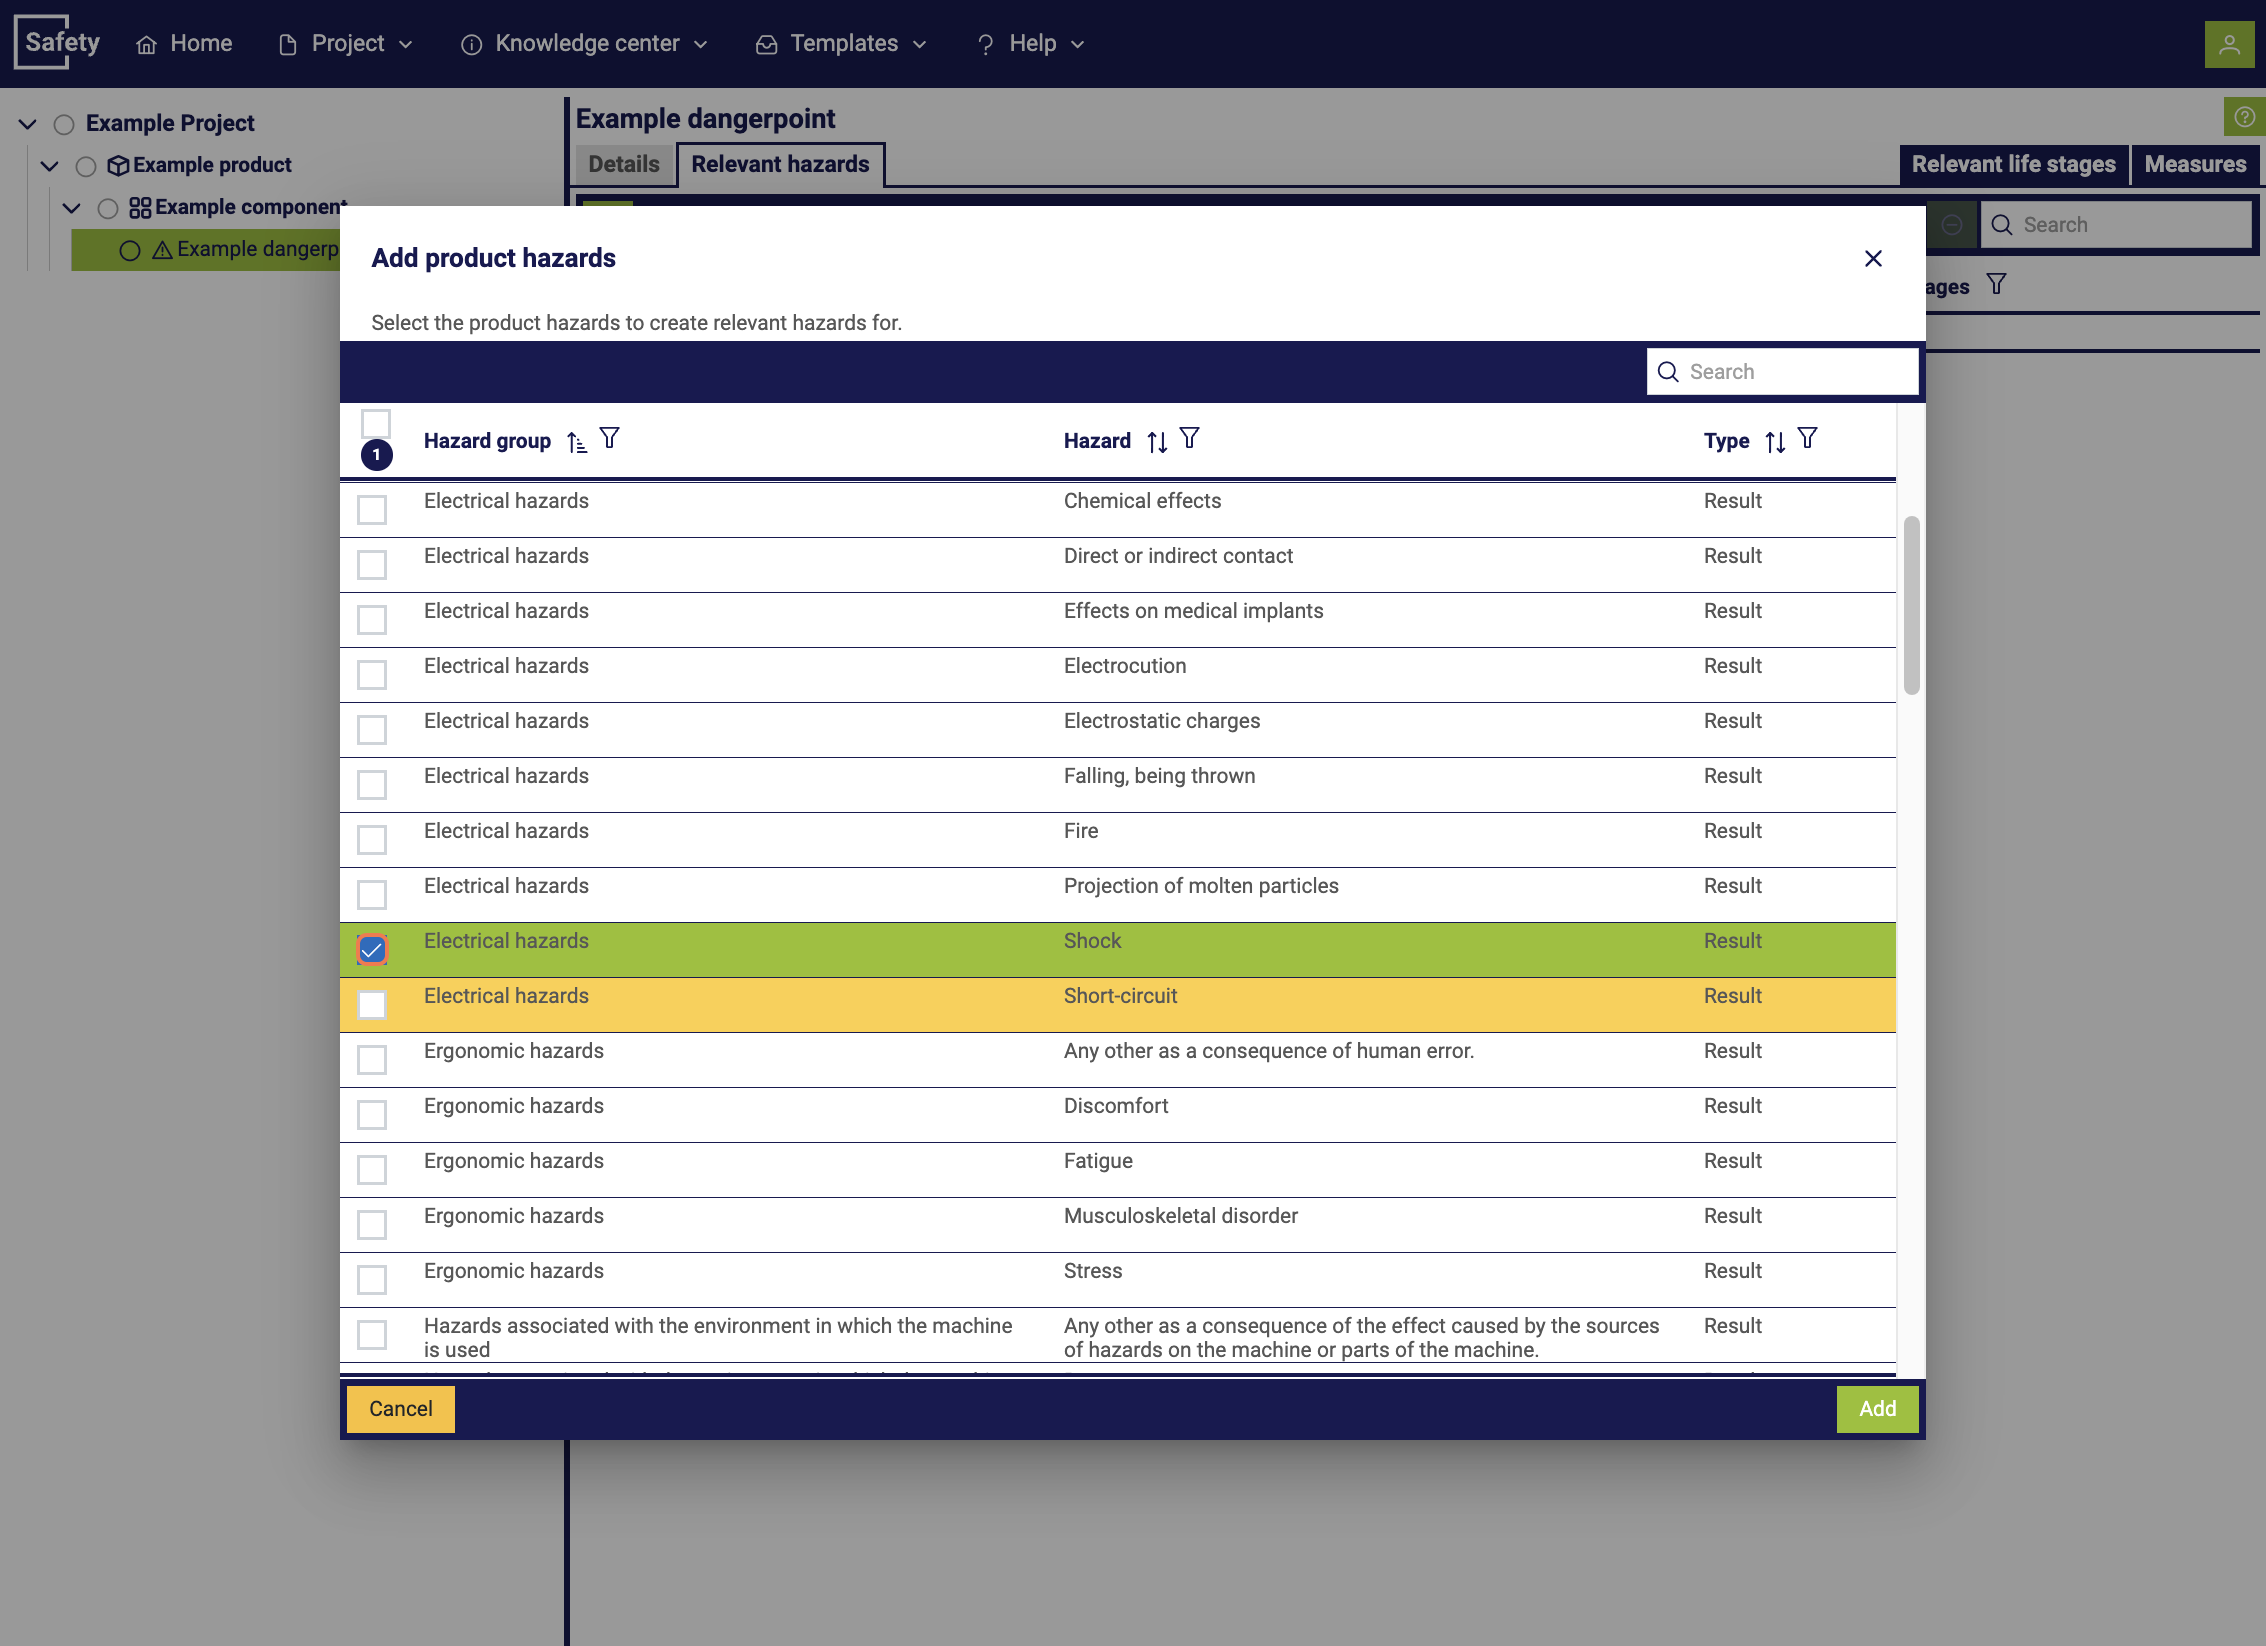
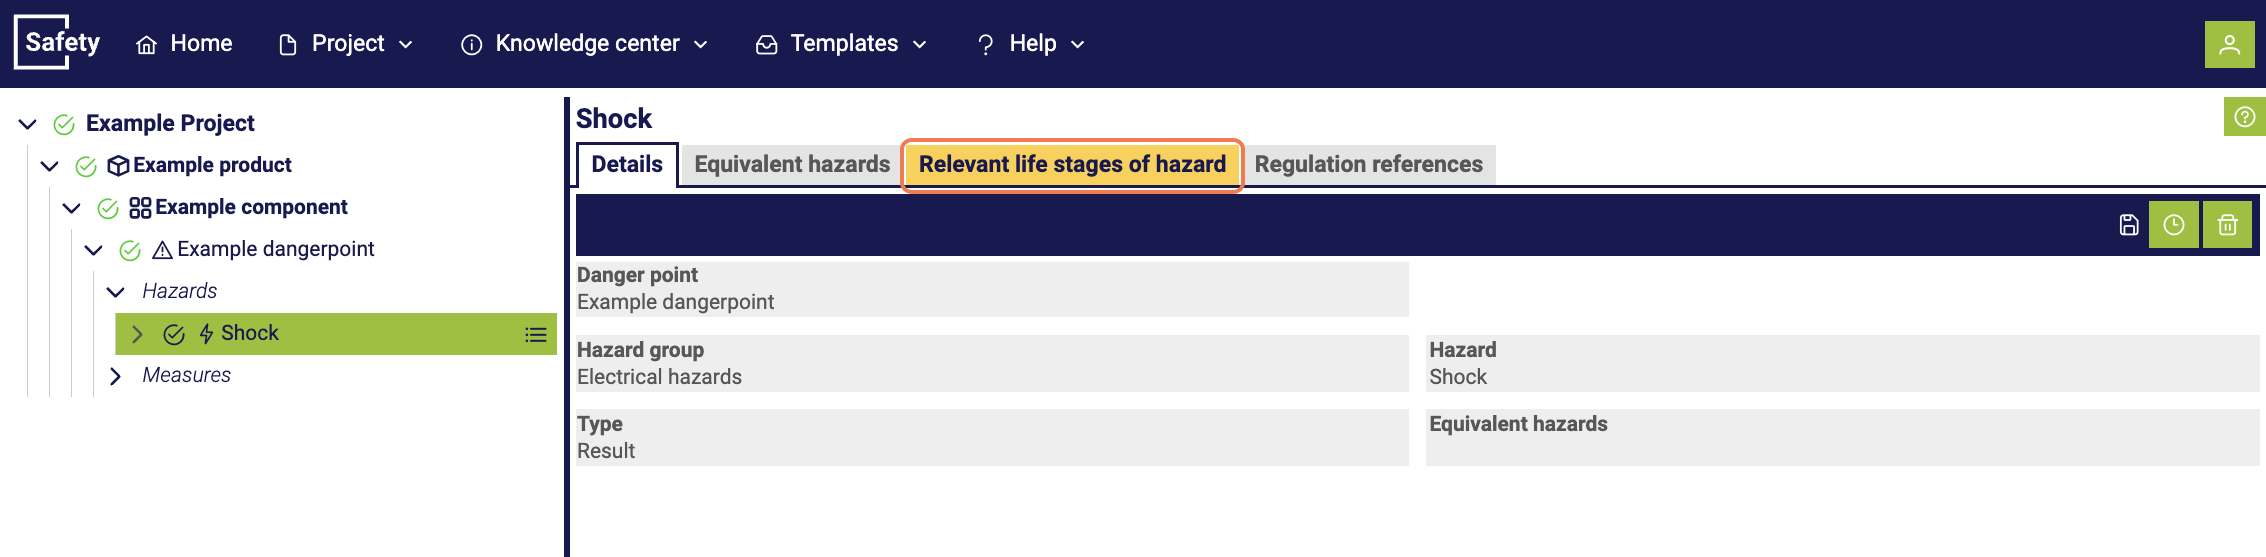
5. Creating a hazard
Once a component and a danger point have been created for this component, you can now create a hazard. To create a hazard, select the "Relevant hazards" section in a danger point. You can start the process by clicking the plus symbol.
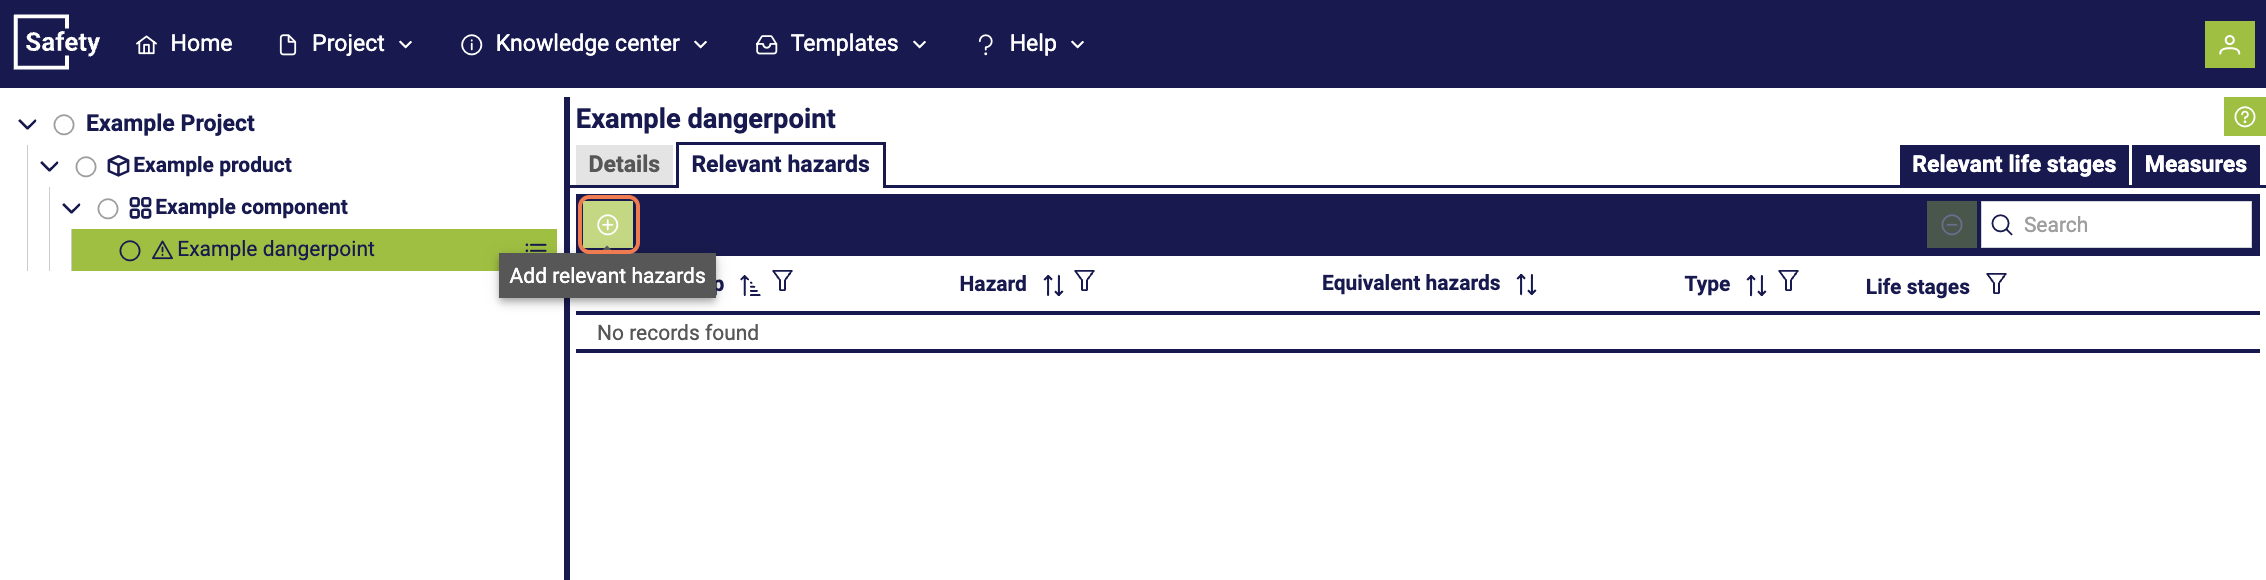
Finally, a pop-up window opens, in which you can select from available hazards.
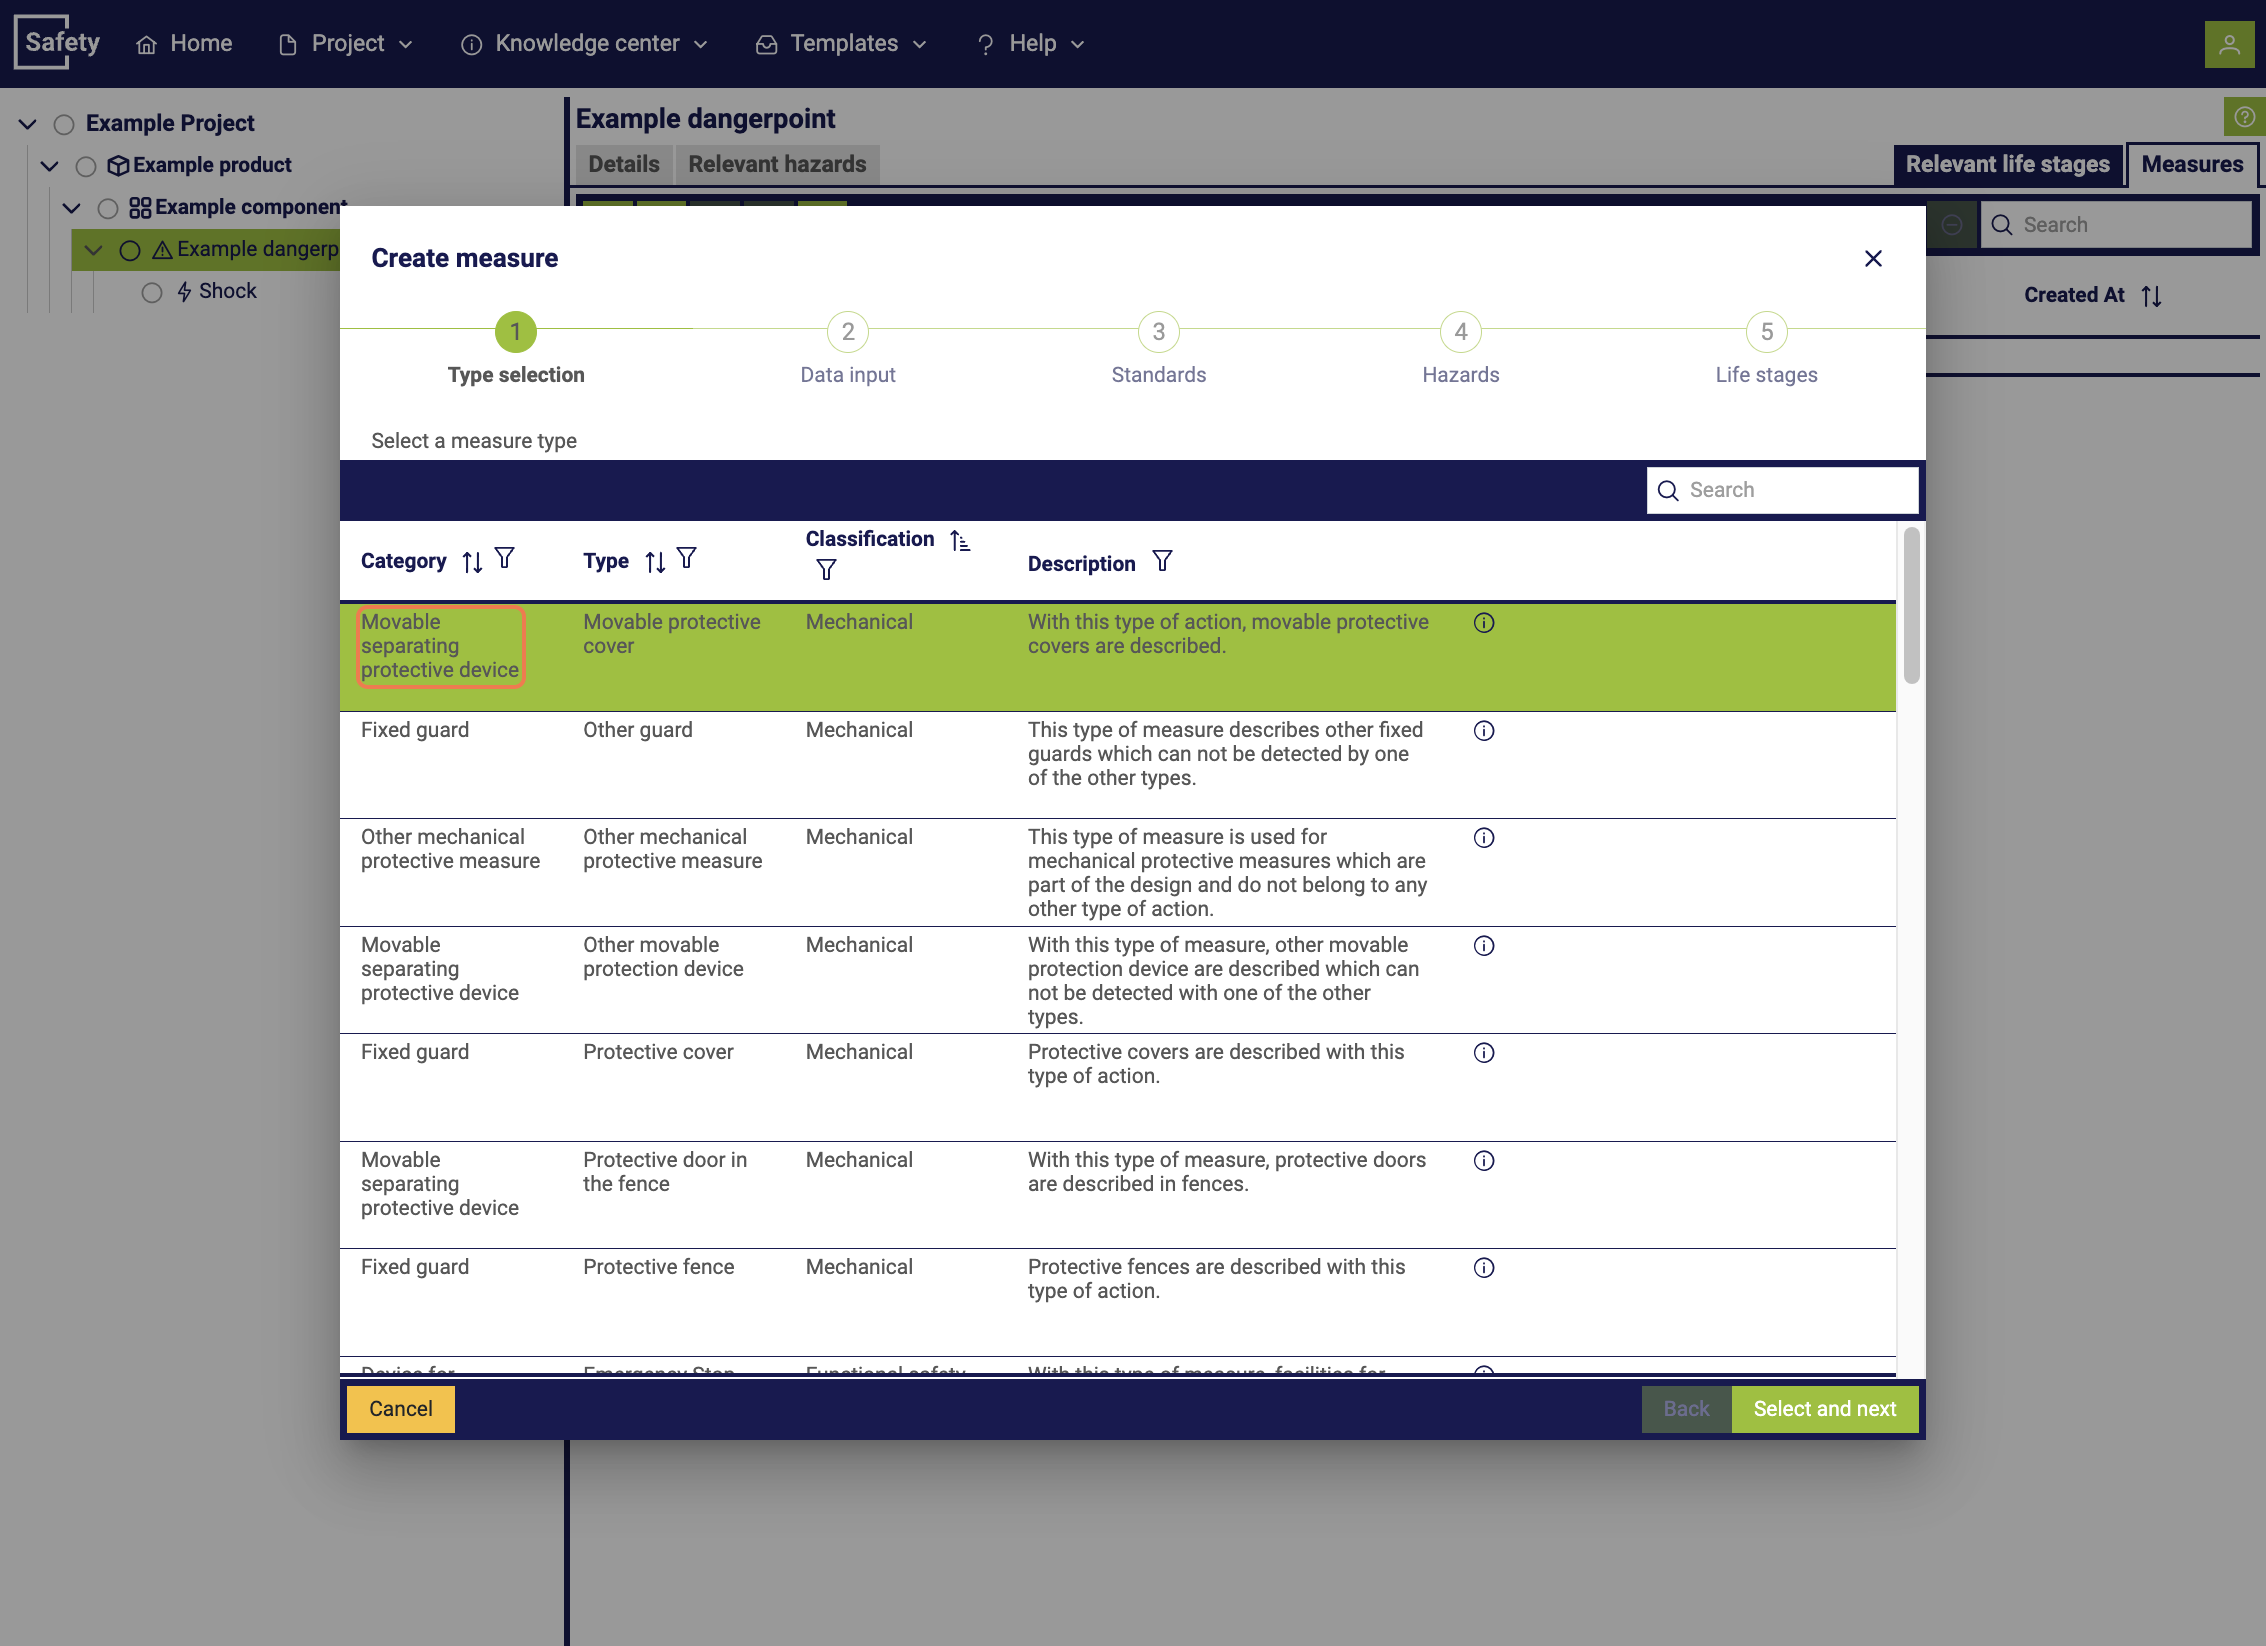
6. Creating a measure
To create a measure, select the "Measure" section in a hazard point and start the process via the plus symbol.
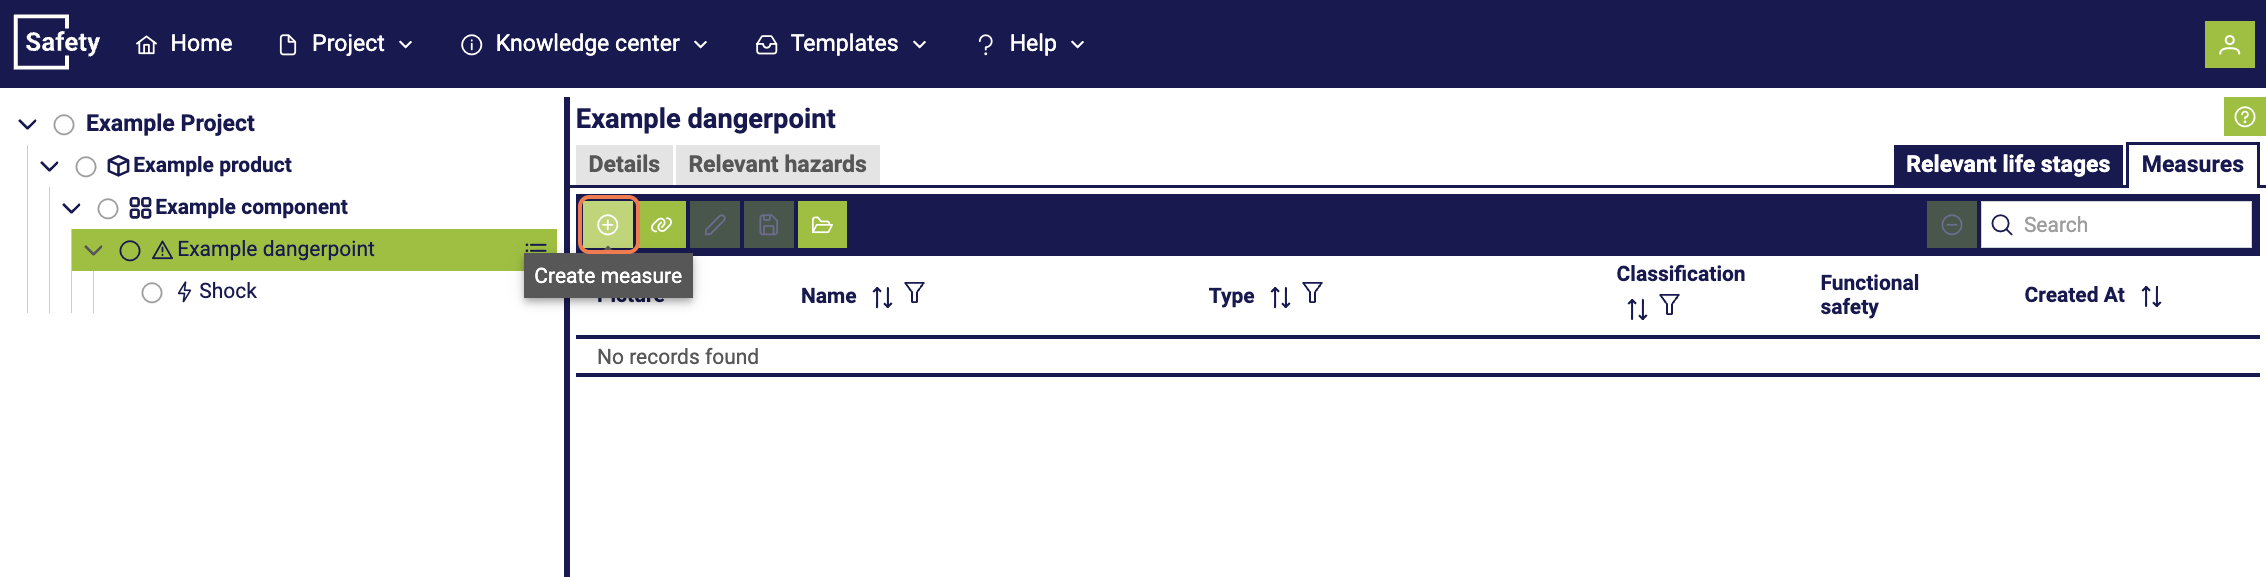
After starting the creation of a new measure, a pop-up window appears. In this, different measure types with differences in the data to be recorded are displayed. Please select which type is applicable.
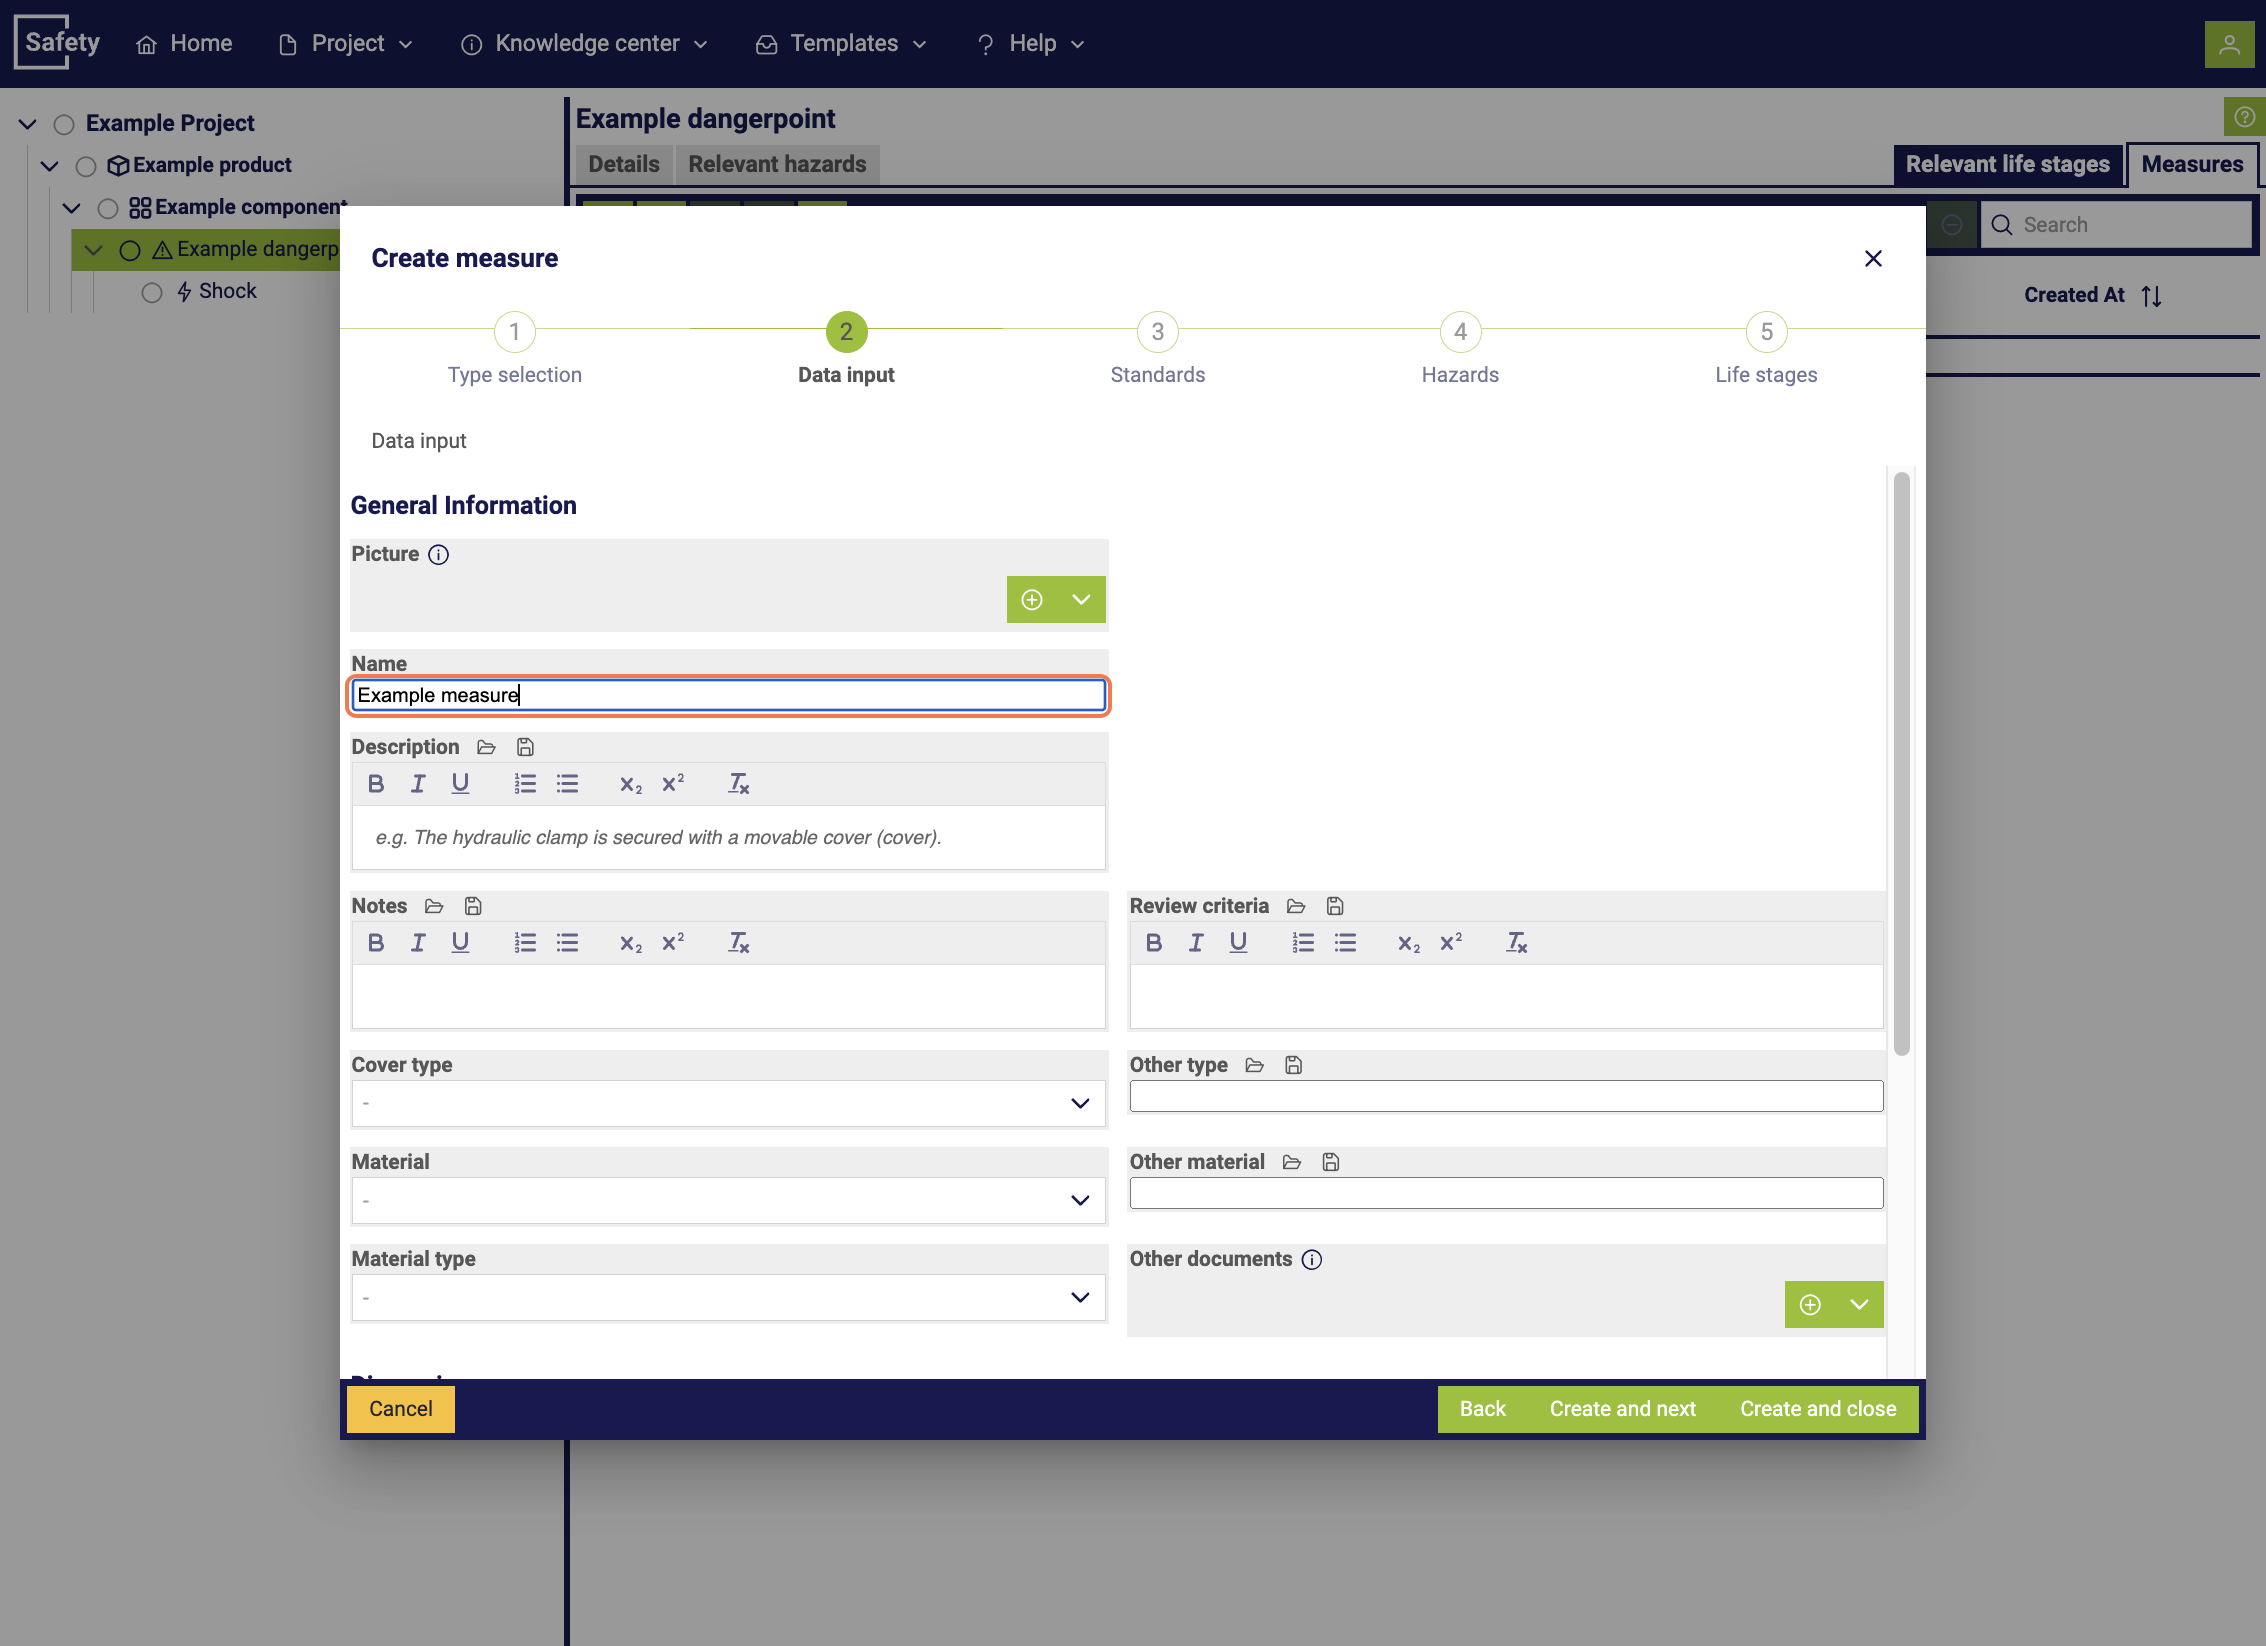
You then have the option to assign a name to the measure and add additional information.
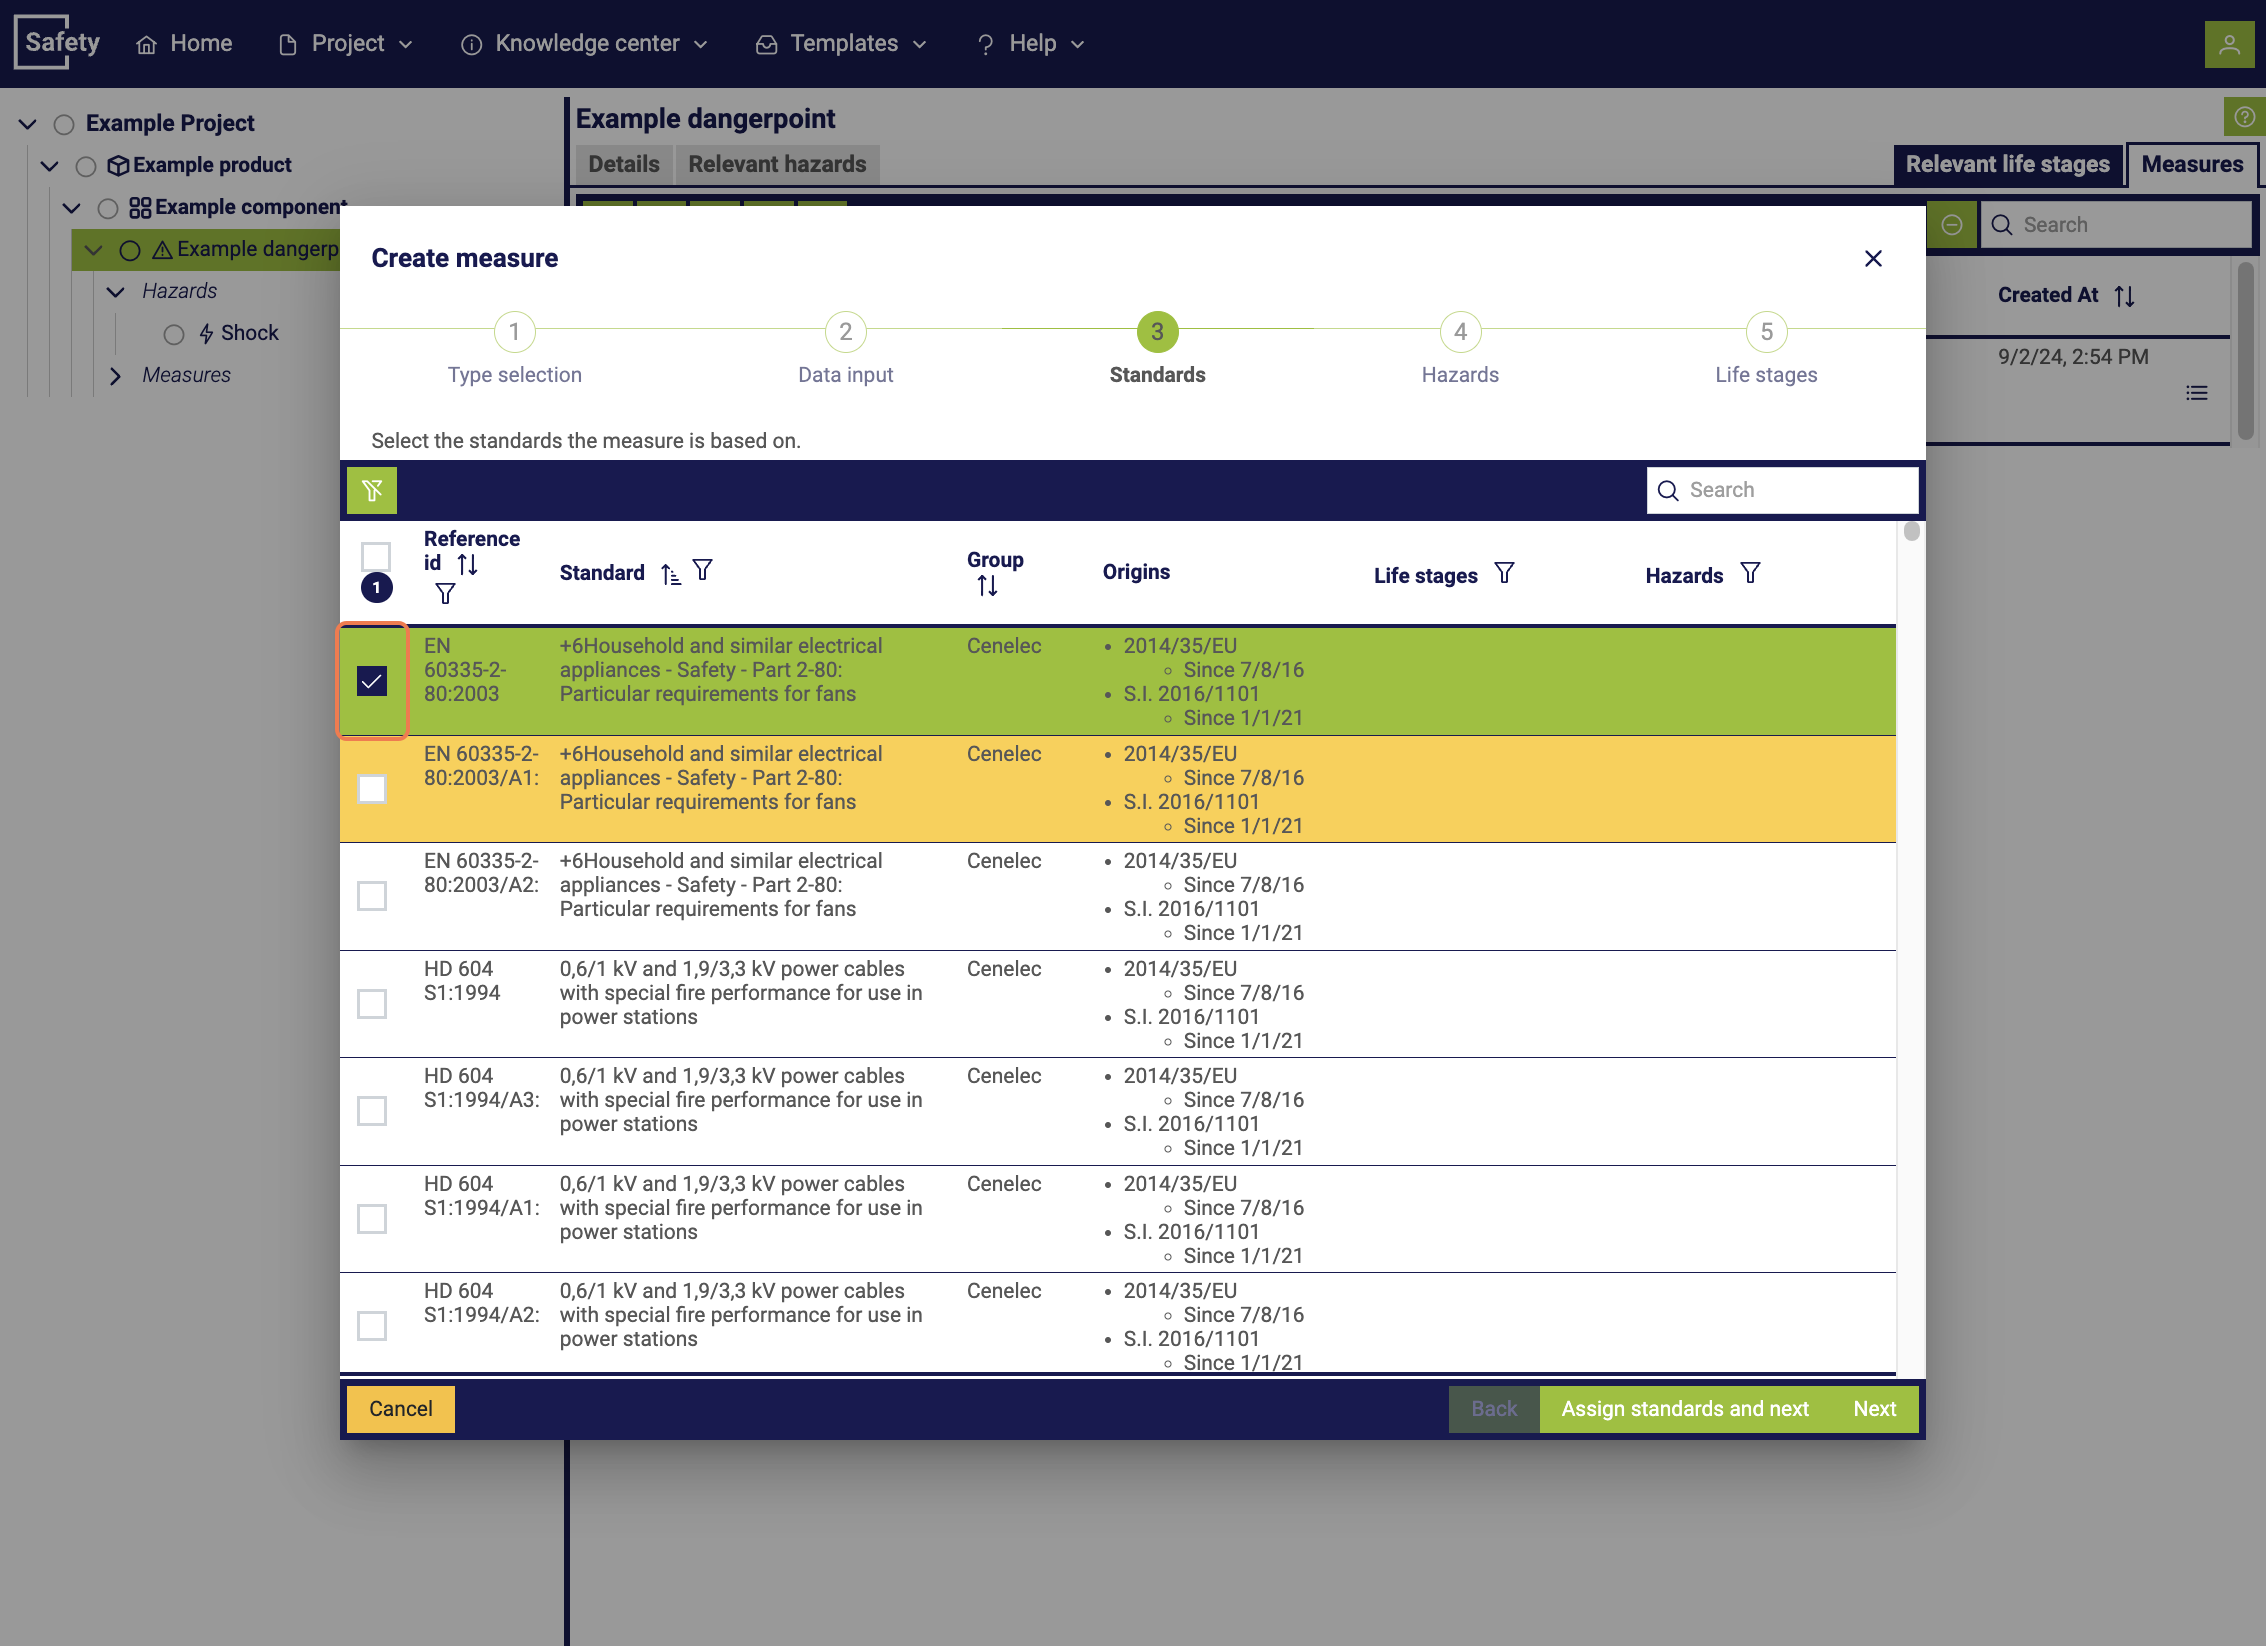
In the next step, select the relevant standards to which the measure refers and which it is to be applied to.
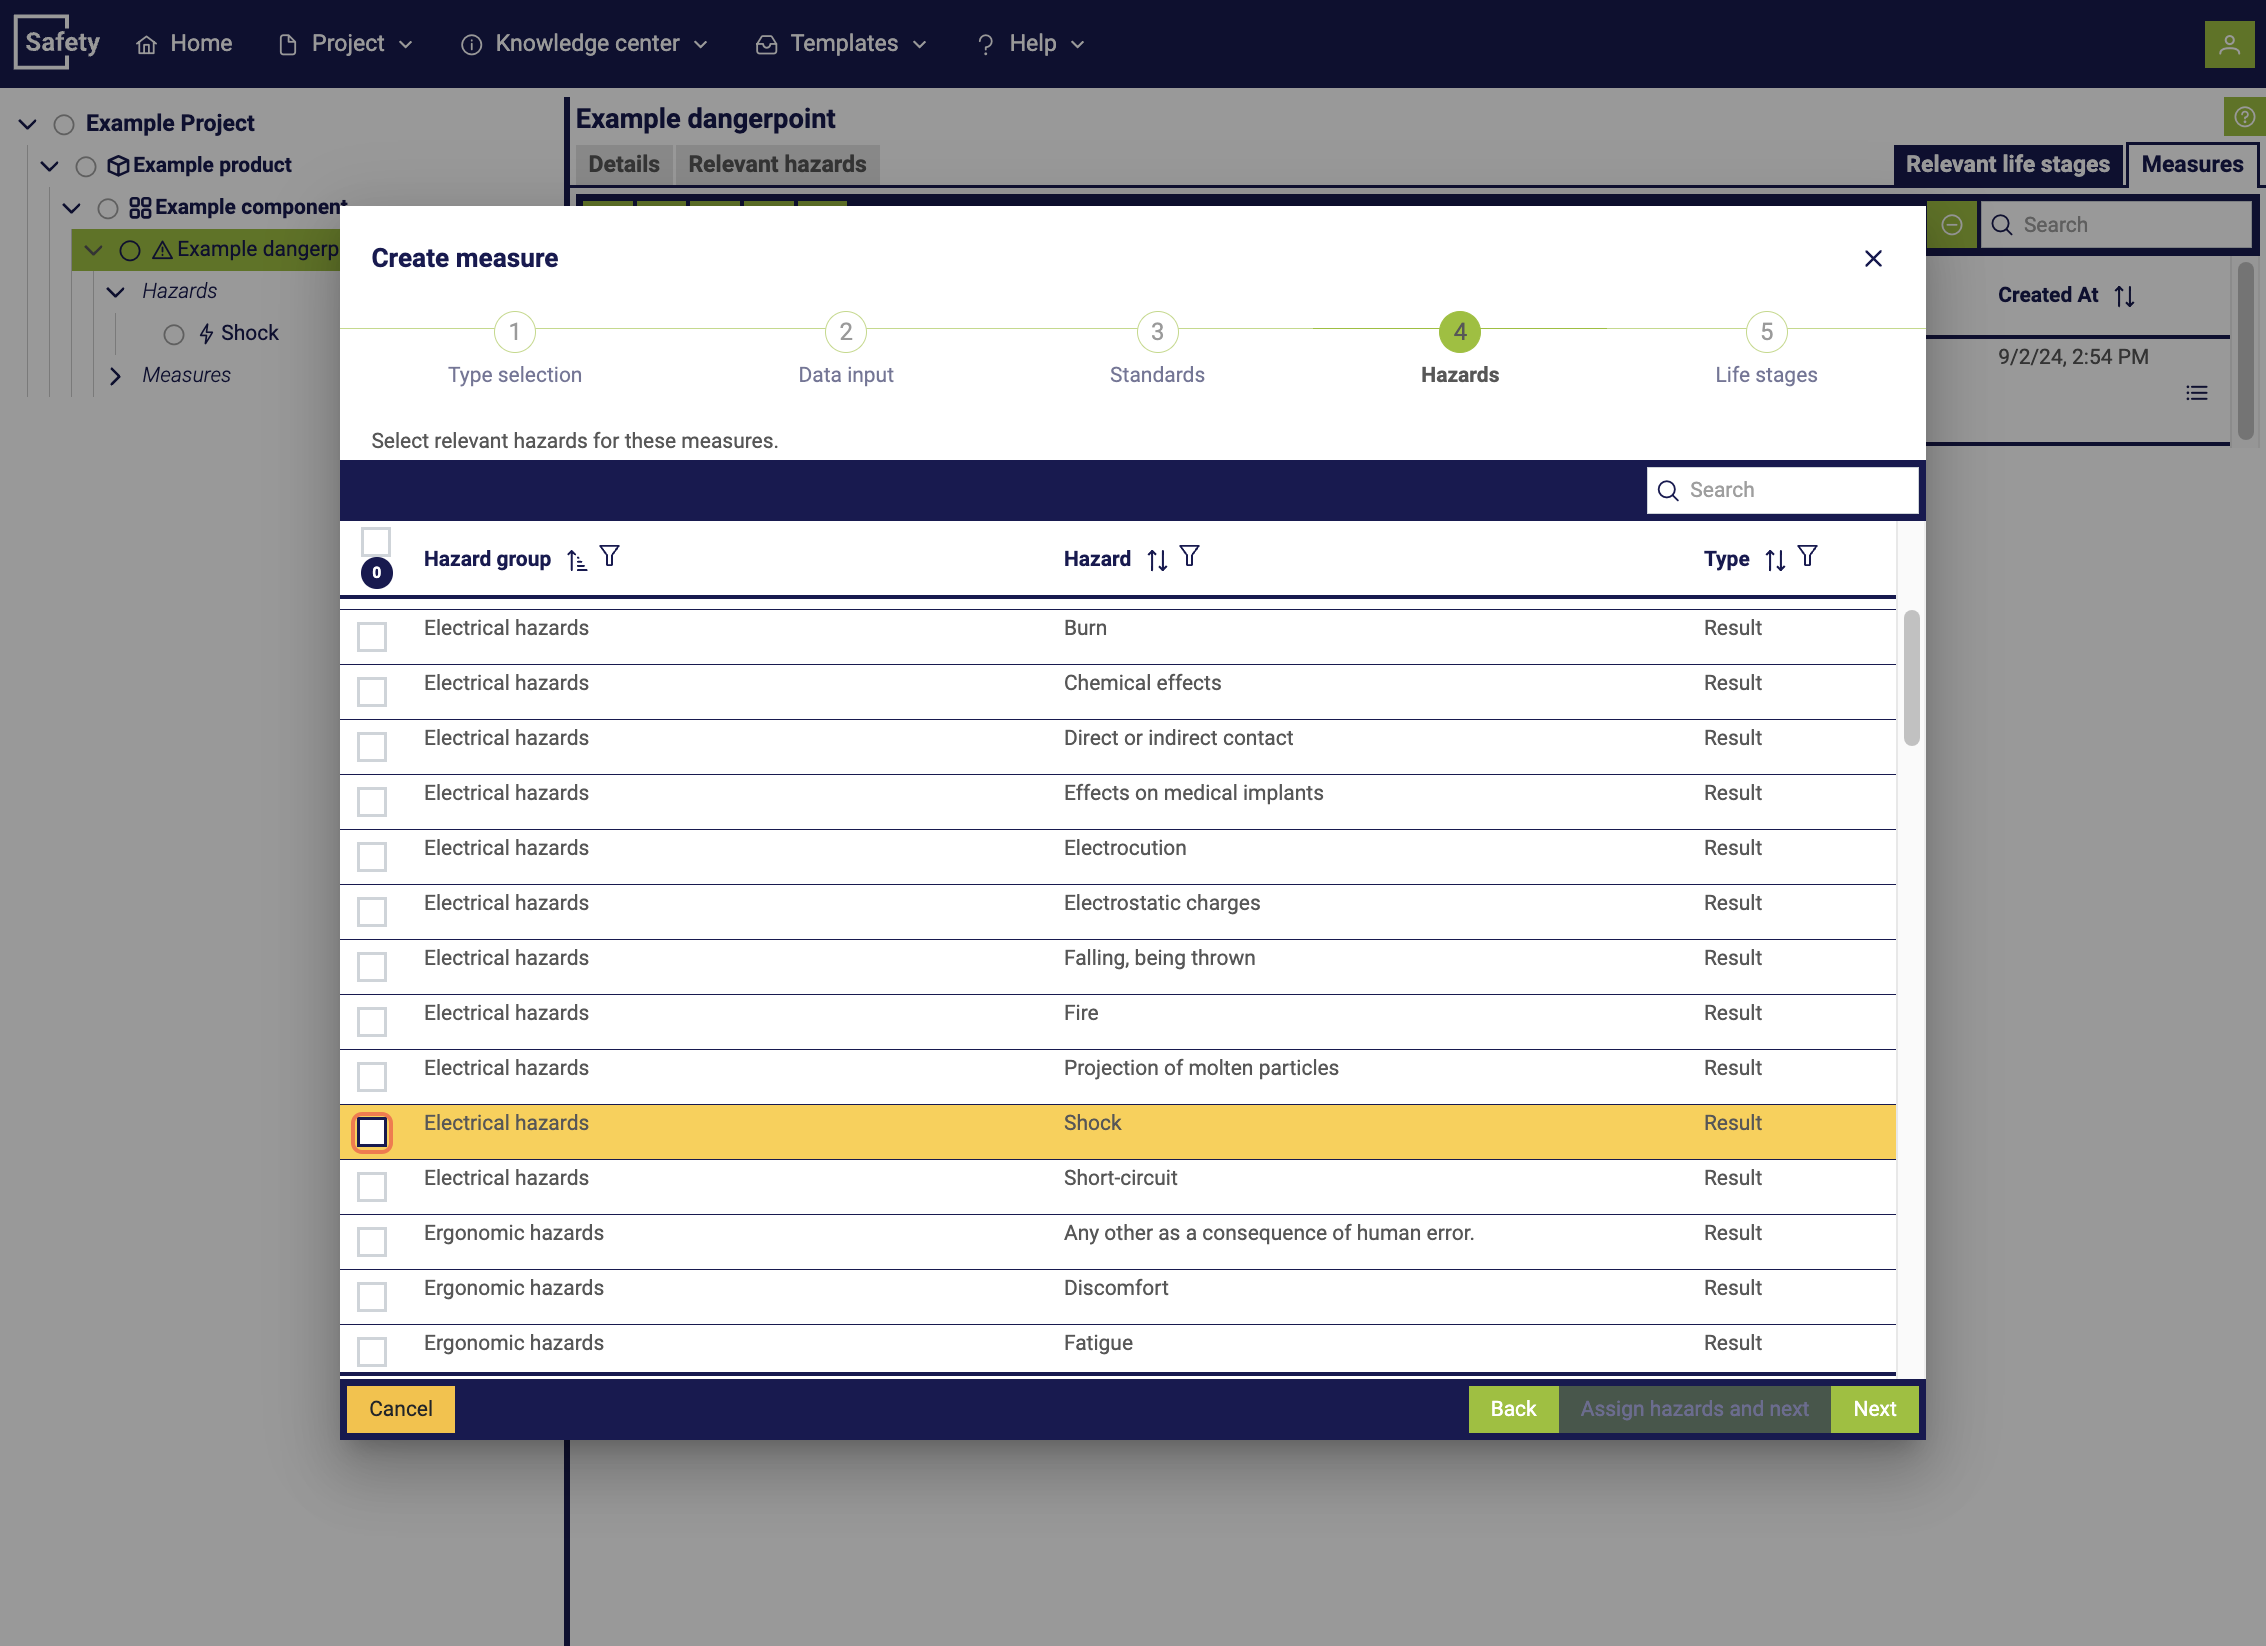
In the final step, link the measure to the identified hazards to integrate it into the risk assessment.
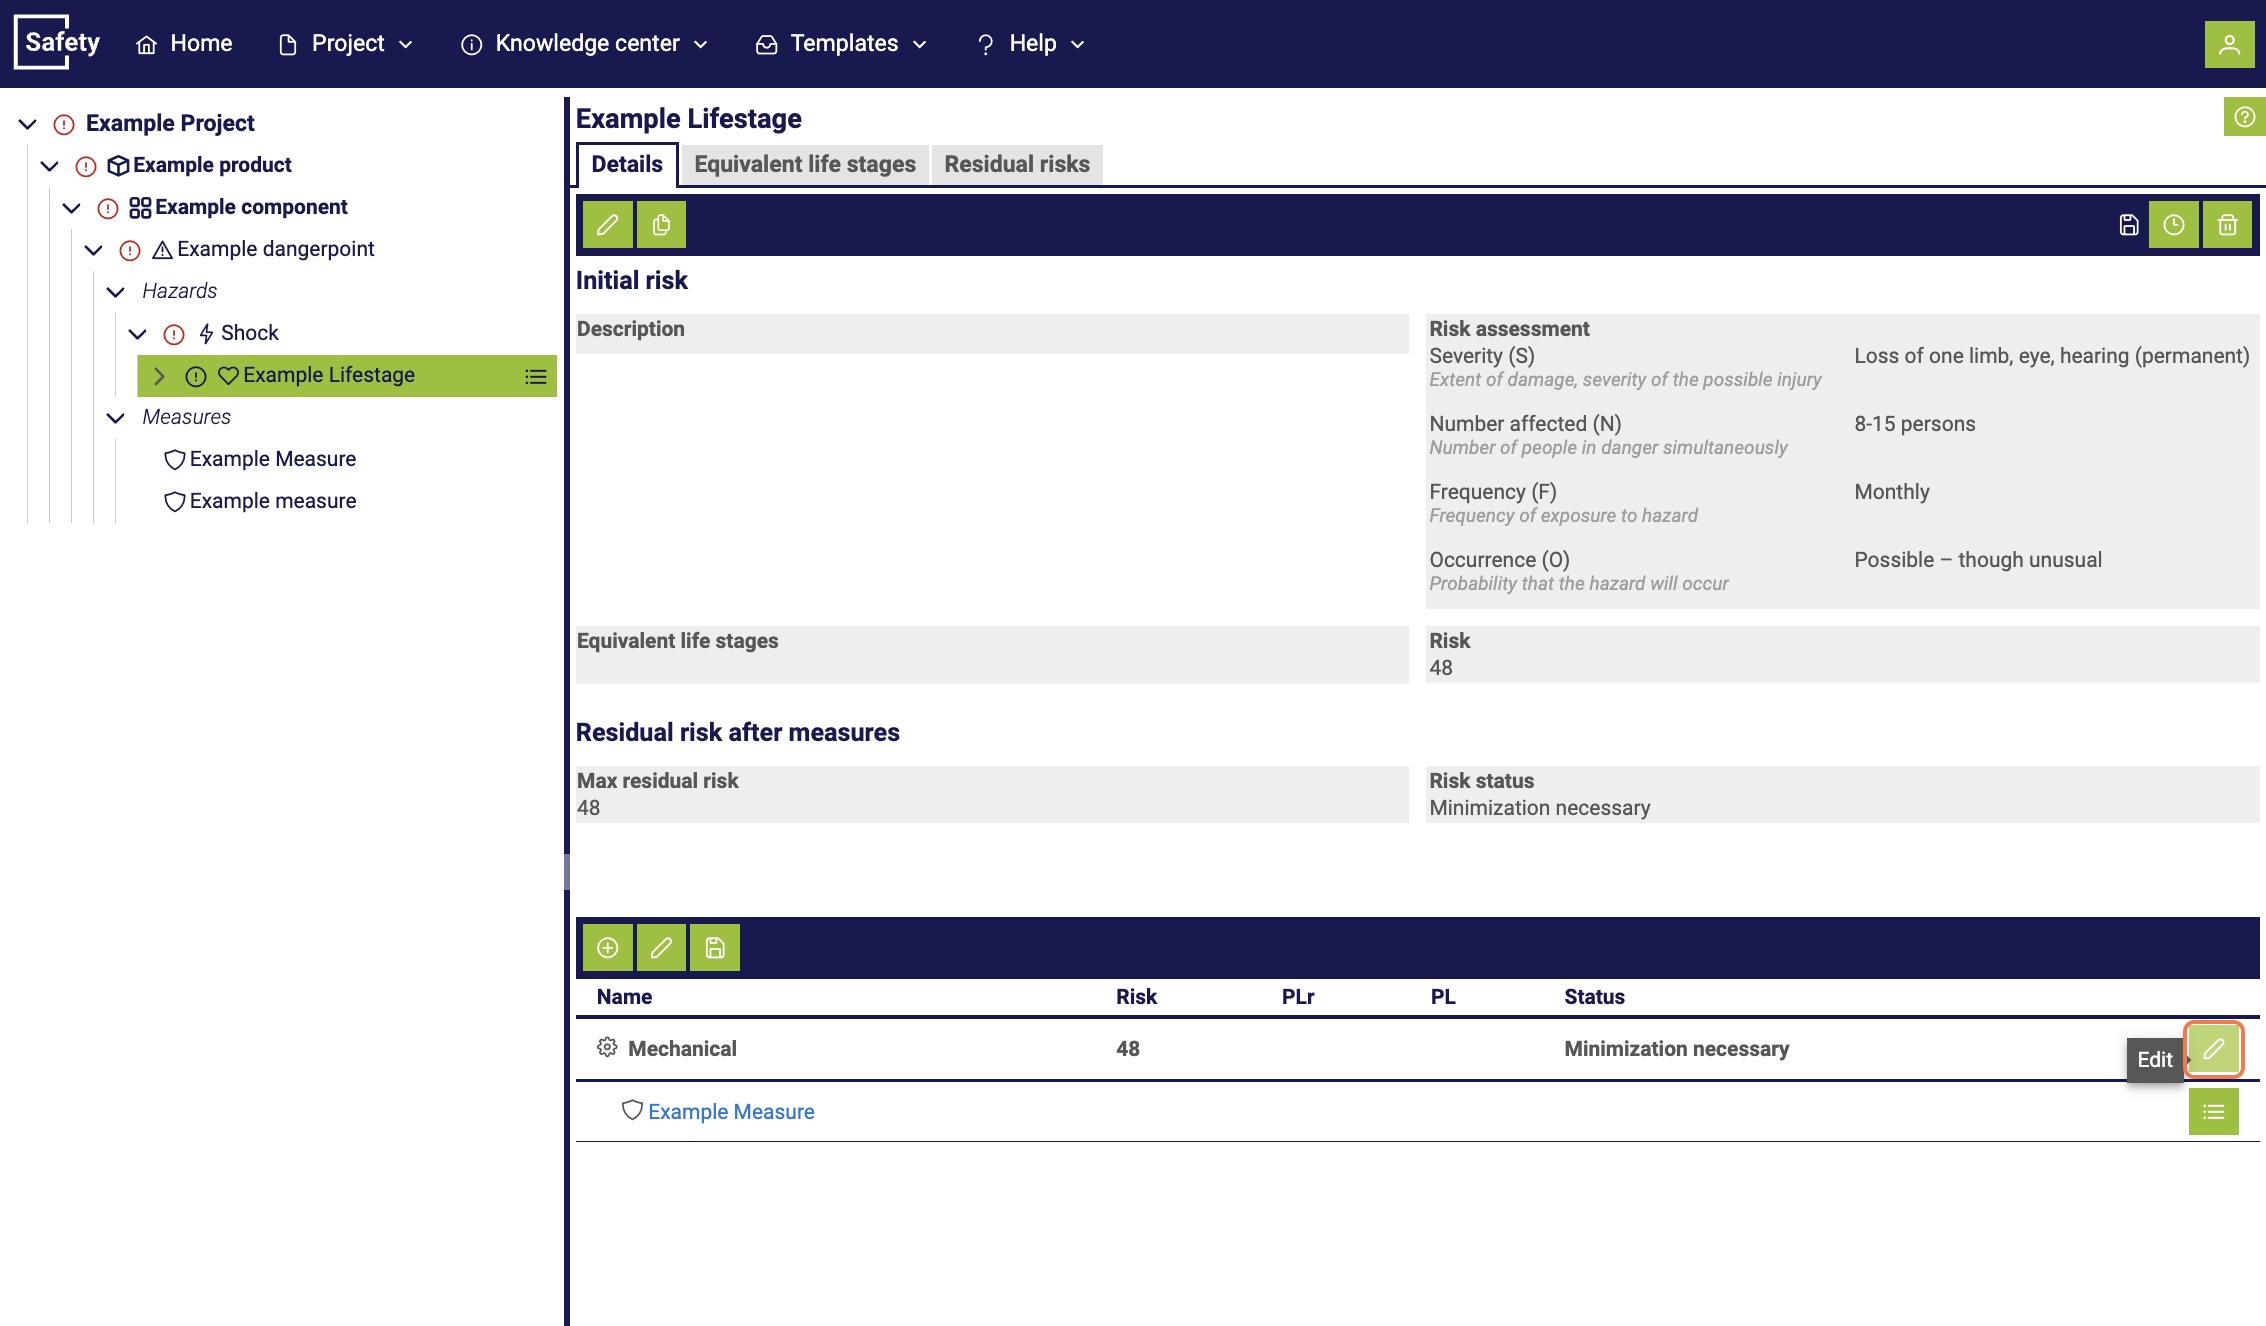
7. Determining initial risk
To perform a comprehensive risk assessment, first assign a specific life stage to a potential hazard. This step is crucial, as it allows the potential risks to be understood in the context of the respective life stage and appropriate measures to be taken to reduce the risk. By assigning life stages to hazards, a more precise analysis is made possible, which enables targeted and effective safety measures to be taken.
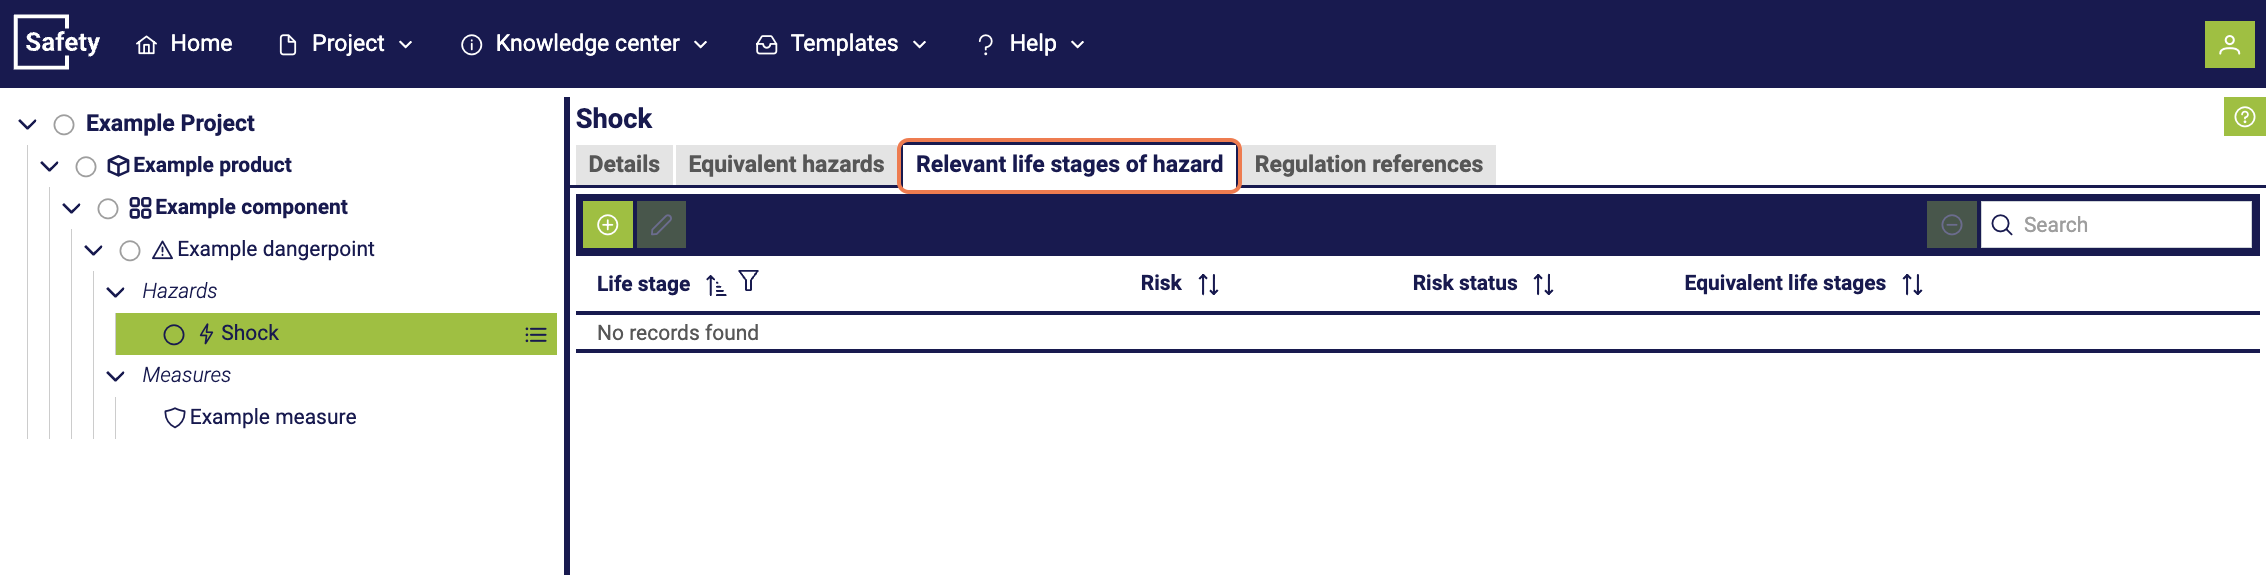
Within the hazard management, it is possible to initiate the process of adding a life stage to refine the risk assessment and optimize safety measures.
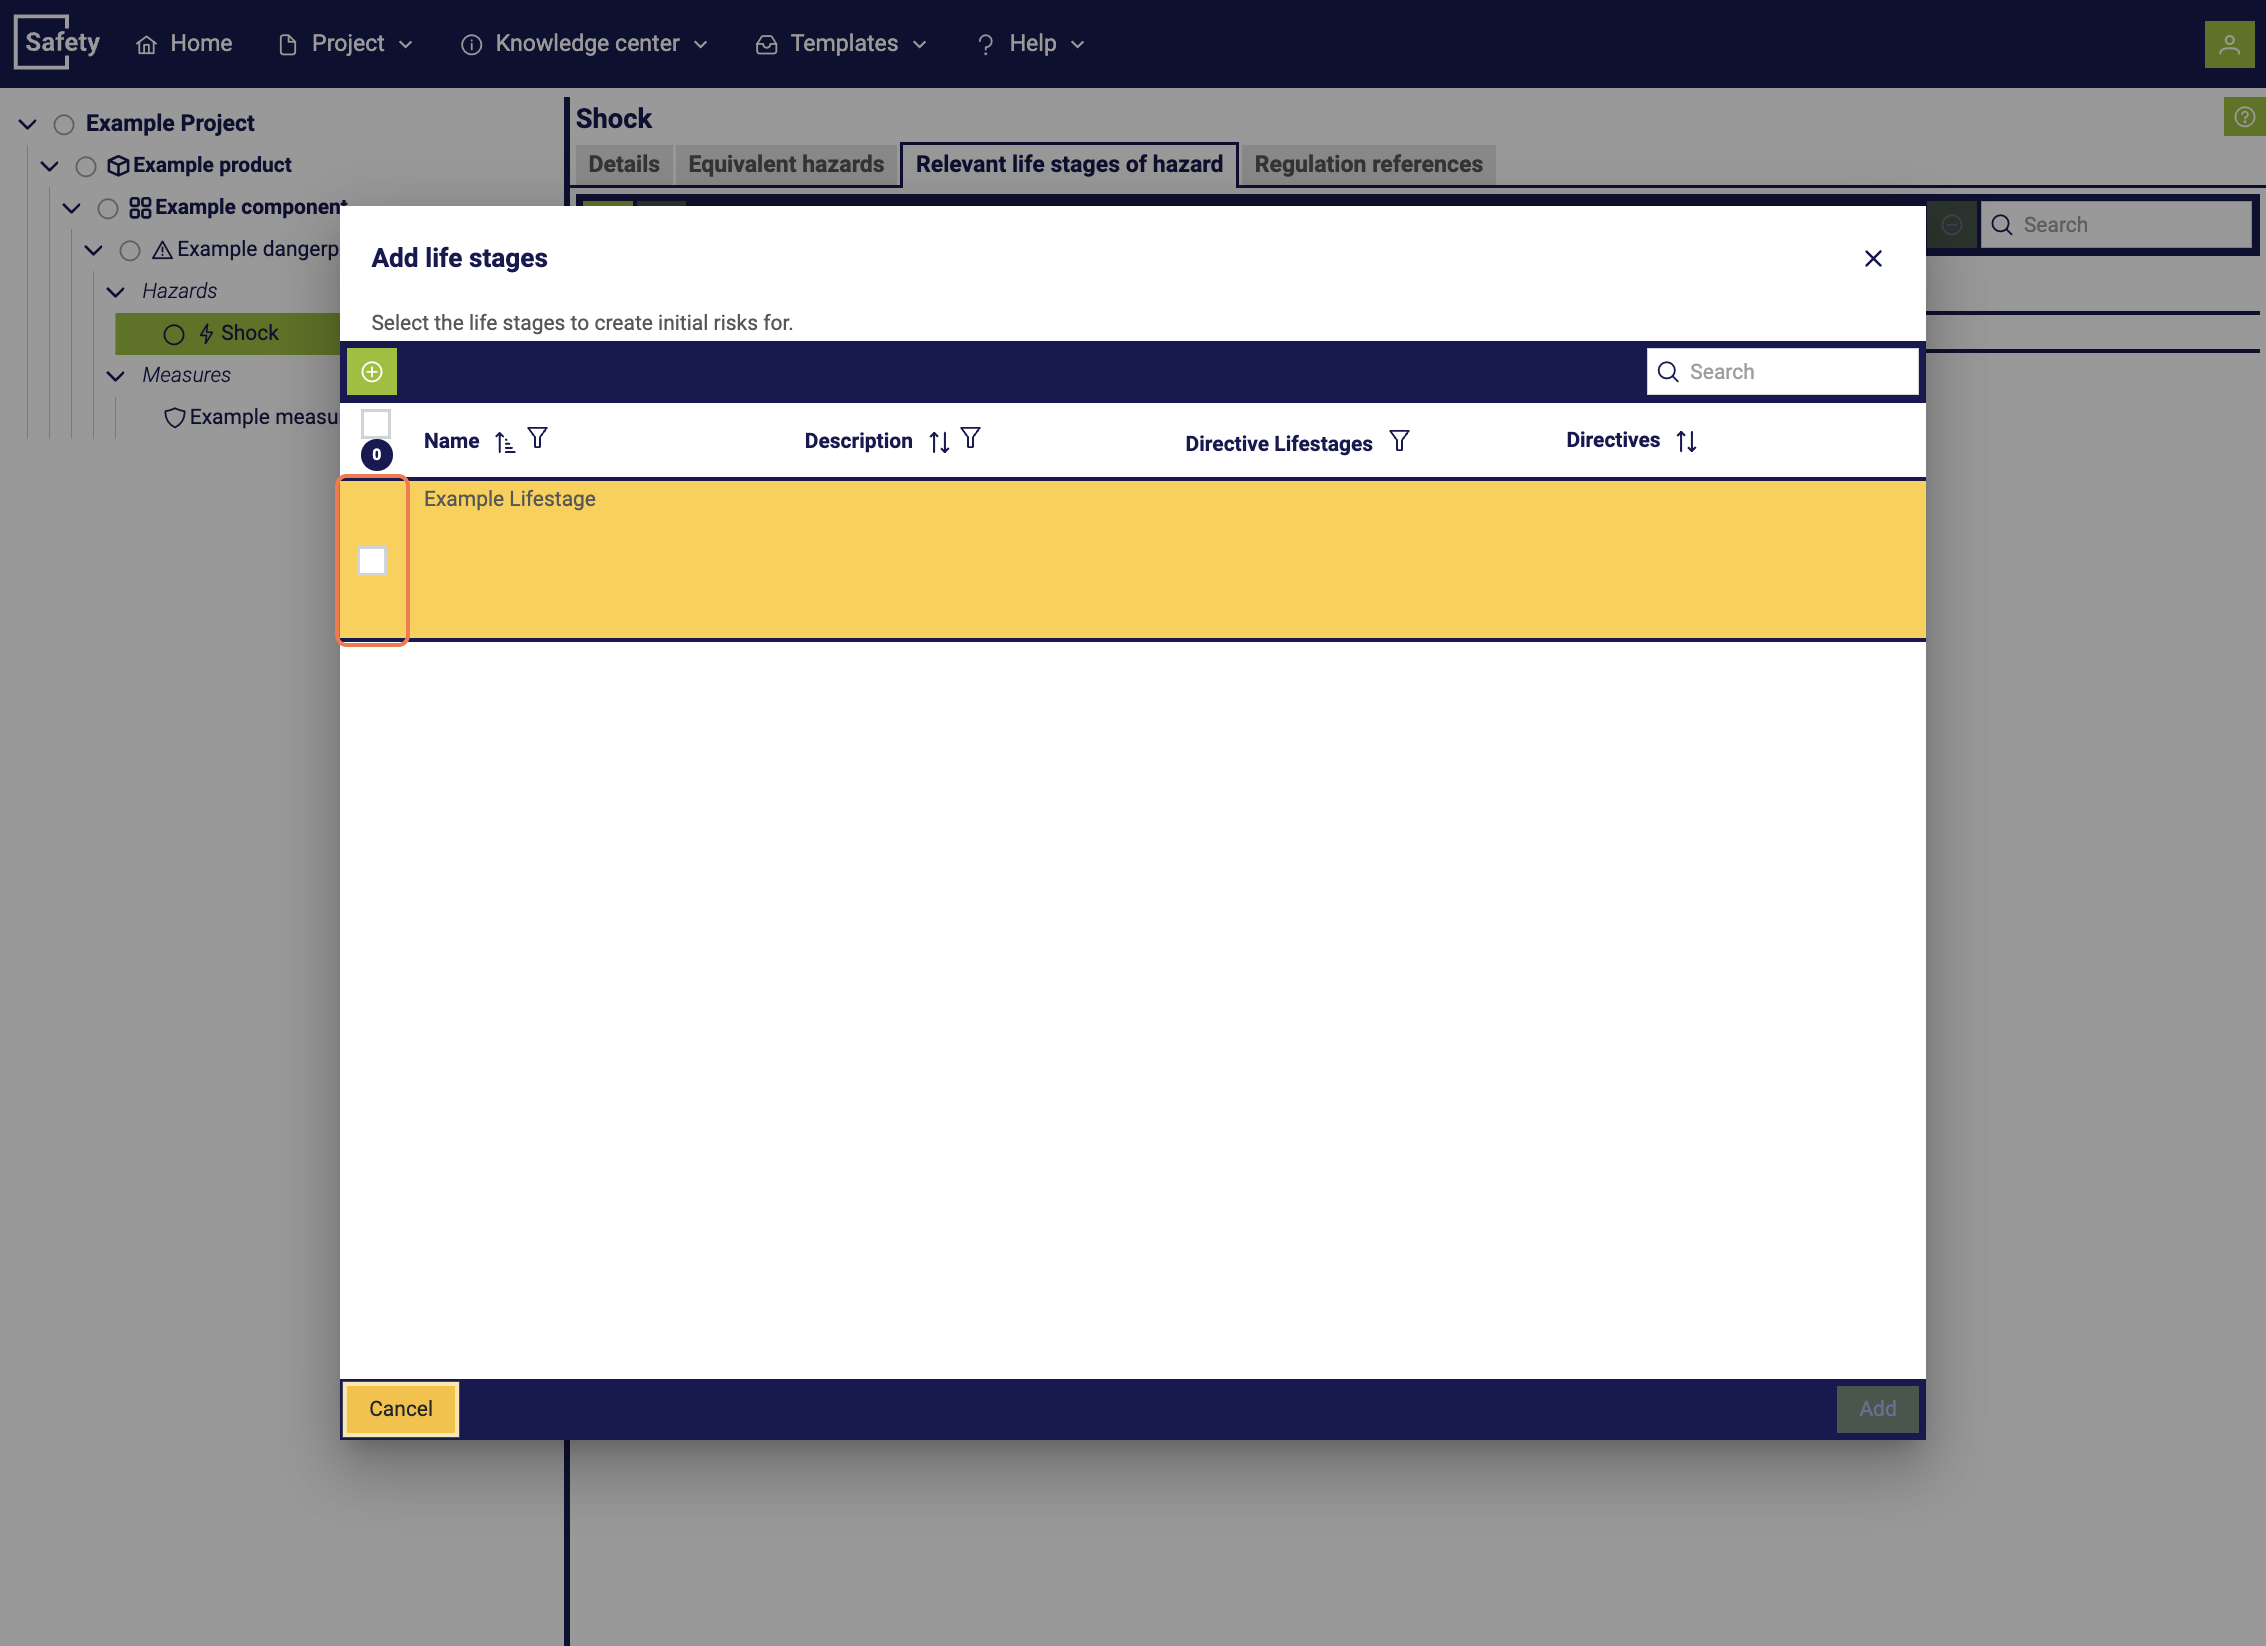
In the next step, the corresponding life stage is selected from a predefined selection.
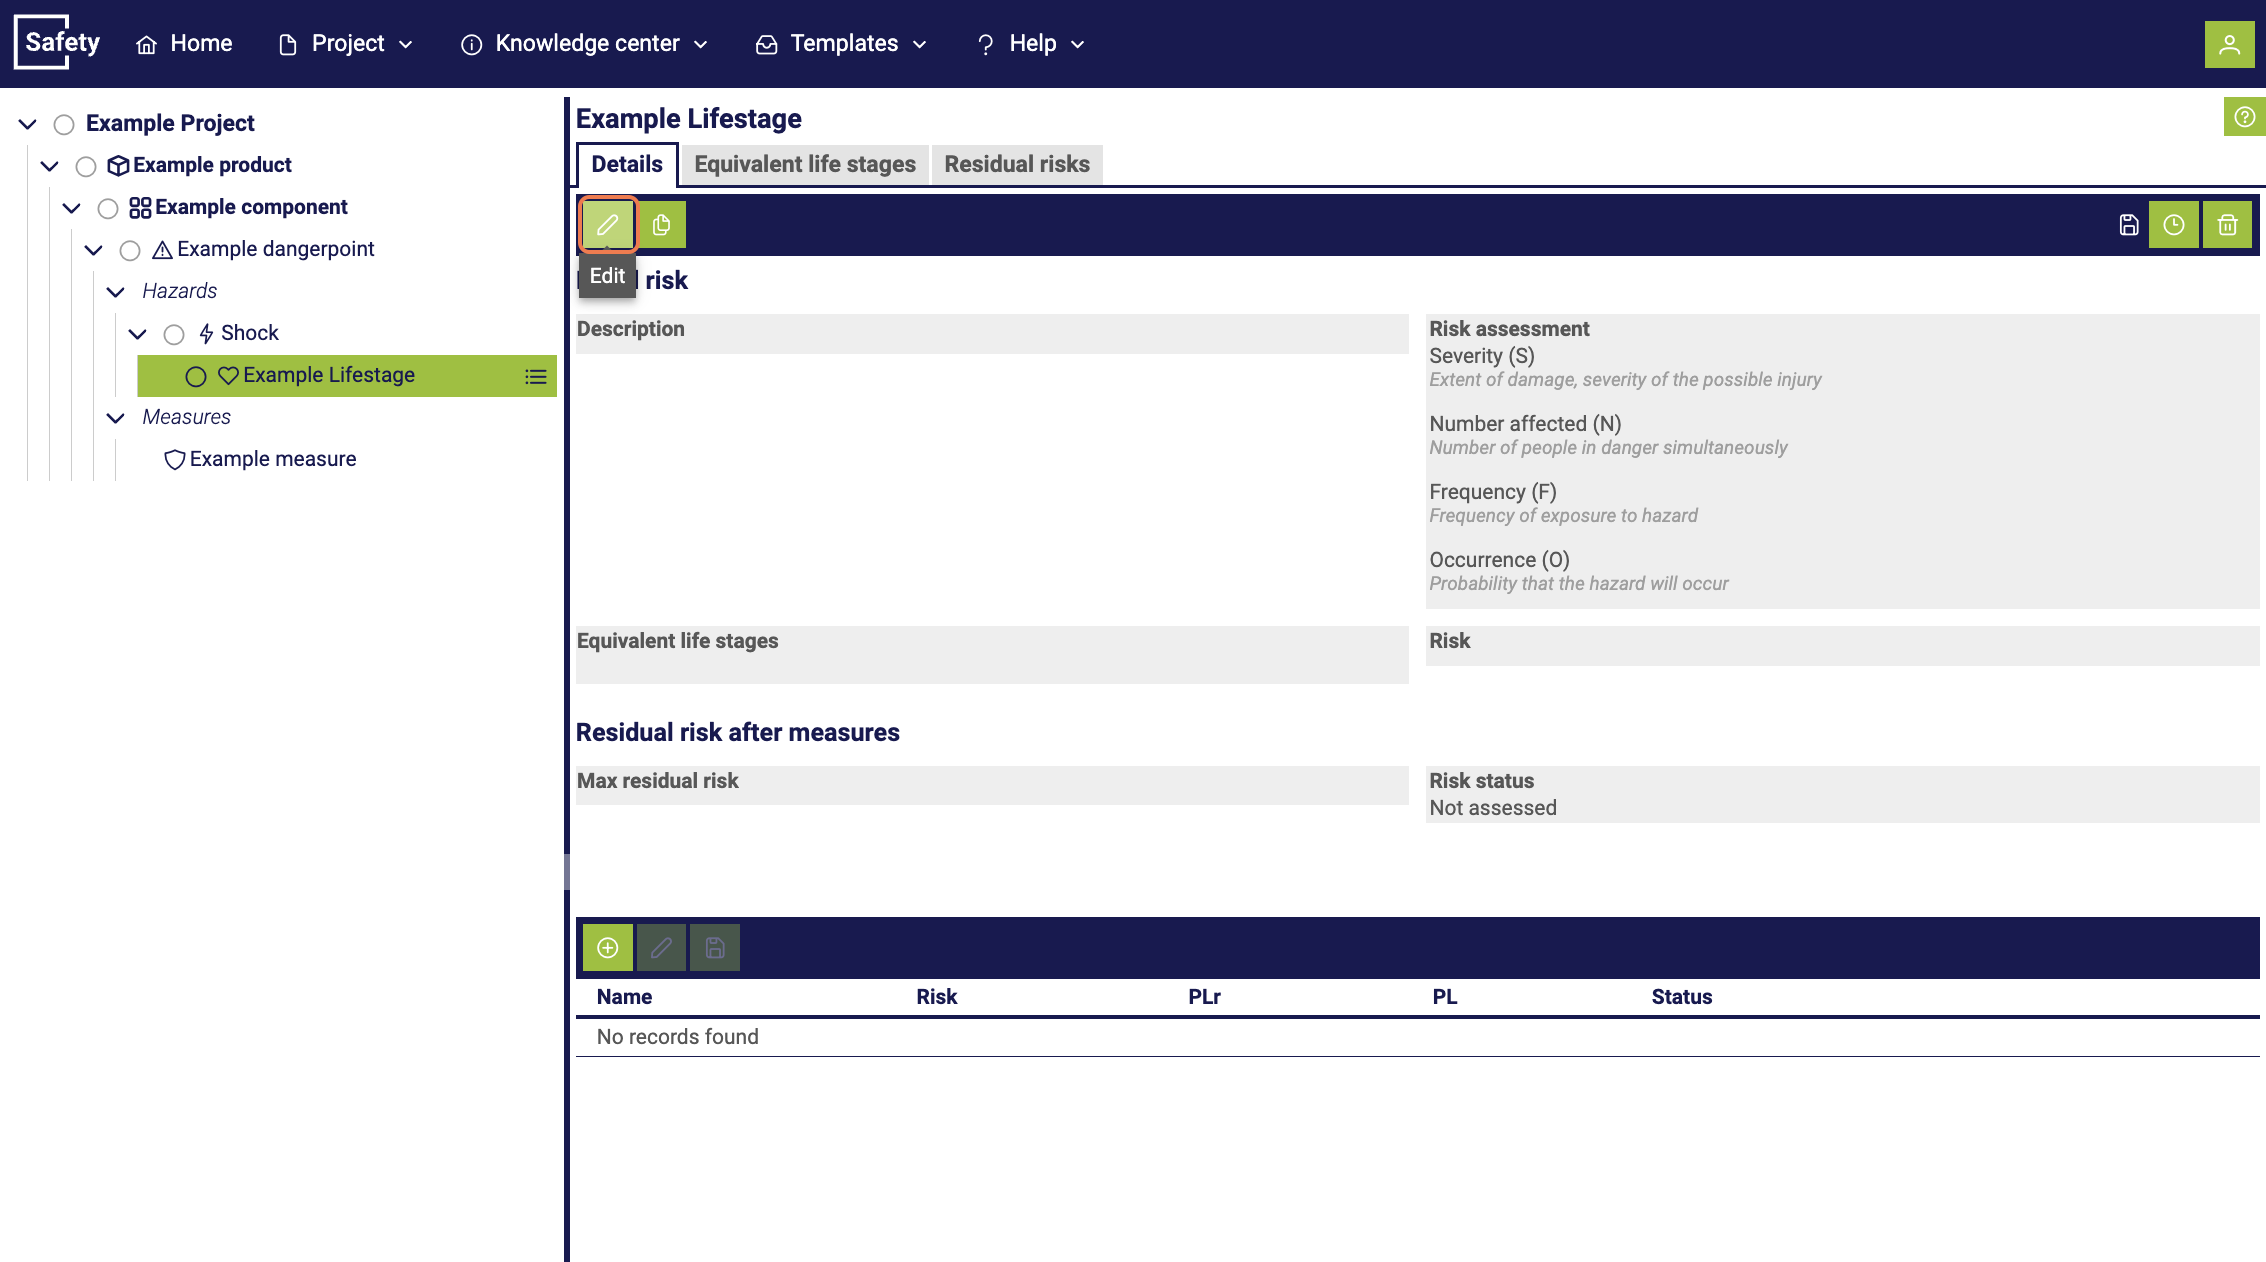
By selecting the life stage, you get the opportunity to determine the initial risk more precisely. This step enables you to analyze and evaluate the potential risks in the context of the selected life stage.
The initial risk of a life stage refers to the risk that exists at the beginning or at the start of a specific phase in the life cycle of a product or installation. It describes the potential hazards and risks that exist at this point in time, before measures to reduce or control the risk are taken. The initial risk forms the basis for risk assessment and the development of safety measures during a specific phase in the life cycle of the product or installation.
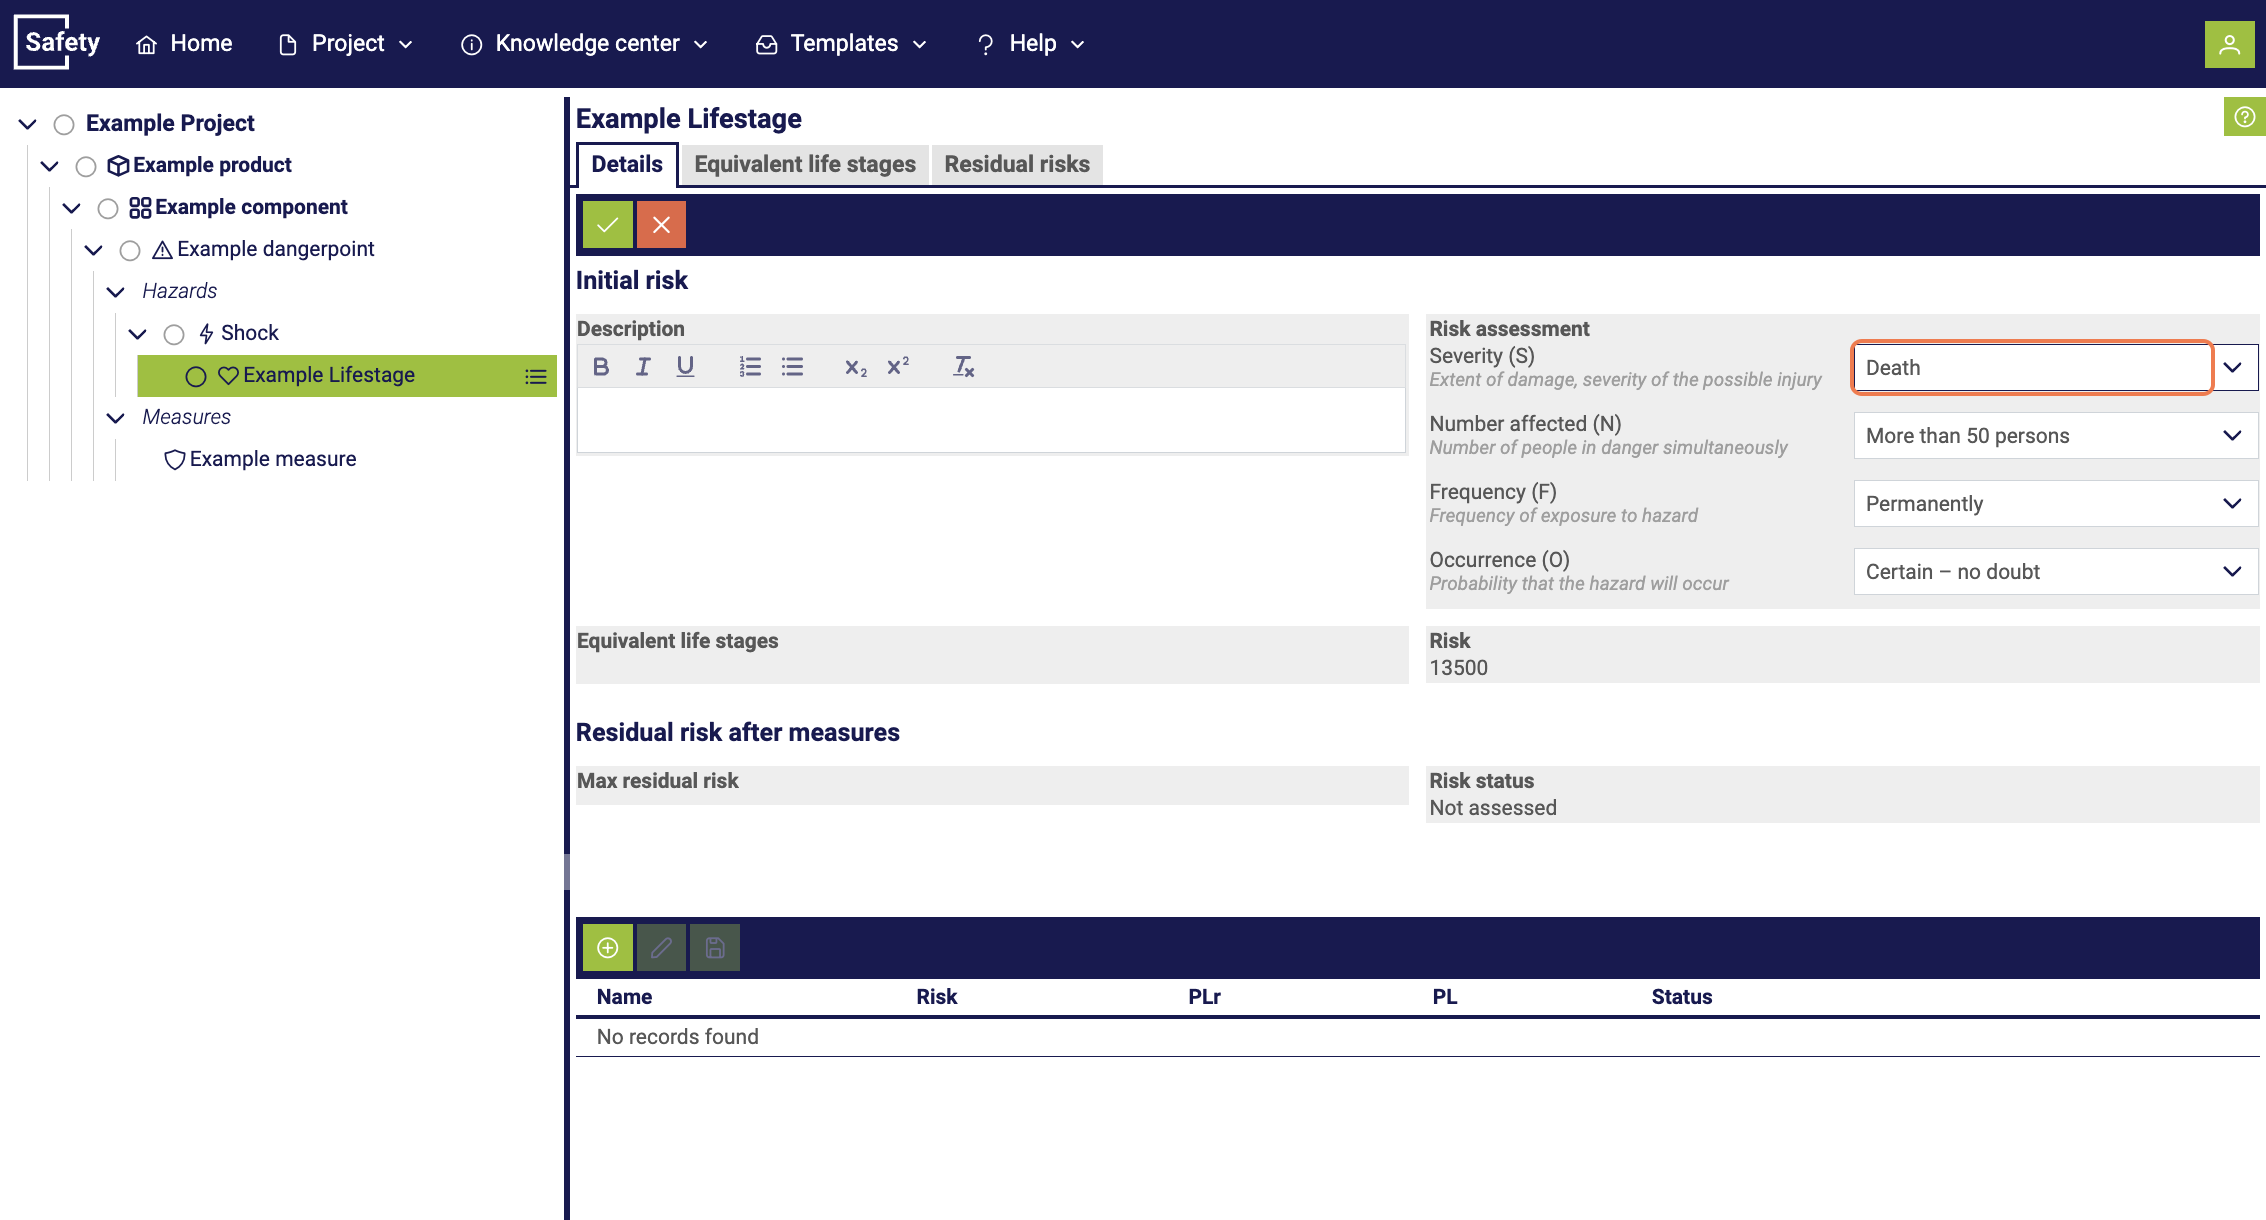
Subsequently, the risk is evaluated in terms of potential damage, the number of people affected, frequency and probability. Based on this evaluation, a residual risk and a specific risk status are determined.
8. Determining measures
To minimize the risk of a hazard, it is necessary to implement measures against the initial risk. By implementing these measures, the risk is reduced according to the evaluation.
The residual risk of a life stage refers to the remaining risk that exists after the implementation of risk reduction measures or checks in this phase of the life cycle of a product or installation. It represents the risk that still exists despite the measures taken and is considered acceptable or sufficiently minimized. The residual risk is carefully evaluated to ensure that it is at an acceptable level and that the safety and health of individuals, as well as the environment, are adequately protected.
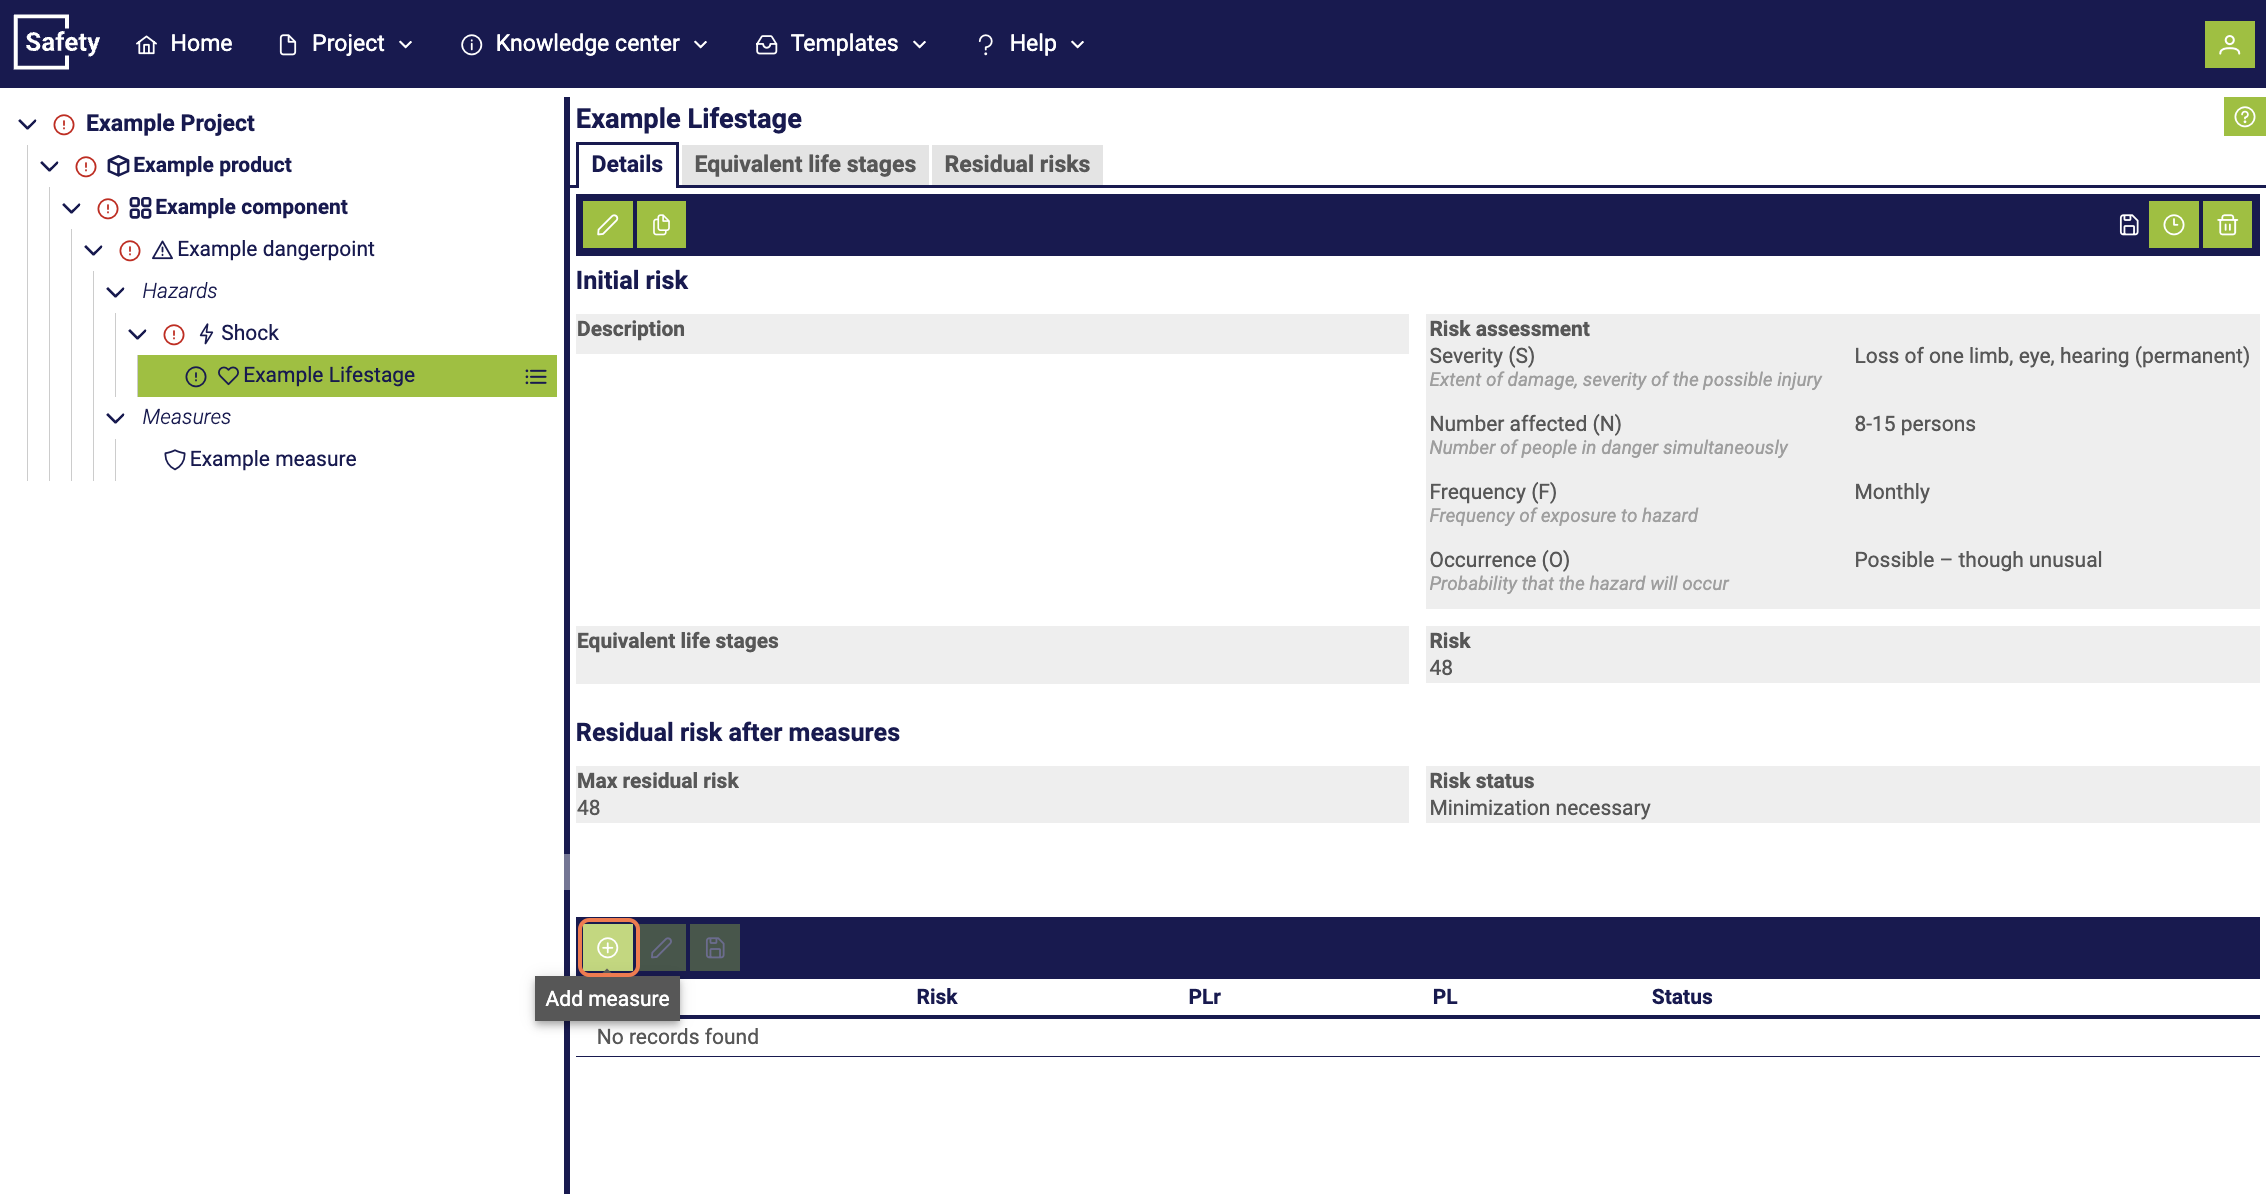
Within the same window and within a specific life stage, there is the possibility to start the process of adding a measure by navigating to the bottom area of the window.

In the subsequent step, a window opens where we can decide whether to create a new measure or use an existing template. After that, a new measure is created to continue the process.
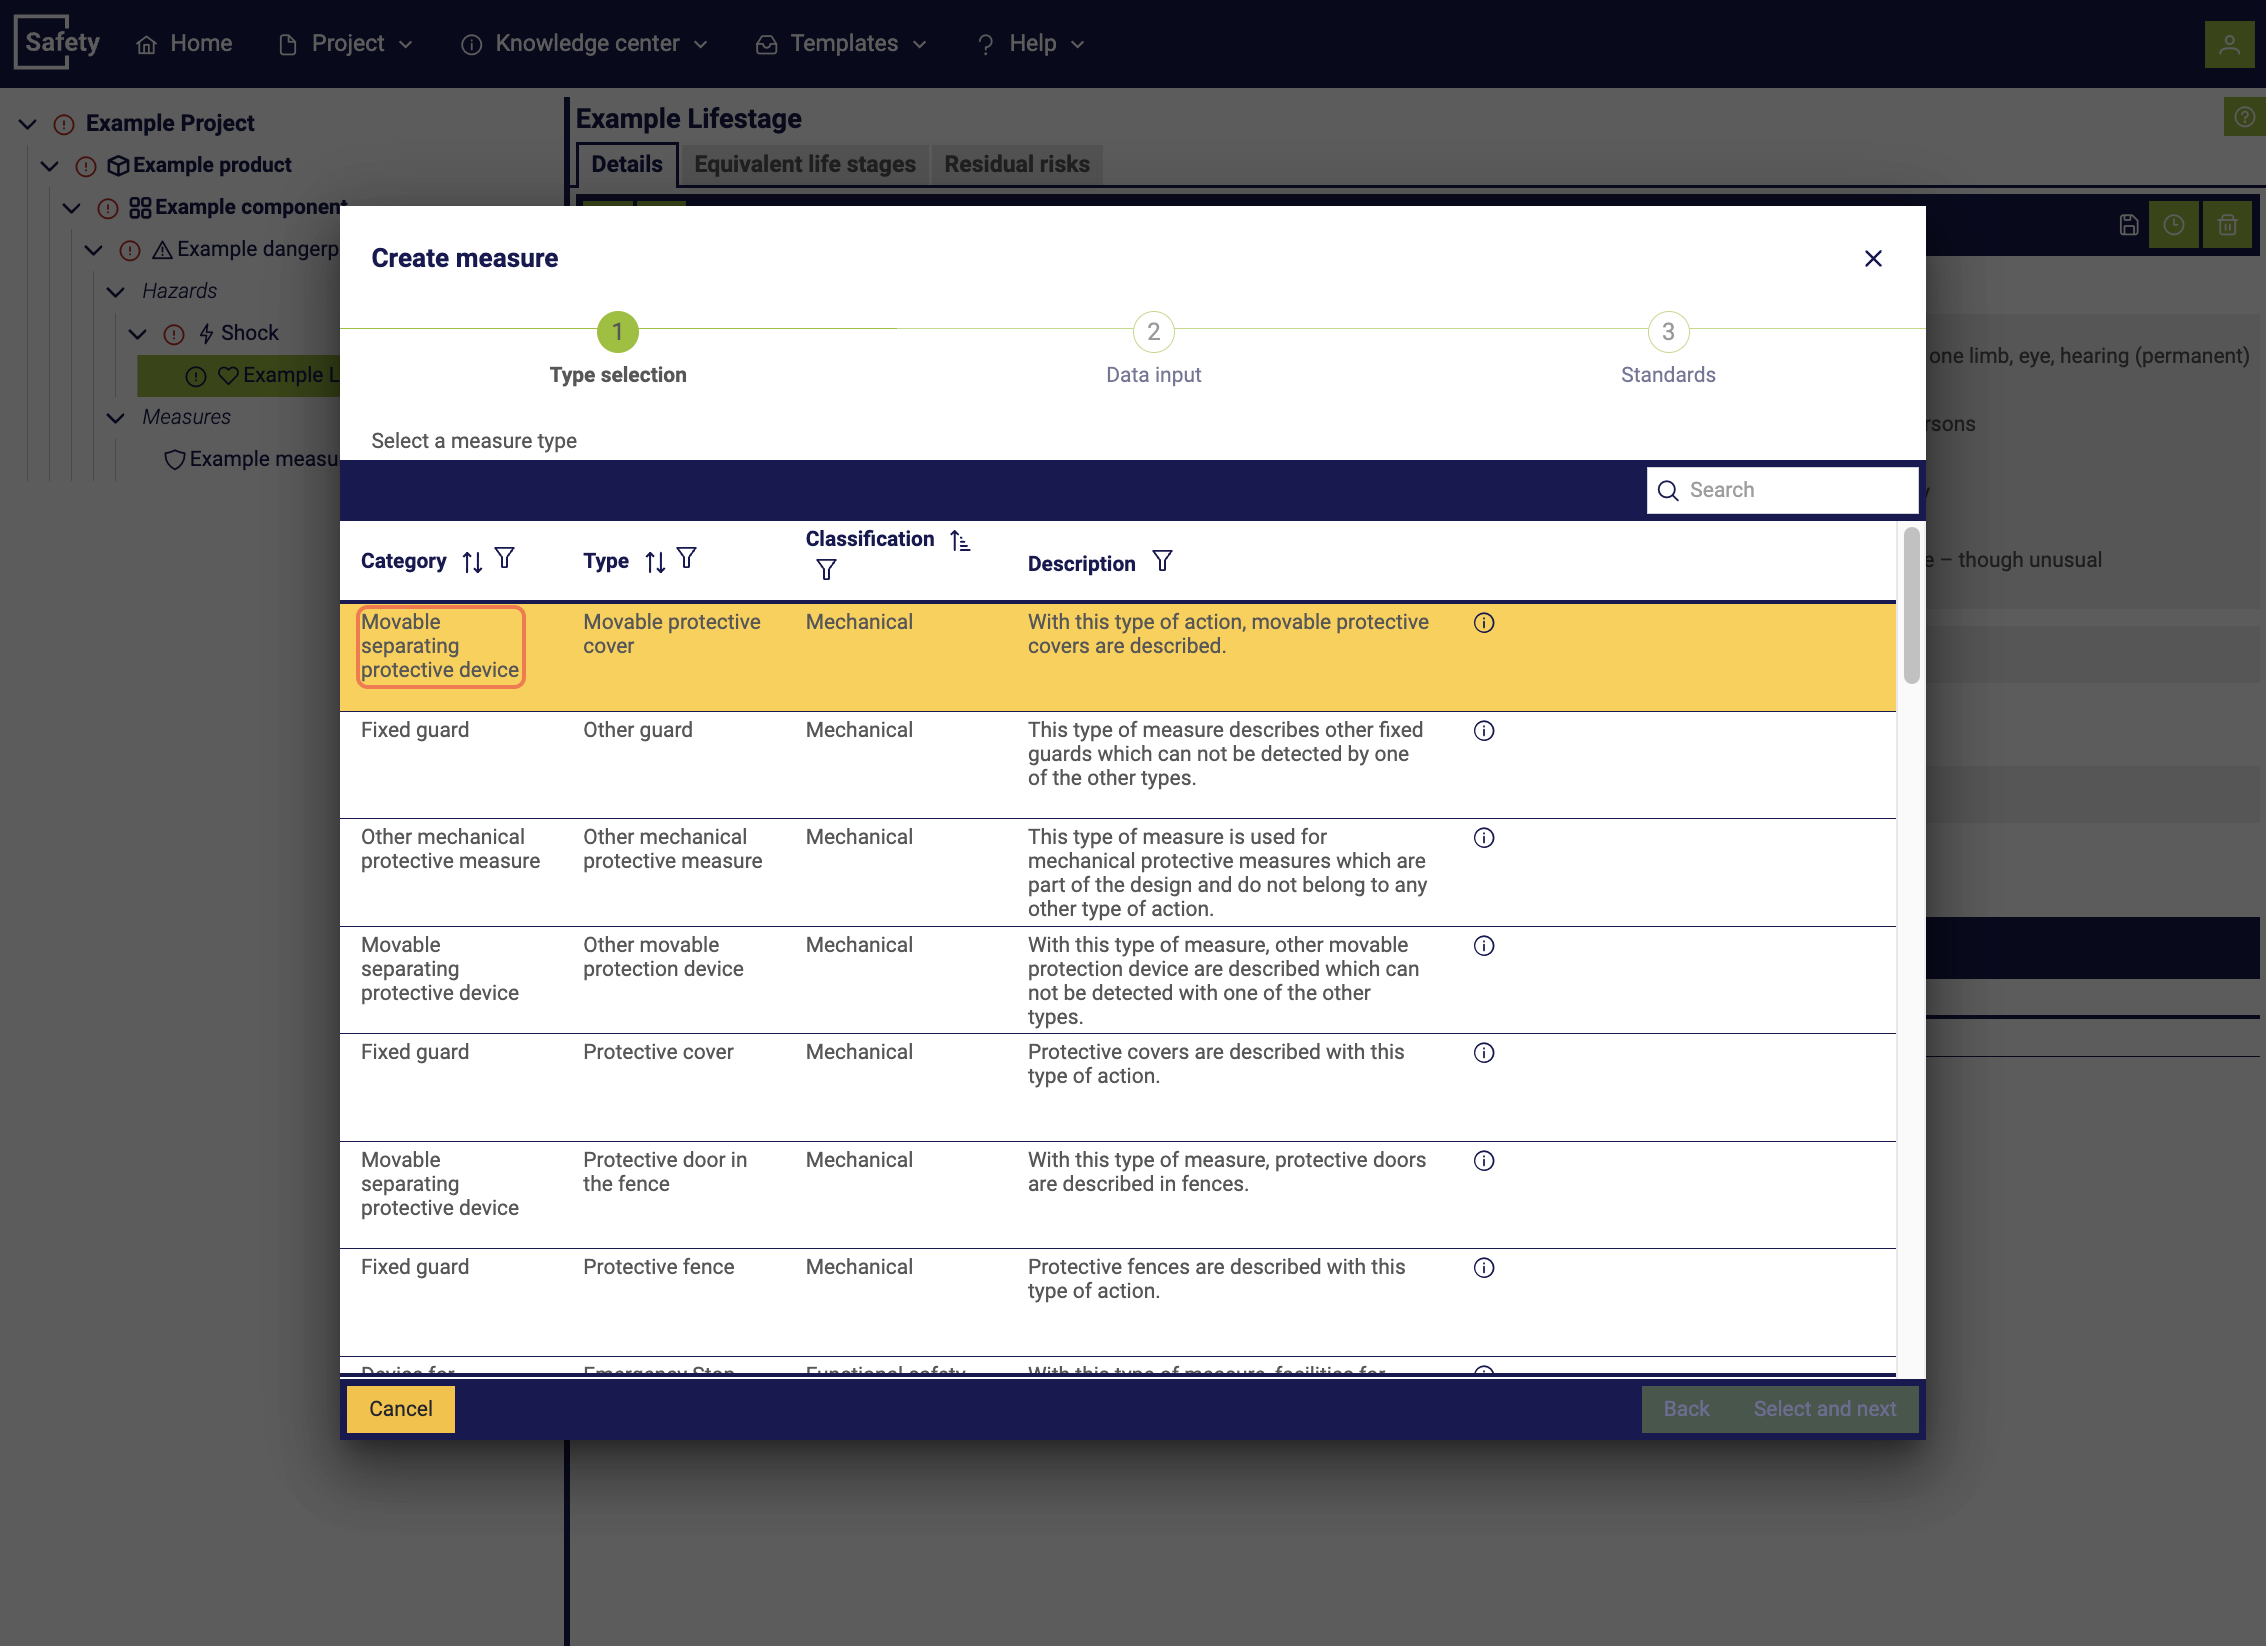
When creating a measure, first select the corresponding measure type. Depending on the selected measure type, there are different requirements regarding the information to be maintained within the measure.
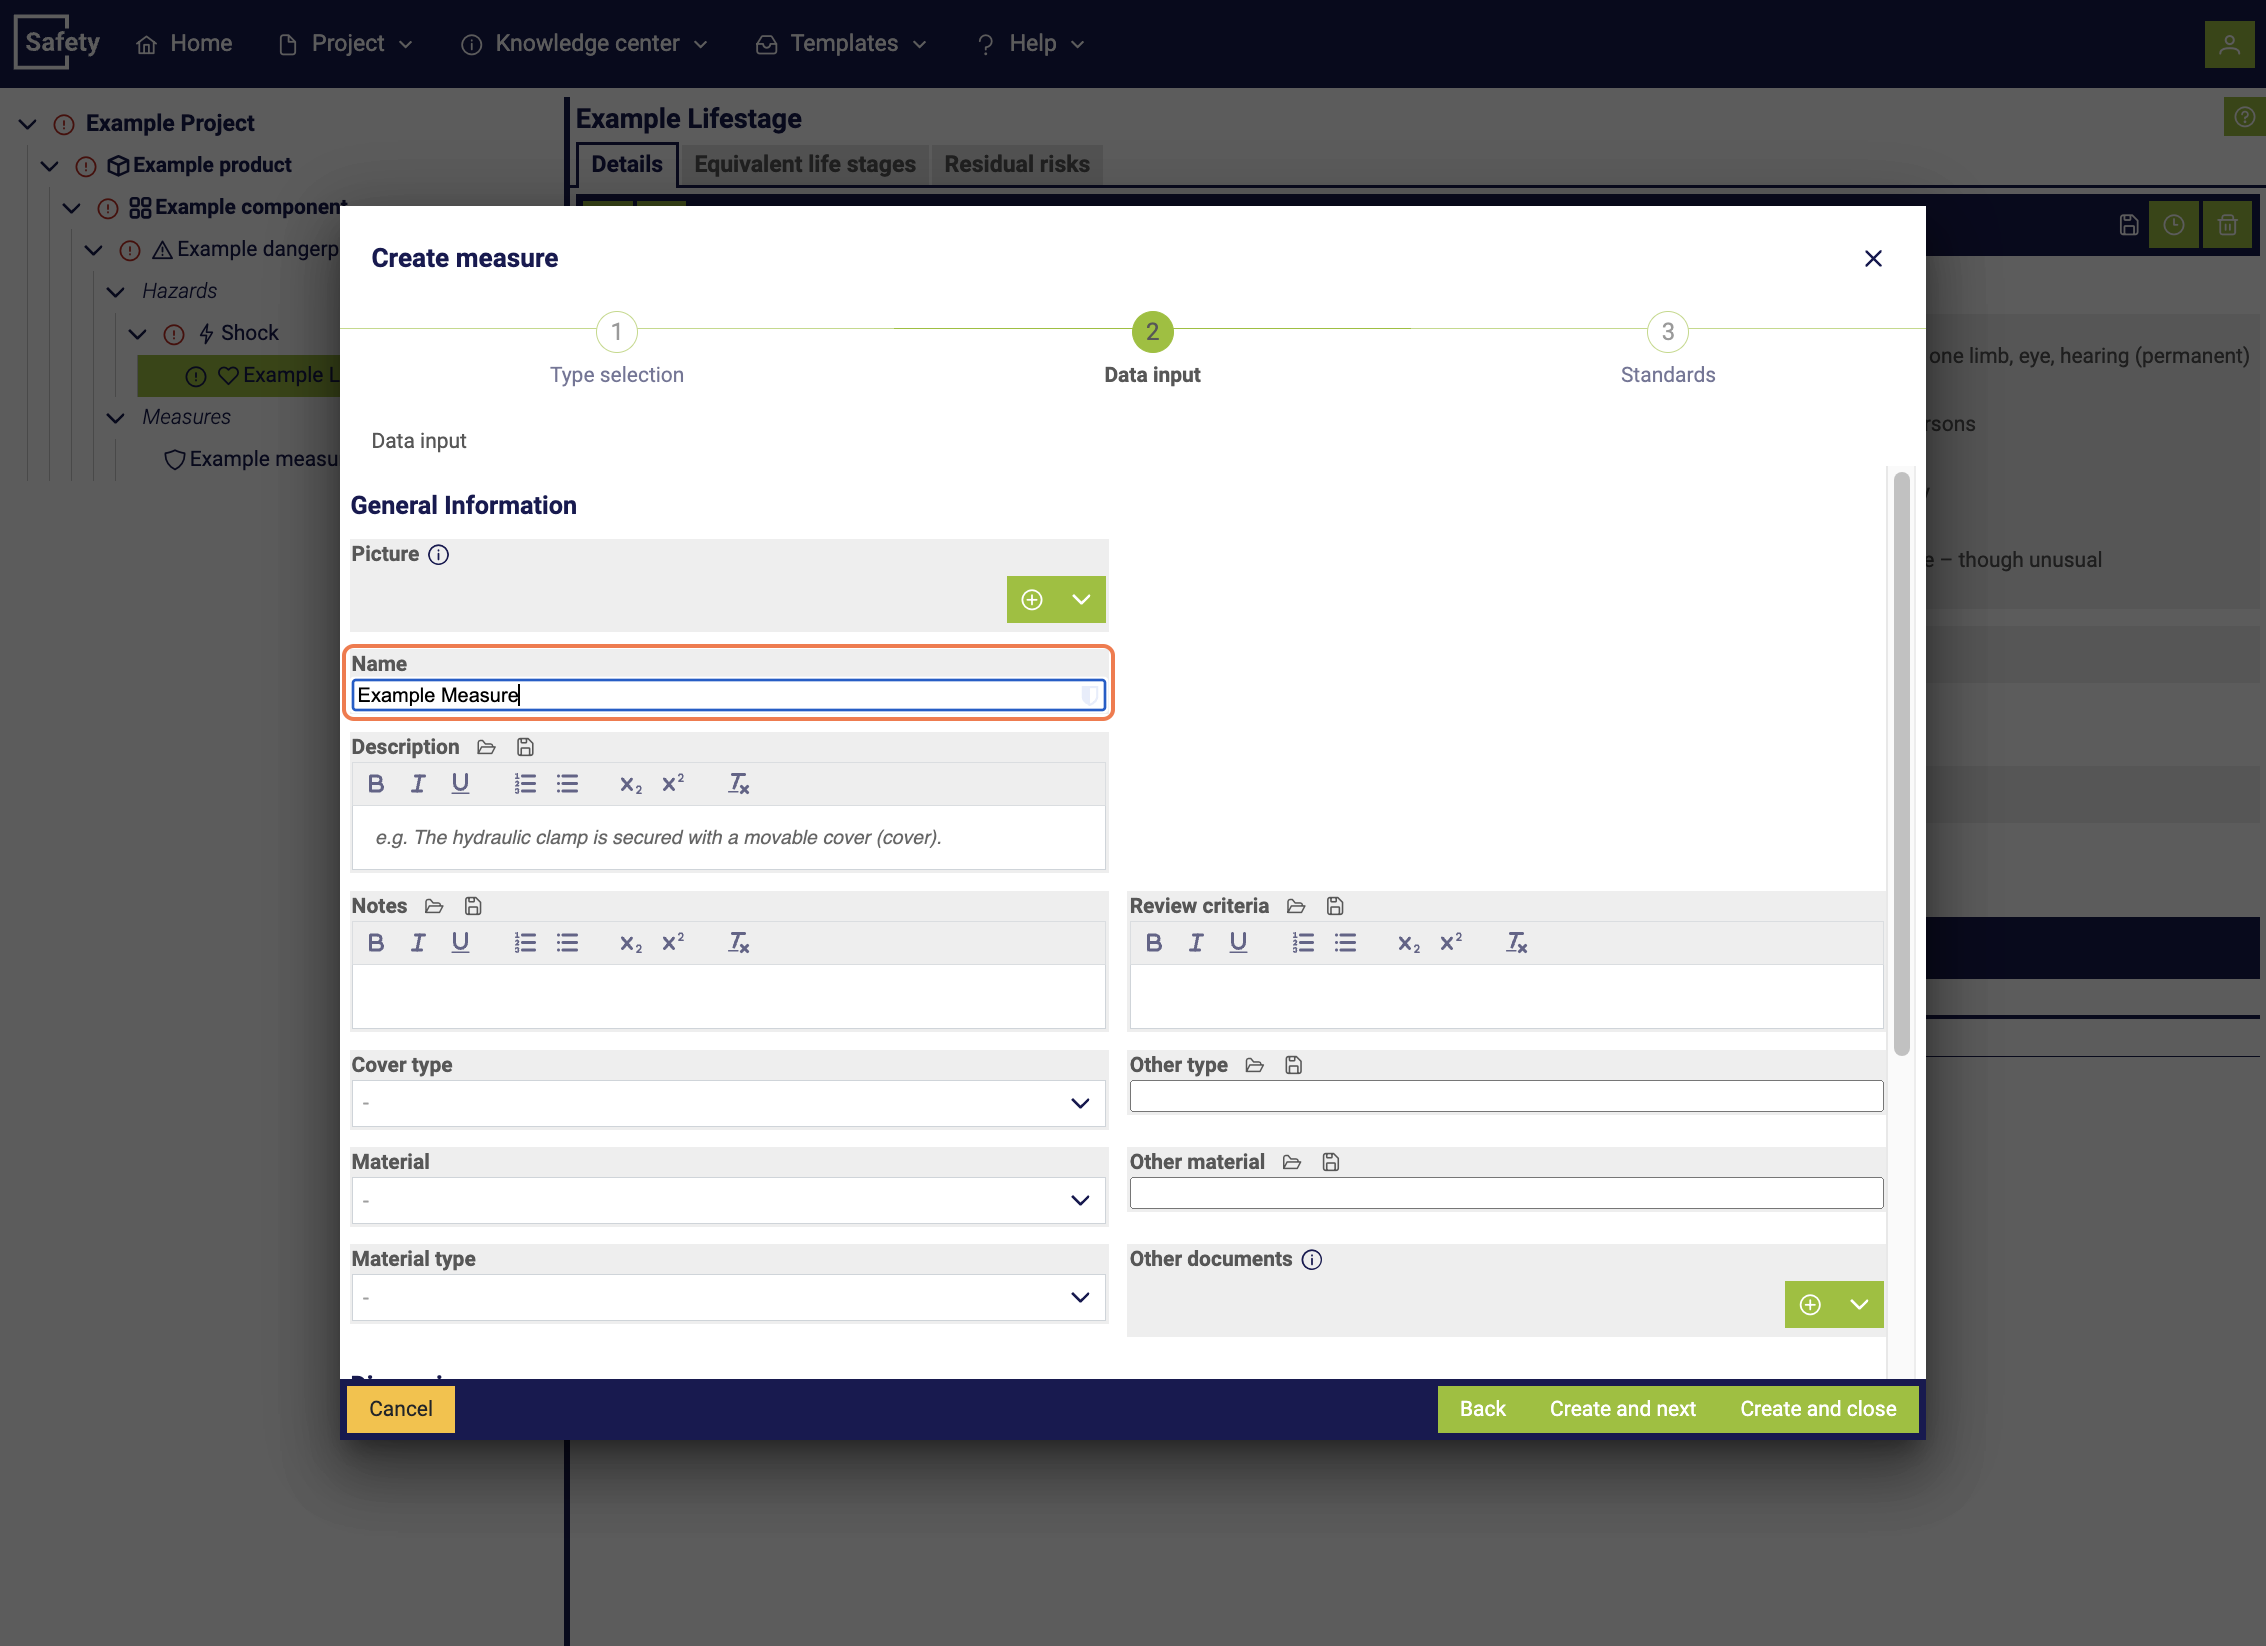
Next, assign a name to the measure and possibly assign standards to it.
Finally, evaluate the measure by clicking on the editing symbol.

In the final window, evaluate the measure similarly to the initial risk and assign an additional risk status. Then, on the left side, the color of the symbols indicates whether further minimization is required or whether the risk has already been sufficiently minimized.
9. Finishing the project
As the final step, you can set the project status to finished after all components within the product have been edited. This marks the project as completed and can only be reopened by a user with administrator permissions.
